Setting an Expiration Date For Candidate Invitations
 Updated
by
Amy Thomas
Updated
by
Amy Thomas
Setting an expiration date on a candidate's invitation to complete an application, assessment or video interview enables you to set limits for each step in your recruitment process. It allows you to increase task completion and receive the results in a timely manner, to help you to find the best candidates.
There are three options in the Criteria platform for expiration dates:
- Rolling day: the expiration can be set to a number of days from when the event was created. For example, you may give candidates 5 days from the time of invitation to complete a video interview or assessment.
- Fixed date: a specific date and time is set as the expiration date for candidate events. For example, you allow candidates to submit an application form until 5:00pm on January 30.
- No expiration: You do not need to set an expiration date at all if you want to allow candidates unlimited time to access and complete a task. You can set the system to automatically send a reminder email to candidates 48 hours after their invitation is created, if they have not yet completed their task.
Company preferences
At the organization level, your company preference setting for Default Testing Event Expiration is set to one of the following:
- Disabled: no expiration date will be set.

- Enabled: invitations will expire in the specified number of days.
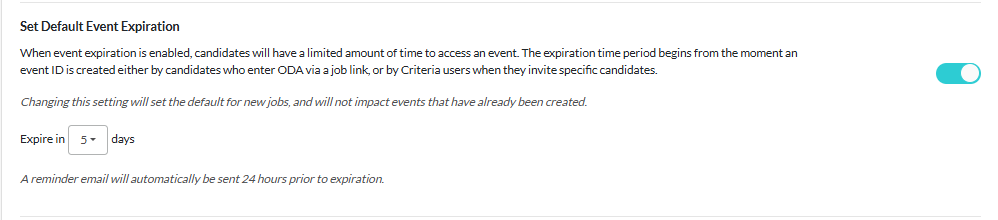
When an expiration date is set, candidates will automatically be sent a reminder email 24 hours before the invitation expires, if they have not yet completed the task.
To set your account to automatically send candidates a reminder email if they have not completed the task within 48 hours of it being created and no expiration date has been set, toggle the Automated Reminder Emails on.

Select the email template you wish to send. Note that only email templates that include either the Candidate Testing Link or both the Testing Center Link and Event ID will be included in this list. This is to ensure that candidates have a way to access their assessment task directly from the reminder email. Click here to learn how to create a custom email template.
This setting is applied across your account and cannot be changed at the job level.
Note that changes to this setting will only apply to candidates invited to an event from the point that the change is made; this update is not retrospective. That is:
- If you turn the Automated Reminder Emails off, any candidates invited before you turned it off will still receive the email. Any new candidate invitations will not receive the reminder email.
- If you turn the Automated Reminder Emails on, any candidates invited before you turned it on will not receive the email. Only candidates invited after you turned it on will receive the reminder email.
Job settings
You can change the expiration date at the job level and at the candidate level.
- To set a default event expiration at the job level, navigate to the job settings screen in your Criteria account.
- In the Jobs screen, click ... Actions to the right of the job and select Edit Job from the dropdown list.

- If you have the job open, click the Settings wheel in the top right corner.
- In the Jobs screen, click ... Actions to the right of the job and select Edit Job from the dropdown list.

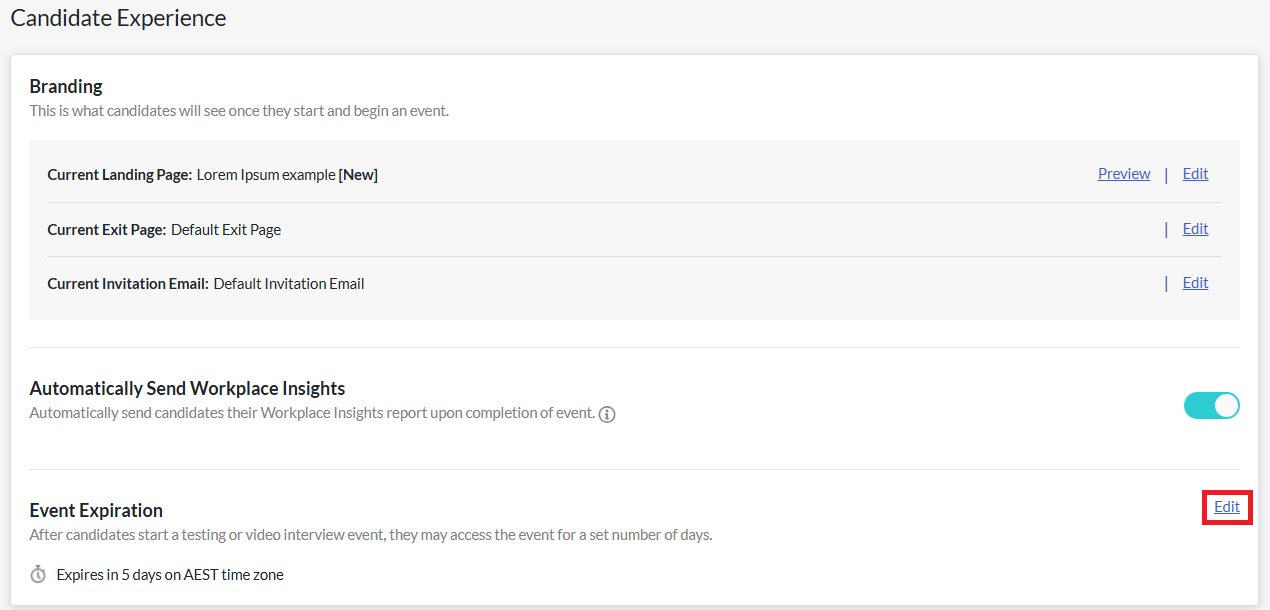
- Click Edit in the Event Expiration section under Candidate Experience.
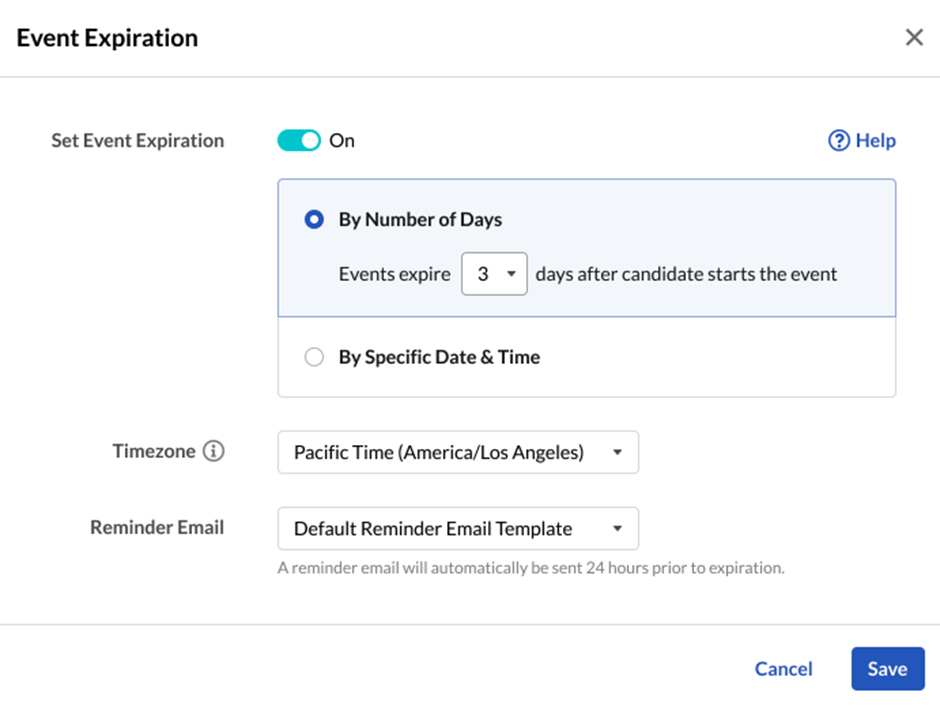
- Select the required option.
- To use the rolling days option, click By Number of Days. By default, the number selected in Company Preferences will be selected (if enabled there) but you can change this by clicking on a different number in the dropdown list.
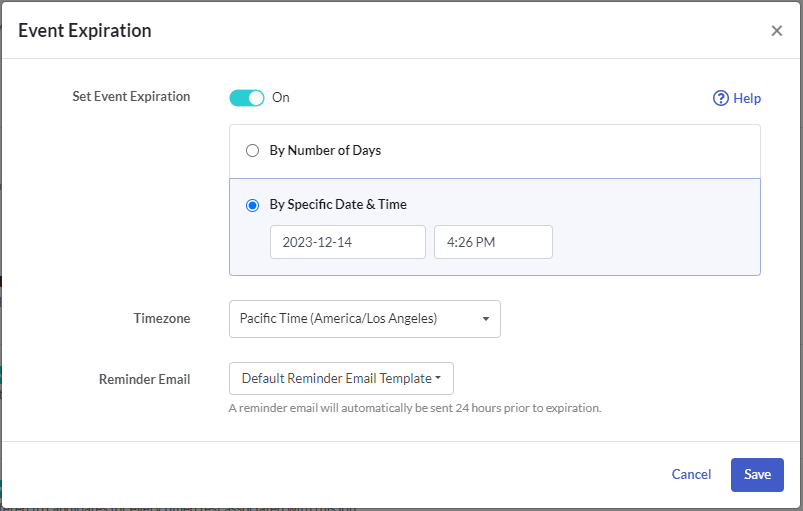
- To use the fixed date option, click By Specific Date & Time. The date and time can be selected up to the minute. Only future times can be selected.
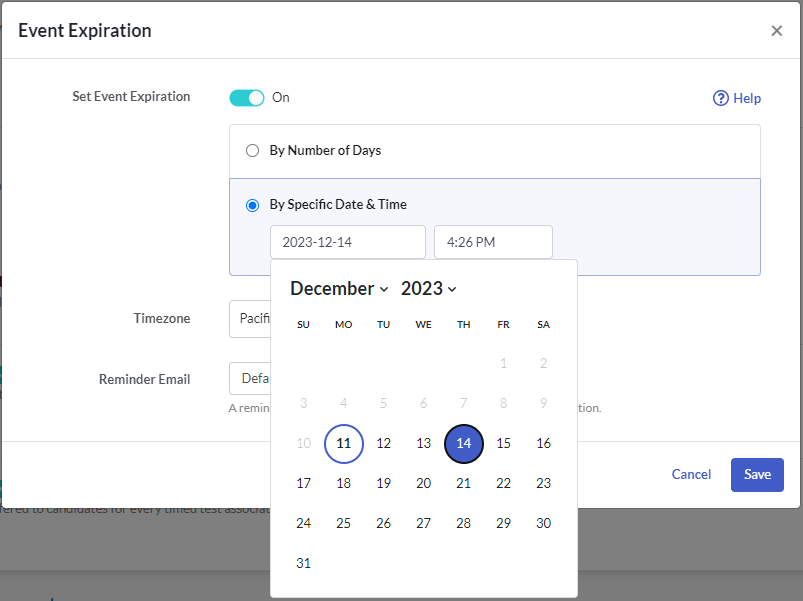
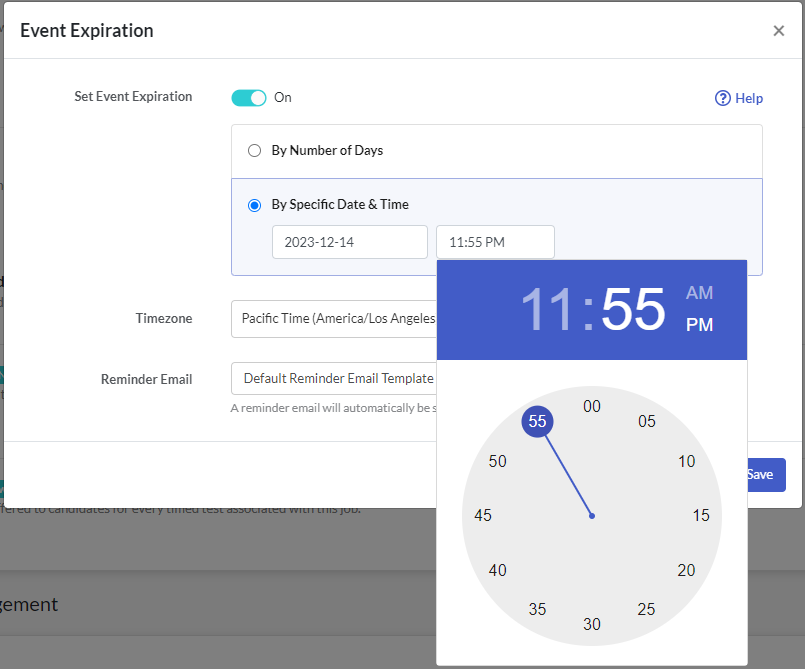
- To use the rolling days option, click By Number of Days. By default, the number selected in Company Preferences will be selected (if enabled there) but you can change this by clicking on a different number in the dropdown list.
- Click Save.
If you select By Specific Date & Time, here are some important points to consider:
- Using multiple rounds of evaluation tools: this expiry date and time will apply to every stage in the job. Candidates will not be aware that there are multiple stages in the process, which all need to be completed by that date. For example, if the expiry date is set for June 10 and the candidate originally applies on June 8, that means that all evaluation tasks will need to be completed by June 10.
- Rolling recruitment: if you are recruiting for this job over a long period of time, using the By Number of Days option or not setting an expiry date, may be better options. If a candidate is invited in the job, or uses the open link, after the expiry date and time have passed, they will not be able to access the assessment.
Candidate invitations and reminders
All invitations sent from a job will use the expiration date parameters set for the job, unless you choose to override them when setting up a specific candidate's invitation.
Open links
If you are using open links as part of your recruitment process, the expiration settings for these are governed by the job's settings. For example, if you have set a rolling day expiration of 5 days, when candidates click on the open link to start the event, they will have 5 days to complete it.

Manual invitations
- Within the job, click Invite New Candidates.

- Add in the candidate details and check the invitation settings. Click Advanced Settings.

- By default, the Event Expiration will reflect the parameters set at the job level, however you can select a different option for this invitation.
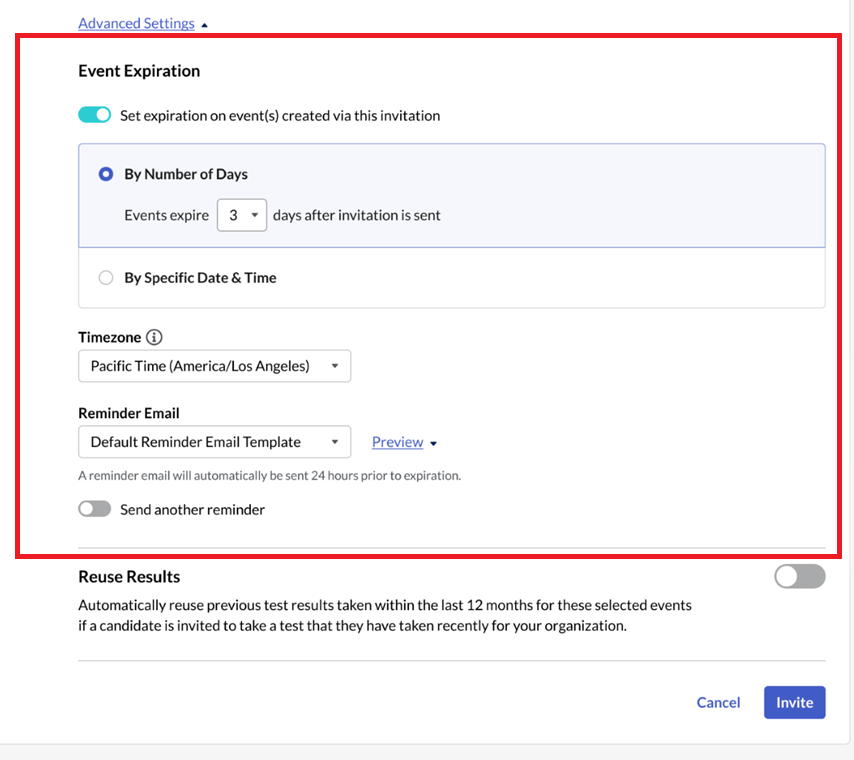
- The same options provided at the job level are available here: no expiration, rolling day, or fixed date.
- A different time zone may also be selected for this invitation.
- Once you have set all the required parameters for your candidate's invitation, click Invite.
Automated reminders
If you have set an expiration date for the assessment task, candidates will automatically receive a reminder email 24 hours before the invitation expires. You can select which reminder email template will be sent when you are creating the invitation.

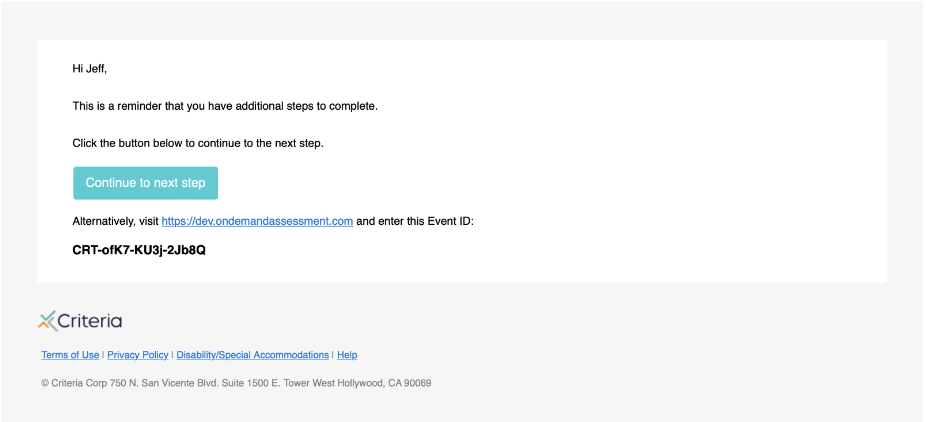
If you have set your Criteria account to automatically send candidates a reminder 48 hours after their task has been created, and no expiration date was set, the candidate will receive an email reminding them of the pending task. This will include the details for how to access the task again.
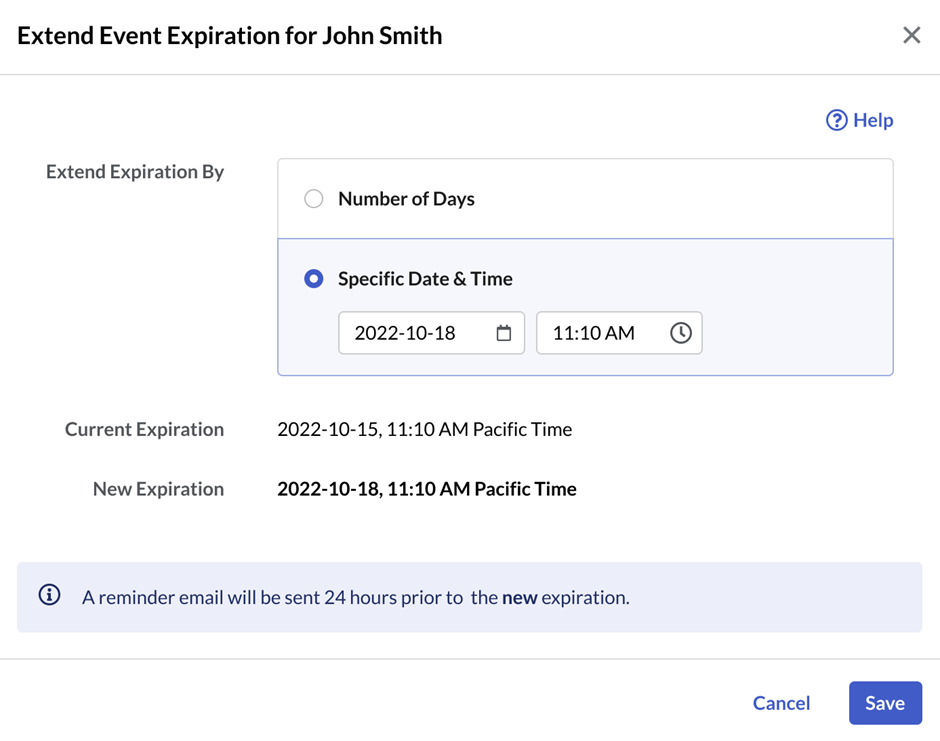
Extending event expirations
If your candidate is not able to complete an event within the time frame you originally set, you can extend their invitation within the Criteria platform. You can select to extend the invitation by a set number of days or specify a new expiration date and time.
You will not be able to change the candidate time zone when extending invitations, as this could potentially be confusing for your candidates.
For example, if you are bulk extending a group of candidates' expiration dates using the fixed date option, and the new expiration date is earlier than some candidates' current expiration date, those candidates will retain their original expiration date.
Expired jobs
If a fixed date and time is selected for a job, when that job has expired, a warning will display on the Jobs tab. To update the job, return to the Settings page and make the required changes.

Candidates who are invited to complete an assessment or interview in a job with an earlier expiration date, will still be created with that date. However, they will not be able to access the task that has been set for them and will need their invitation to be extended to a future date.