Creating a Job - Additional Settings
 Updated
by
Amy Thomas
Updated
by
Amy Thomas
Your Criteria account has default settings for the invitation email template, expiry date, candidate time zone and automatically sending your candidates the Workplace Insights Report (if relevant for this job). Your account also has a default landing page and exit page selected. These will be automatically set when your job is created.
Job Settings is where you configure the candidate journey and can change the job-level defaults for a role.
Criteria supports two versions of the Job Settings page: Candidate Journey Builder and Classic Job Settings. Although they have many of the same options, they look quite different. Both versions are covered in this guide.
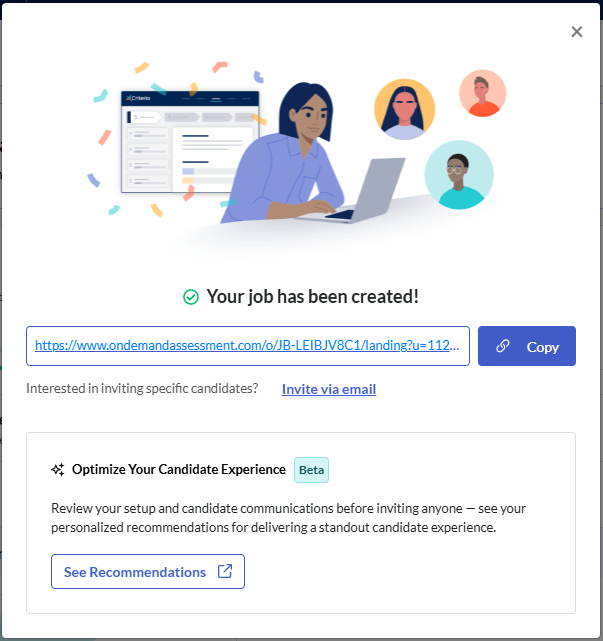
Once you have created the job click the cross in the top right corner of the Your job as been created! popup, or click outside the popup message to close it and view the Candidate Journey Builder / Job Settings screen.
Candidate Journey Overview / Pipeline
Candidate Journey Builder
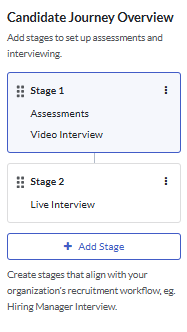
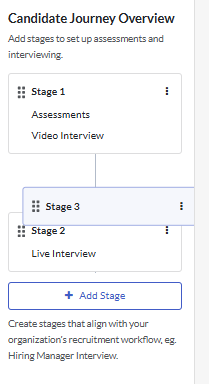
The Candidate Journey Overview section on the left side of the screen shows the pipeline for your job. Here you can add, sort, rename, and delete the stages for the job.
Add a stage
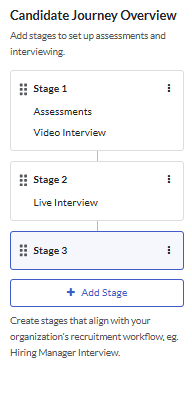
Click Add Stage to add a new stage to the pipeline. These will automatically be labelled Stage 2, Stage 3, etc. and be added at the end of the pipeline.
Move stages around
To rearrange the stages, click on the 6 dots, then drag the stage to the required location.
Rename a stage
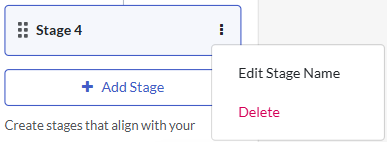
To rename a stage to be more meaningful within your organization's workflow, click the 3 dots (hamburger icon) and select Edit Stage Name.
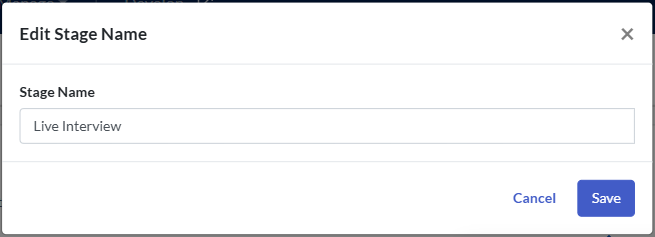
Enter the new name for the stage, then click Save.
Remove a stage
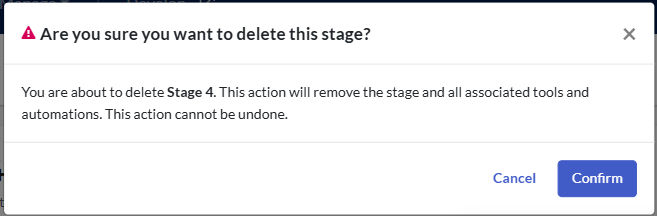
To remove a stage that is no longer required, click the hamburger icon and select Delete.
Click Confirm in the pop up message. Note that this action will remove the stage and all associated tools and automations. It cannot be undone.
Classic Job Settings
For jobs using the Classic Job Settings screen, your Criteria account's default pipeline will be selected. You can choose to use a different pipeline for this job. Pipelines can be reused across multiple jobs.

Evaluation tools
Candidate Journey Builder
Click on the stage in the Candidate Journey Overview to view the details for that stage.
By default, the test battery and/or video interview will be added to Stage 1 and the real time interview will be added to Stage 2. The job may have multiple assessment stages and multiple real time interviews. Only one video interview may be used with the job.
You can add, remove or move evaluation tools within each stage.
Application form / request documents
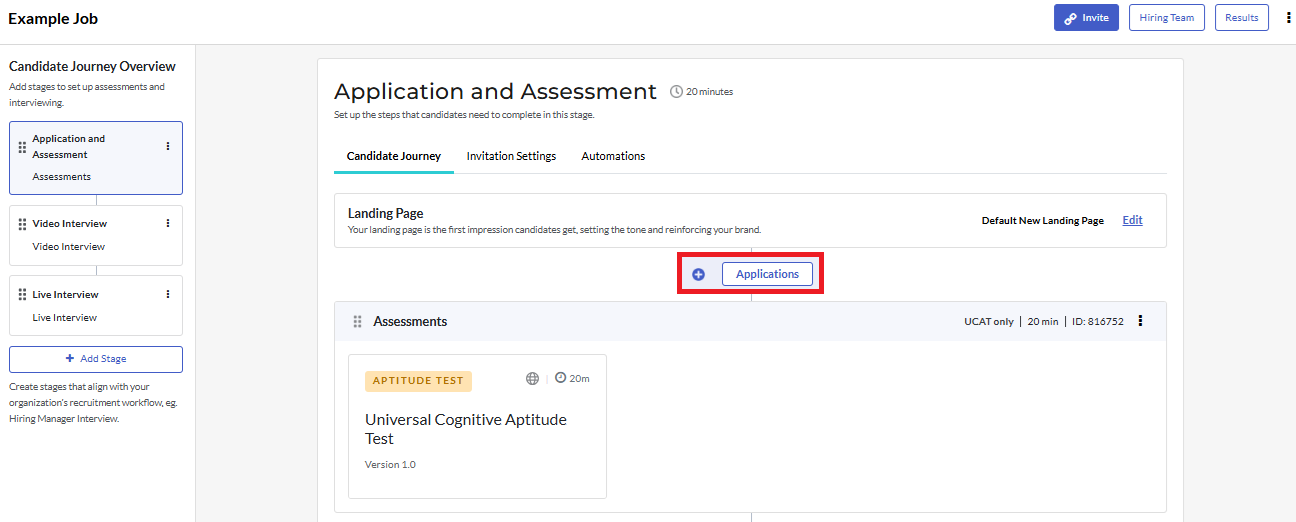
- To add an application form, click + and select Applications.
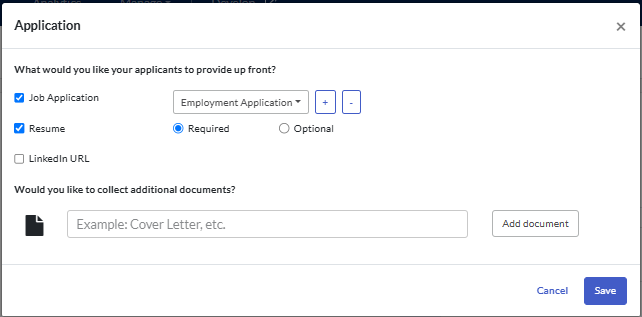
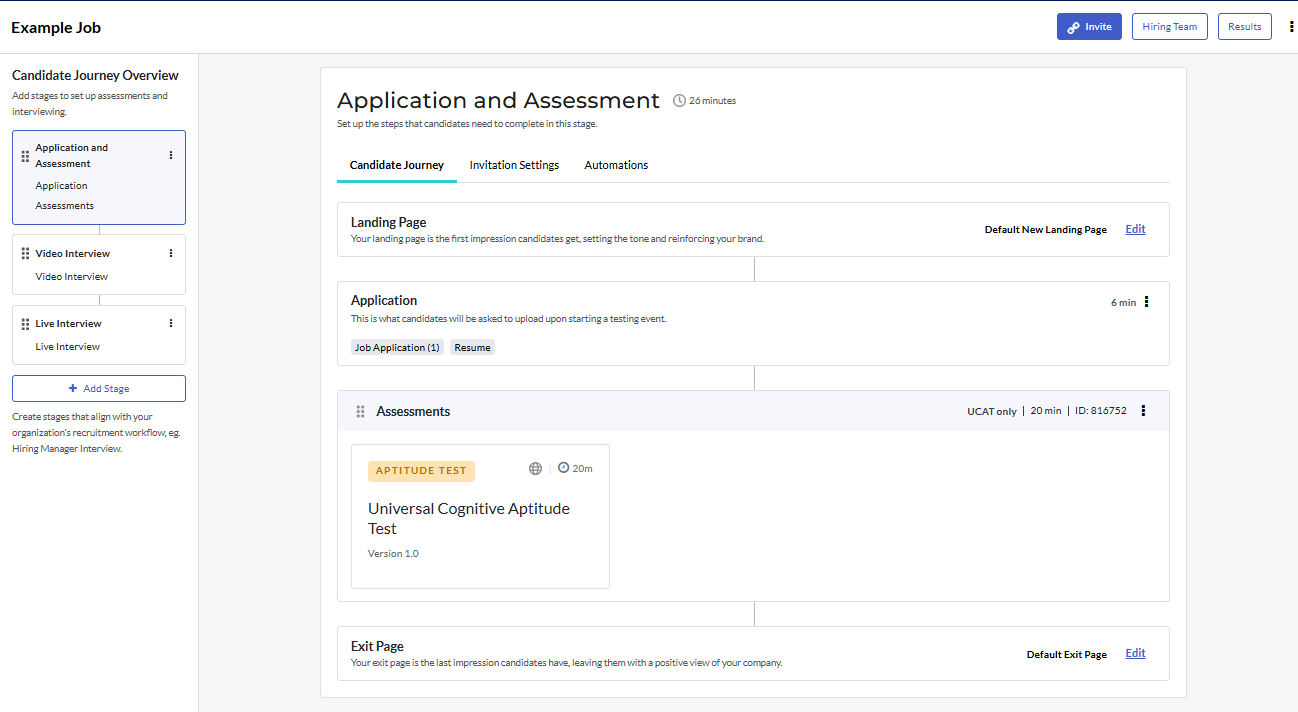
- Select the required application and document upload information, then click Save.
Assessments
- To add a test battery to the job, click on a stage that does not currently include a test battery. Either click the + and select from the available options, or click Add for the evaluation tool at the bottom of the page.
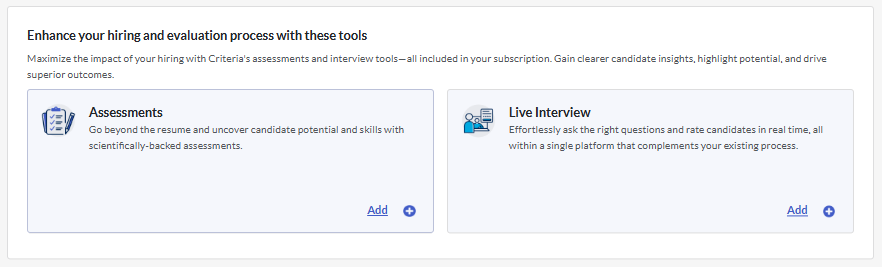
- You will be directed to a new page to select the test battery. These steps are the same ones presented during the job creation process.
Video Interview
If you selected a video interview during the job creation process, you can move this to a different stage. However, you will not be able to add a second video interview.
If there is no video interview in the job currently, you can add one to any stage except those containing a real time interview.
- To add a video interview to the job, click on any stage that does not contain a real time interview. Either click the + and select from the available options, or click Add for the evaluation tool.
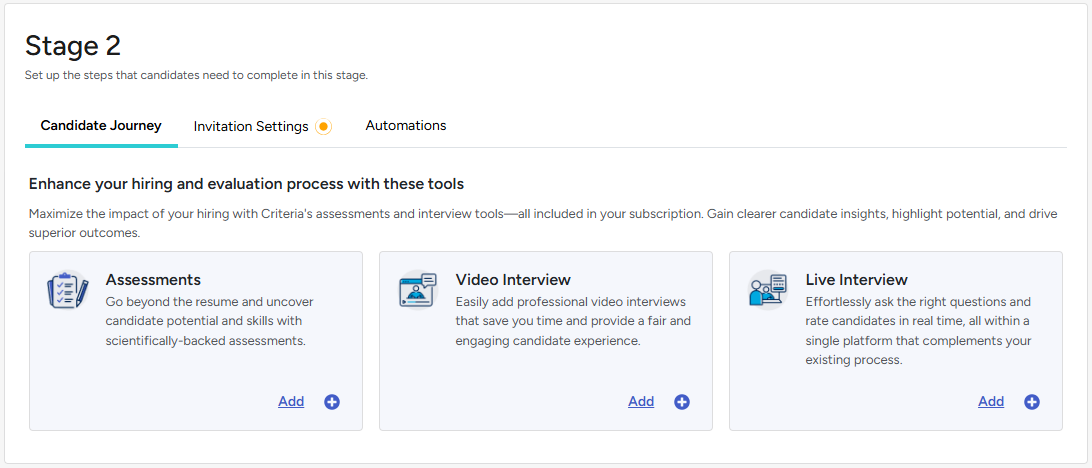
- You will be directed to a new page to select the video interview. These steps are the same ones presented during the job creation process.
Real Time Interview
- To add a new real time interview to the job, click on a stage that does not currently include any evaluation tools. Either click the + and select from the available options, or click Add for the evaluation tool.
- You will be directed to a new page to select thereal time interview. These steps are the same ones presented during the job creation process.
Moving and reordering evaluation tools
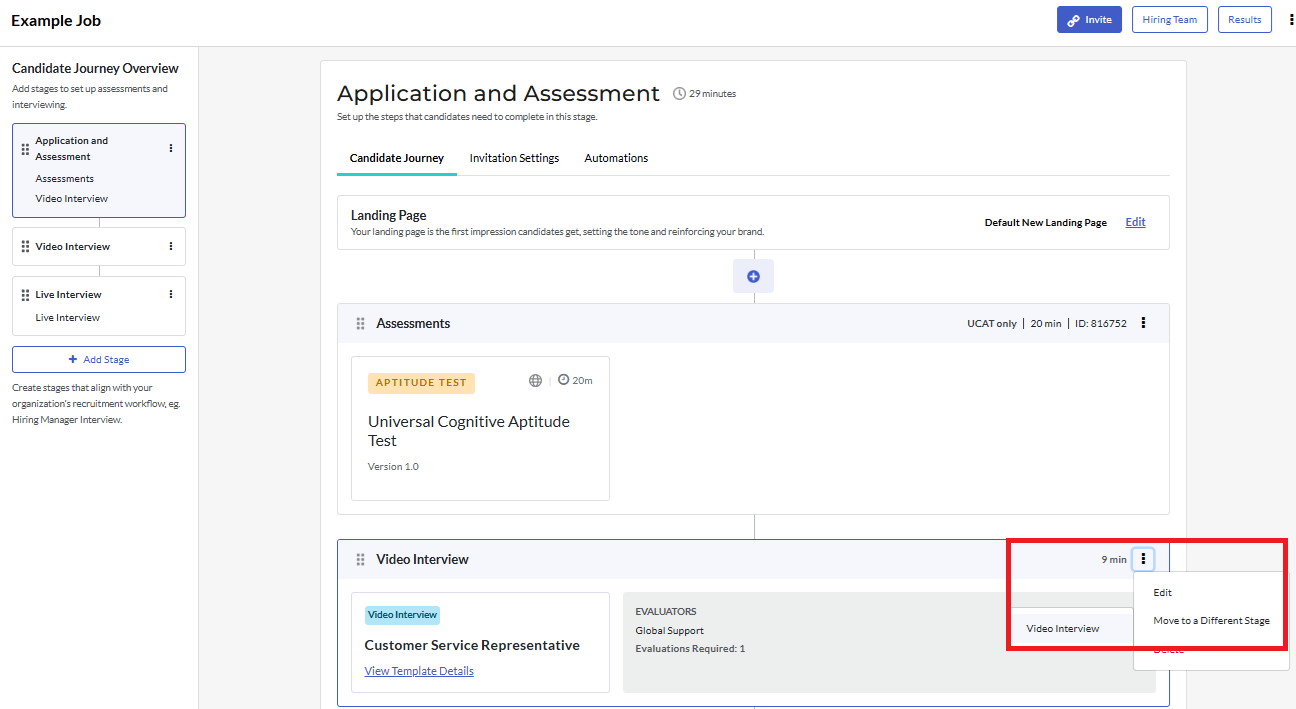
- Move an evaluation tool to a different stage: Locate the evaluation tool that you want to move and click on the hamburger icon. Click Move to a Different Stage and select the required stage from the list.
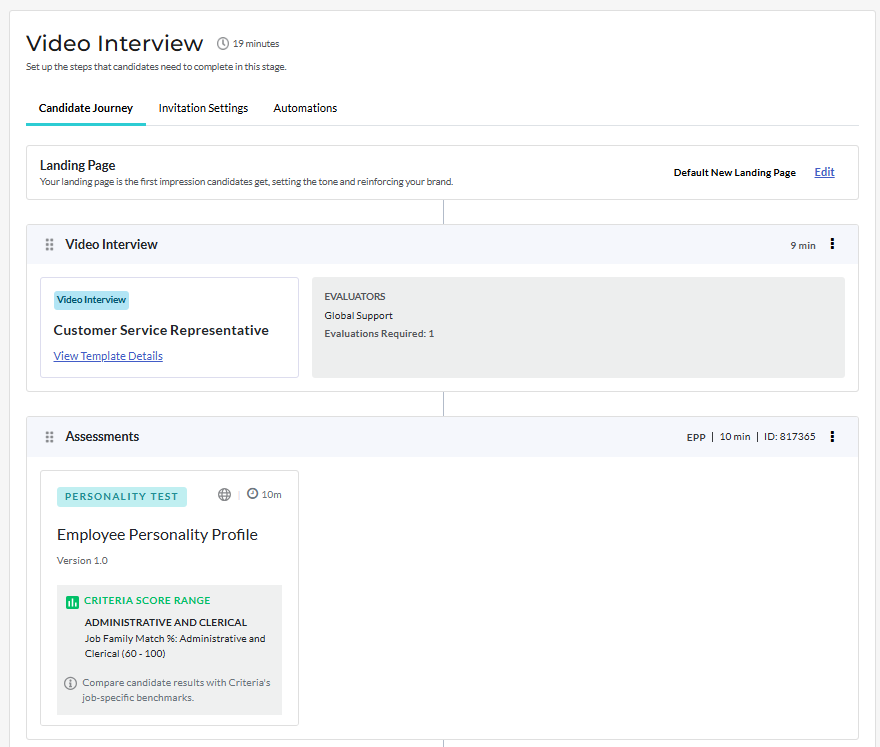
- Reorder evaluation tools: If the stage contains more than one evaluation tool (for example, video interview and assessments), you can change the order that these will be presented to candidates in. Click the 6 dots and drag the evaluation tools into the order you wish candidates to complete them, with the top task being presented first.
Classic Job Settings
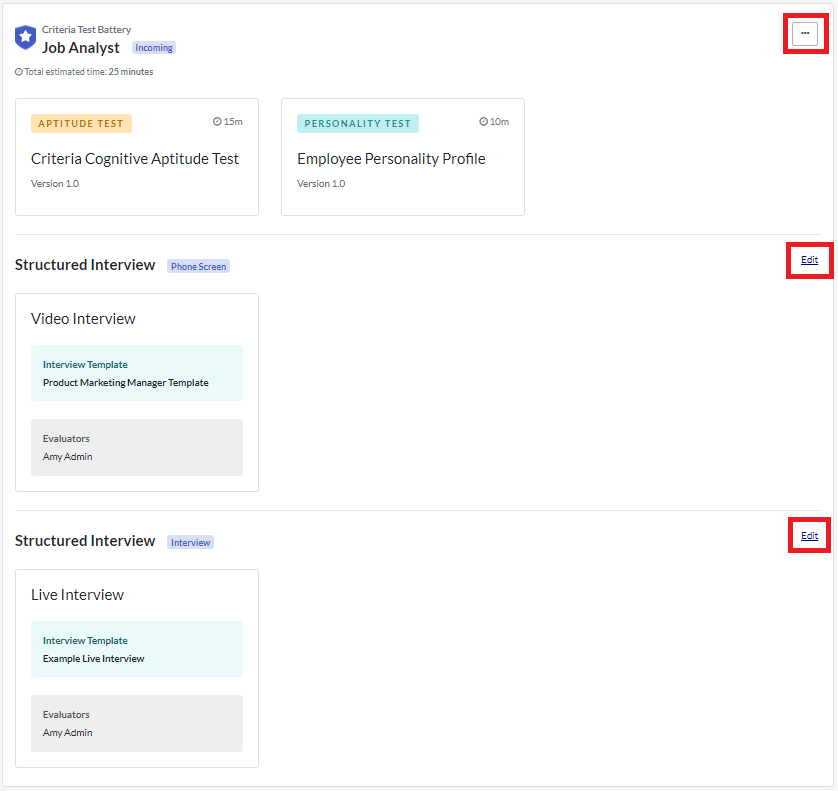
On the Job Settings screen, the assessments selected for the job (if relevant) are displayed before any structured interviews.
By default, the test battery and video interview will both be added to the Incoming stage of the pipeline (if you are using both of these evaluation tools), and the real time interview will be added to the next stage. The blue pill to the right of the test battery / interview template name indicates the pipeline stage they are in.
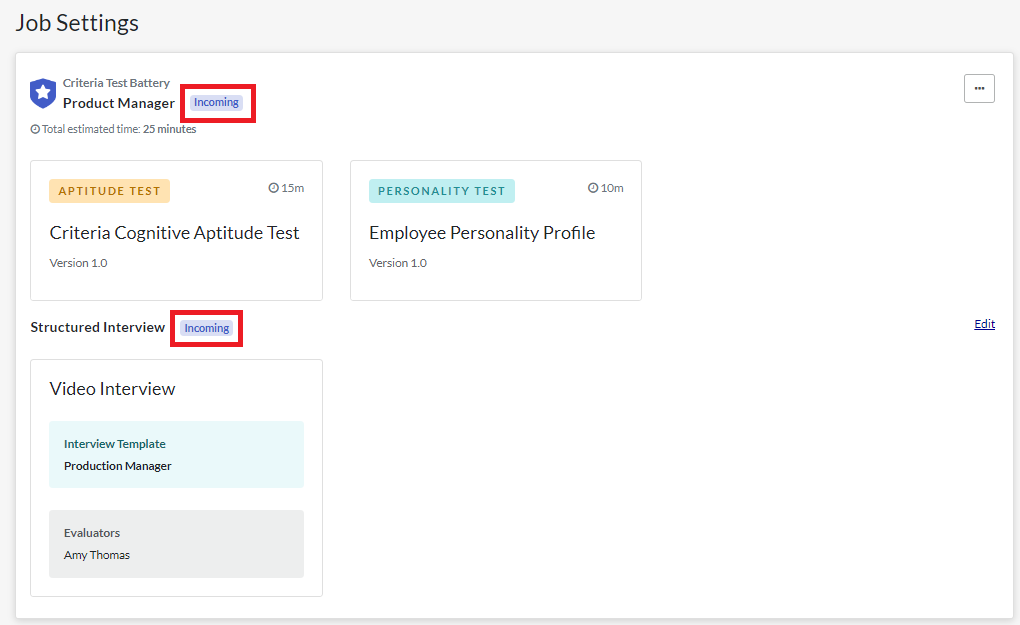
By default, assessments will be listed first (and your candidates will complete this task first) but you can change this so the video interview will be the first thing your candidates complete.
Application form / request documents
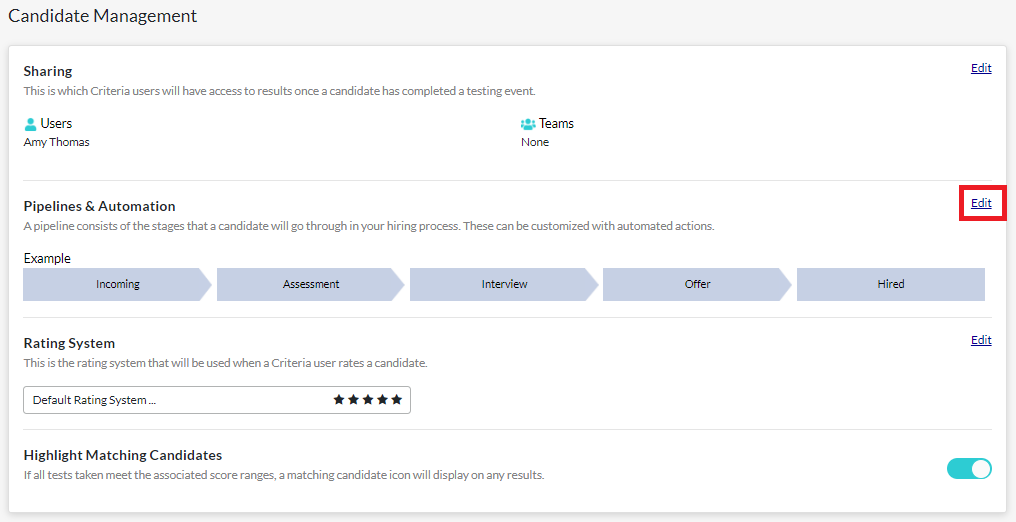
The application form is added in the Pipelines & Automation section. Then you can set the requirements for any documents to be collected.
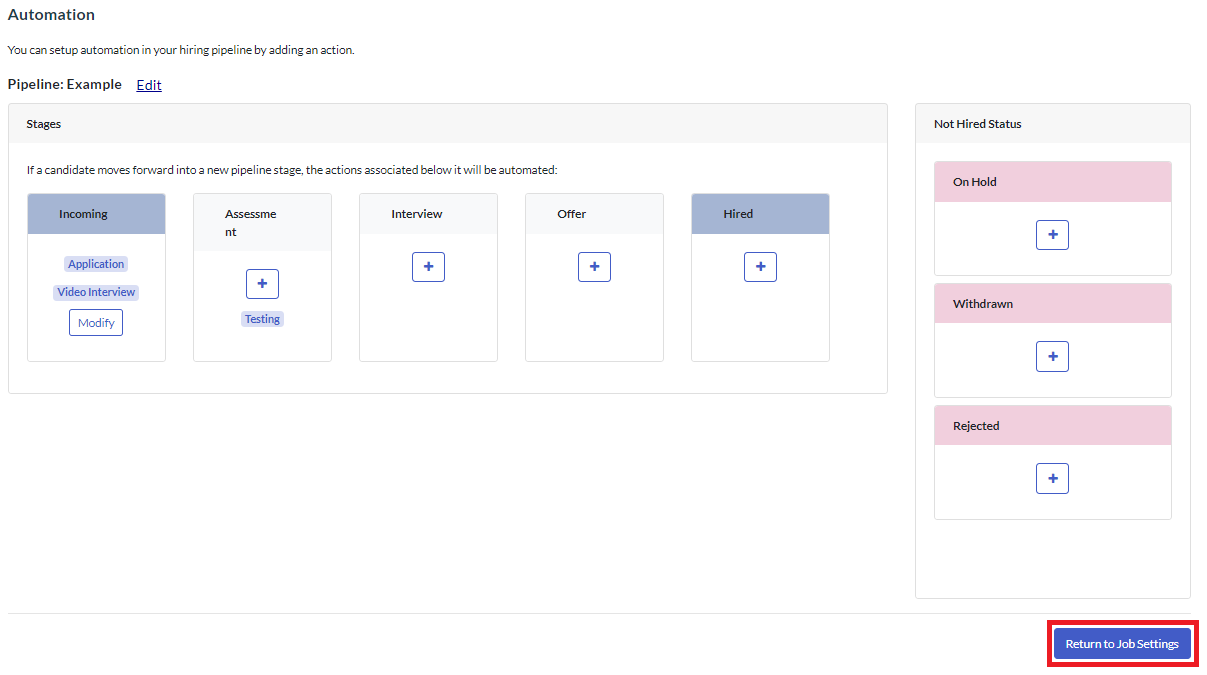
- Click Edit in Pipelines & Automation.
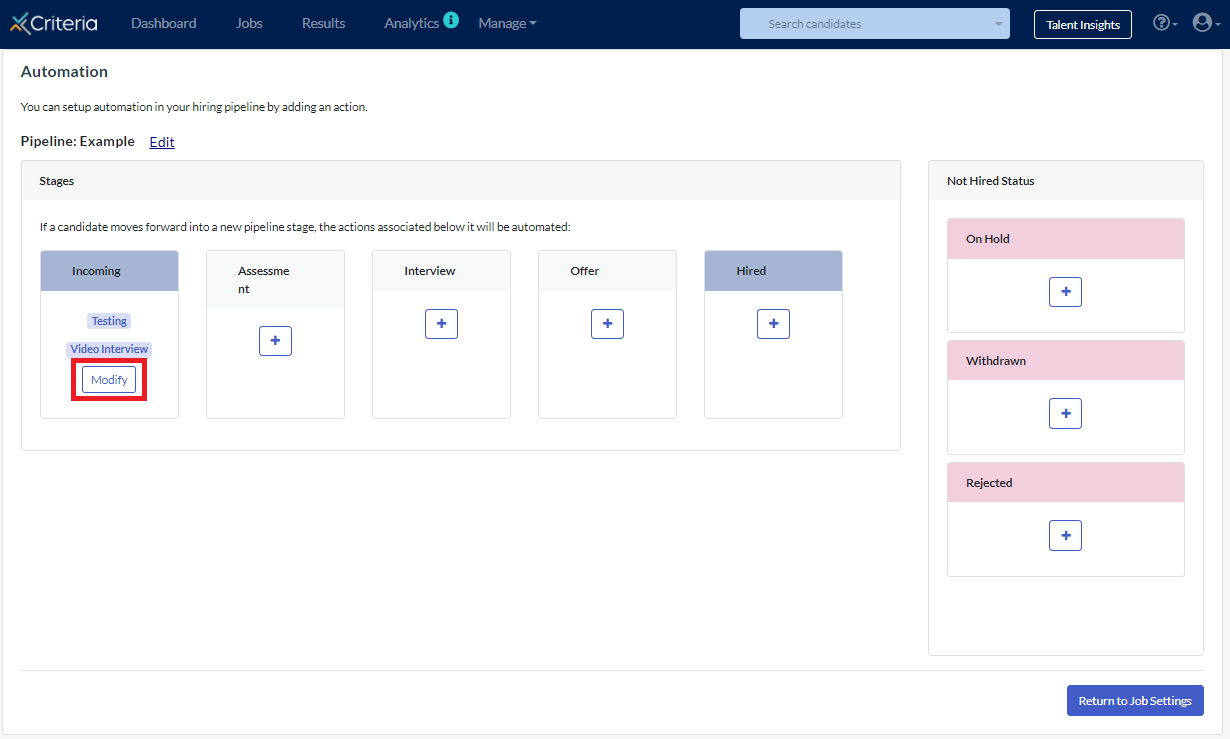
- Click Modify in the Incoming section.
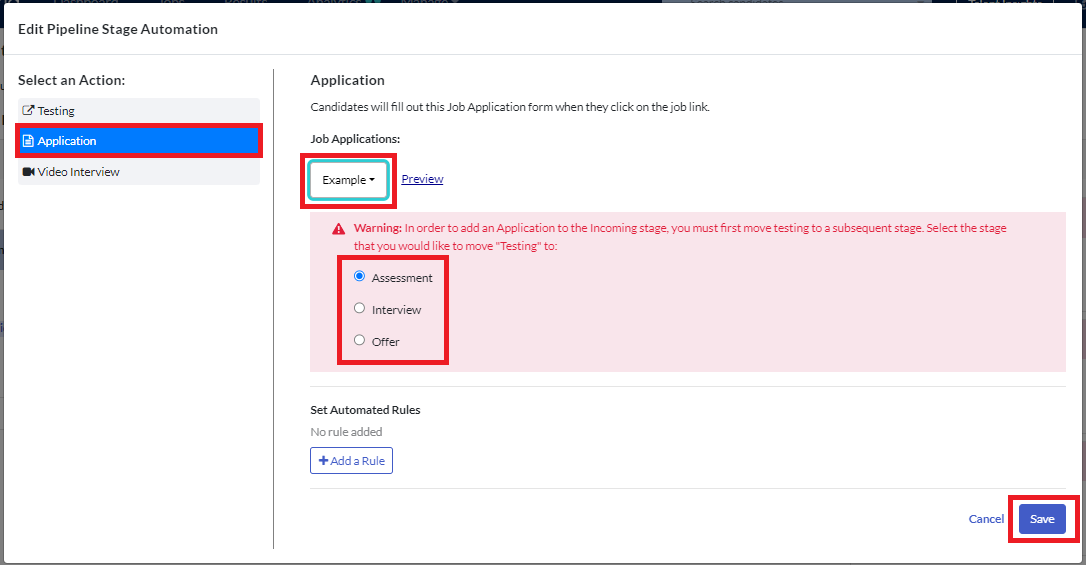
- In the modal that appears, click Application on the left side. Select your Job Application from the dropdown list and click the pipeline stage to move the assessment step to. Click Save.
- Click Return to Job Settings. You can keep the video interview step in the Incoming stage and your candidates will be asked to complete this as soon as they have filled out the application form. If you wish to move it to a later pipeline stage, you can do so from the Job Settings page (see above).
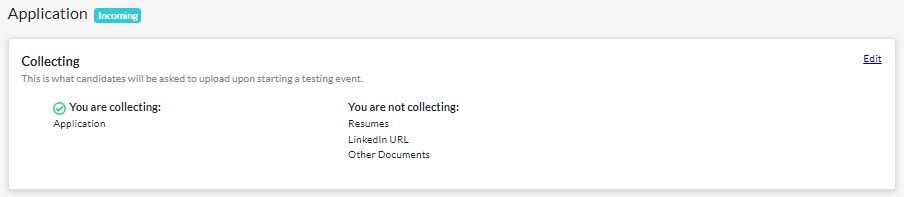
- On the Job Settings page, click Edit in the Application section.
- Here you can change the application form to be used and select any documents you want candidates to provide.
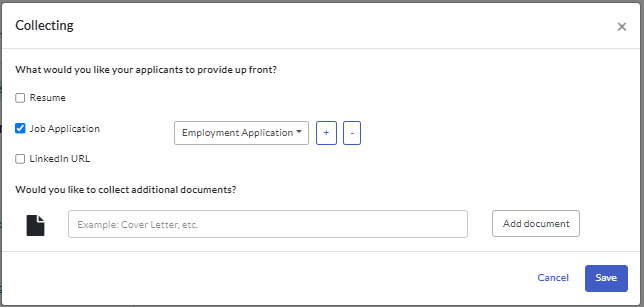
- Click Save.
Assessments
To make changes to the test battery, for example, to add a score range, click ... near the top right corner of the Evaluation Tools section.
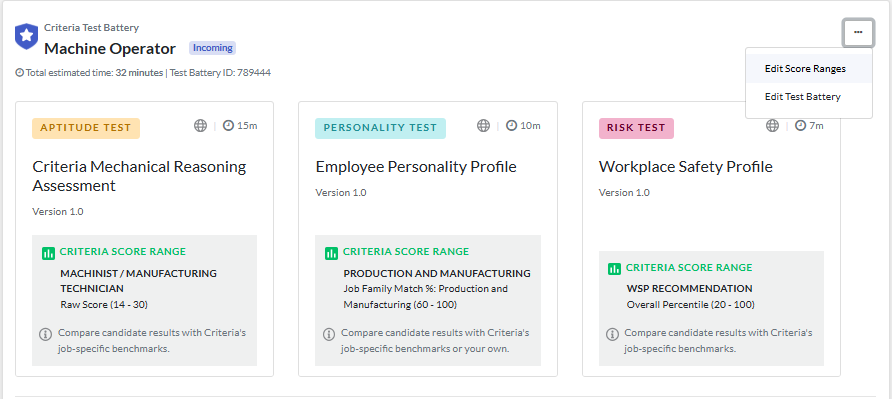
Video Interview
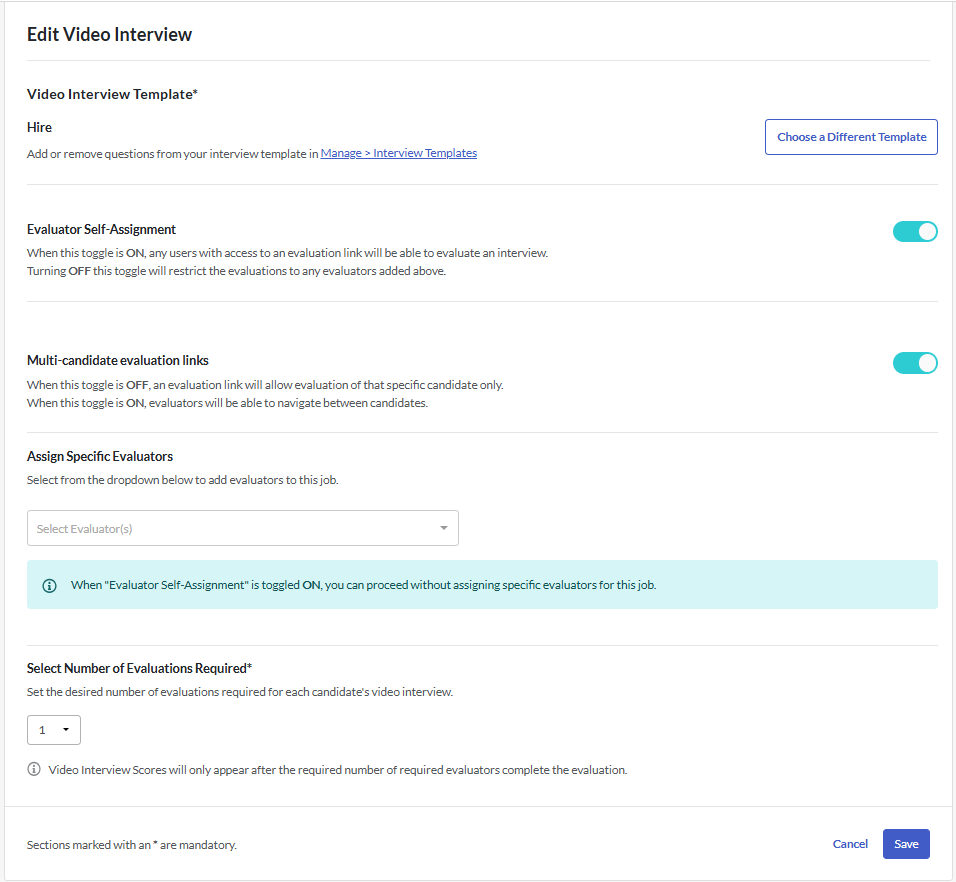
To make changes to the video interview, click Edit to the right of this card. Complete any updates and click Save. Learn more about these fields.
Real Time Interview
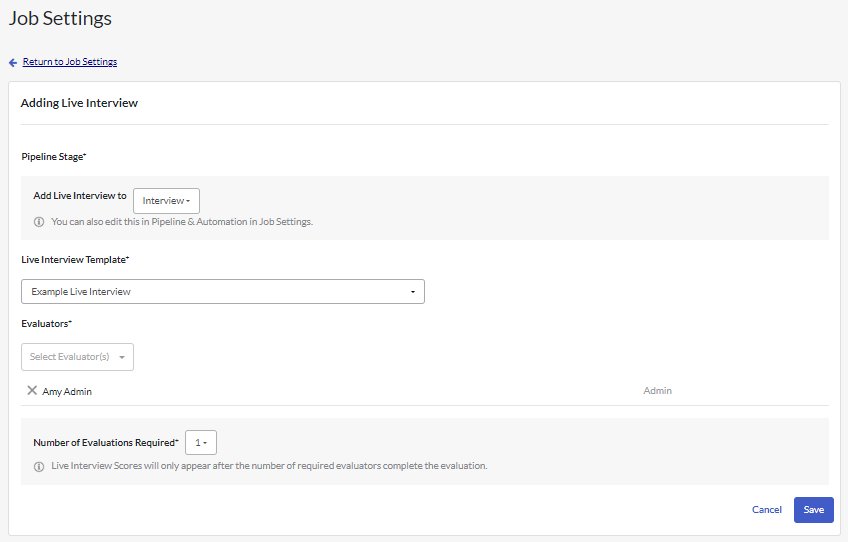
To make changes to the real time interview, click Edit to the right of this card. Complete any updates and click Save.
Proctoring
You can create a proctored job that monitors your candidates as they complete their assessments. This enhances test security for candidates completing the testing remotely.
Proctoring is enabled at the company level, but you can turn it on or off for specific jobs:
- Candidate Journey Builder: Click the hamburger (3 vertical dots) icon. Select Advanced Settings. Go to the Proctoring section.
- Classic Job Settings: Click Settings. Go to the Proctoring section.
Toggle the buttons on or off, as required. Your changes will be saved automatically. The updated settings will apply to candidates created from that point on, but will not affect existing candidates.
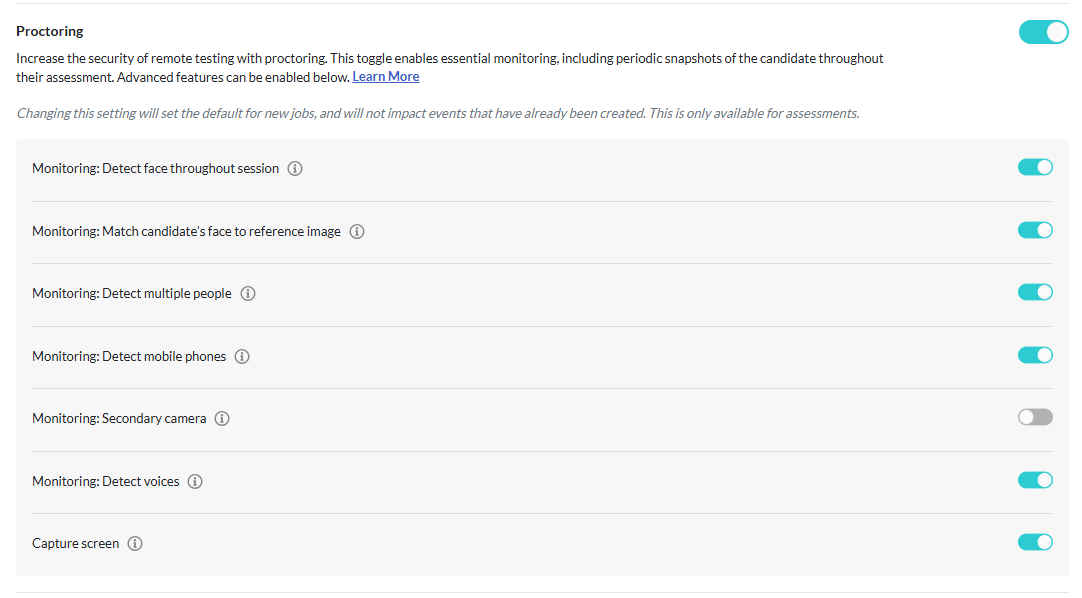
Toggle off the main Proctoring option if you do not wish to include proctoring for this job. Alternatively, leave the main Proctoring option toggled on and turn off the sub-toggles that are not required.
You may still manually invite candidates to complete an assessment without proctoring, even if proctoring is enabled for the job.
Languages
Your subscription may include the option to provide your candidates with assessments in alternative languages. If your job meets the following criteria, you can select the languages candidates may complete testing in:
- The job only includes assessments (and optionally an application form).
- All the tests in the job are available in the alternate language.
- In the Candidate Journey Builder, click the hamburger icon (3 vertical dots) in the top right. Select Advanced Settings.
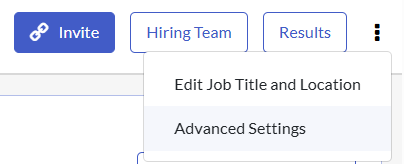
- Go to Candidate Experience and click Edit next to Languages.
- All of the assessments in the job must be available in at least one alternative language in common for this option to be accessible.

- All of the assessments in the job must be available in at least one alternative language in common for this option to be accessible.
- Select the default language from the dropdown list. This is the language that will be presented to candidates before they choose a language.
- Select any alternative languages from the dropdown list. Candidates can select one of these languages to complete the assessments in.
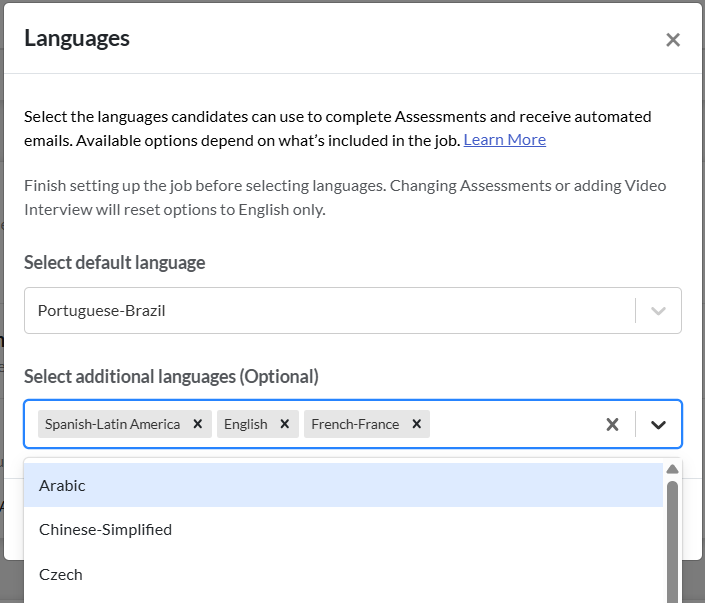
- Click Save.

Automation
Within the Criteria platform, you can add automated tasks that will progress candidates who do or don't meet the role requirements into specific pipeline stages. Click here to learn more about setting this up in your job.
Emails and expiration date settings
Candidate Journey Builder
Once you have added all the evaluation tasks, it's time to set up the candidate experience.
- A different email template may be selected for each stage in the flow.
- The Event expiration and reminder email are set at the job level, so candidates at any stage in the job will be sent this email and have a set number of days to complete it (if enabled for the job).
Invitation email
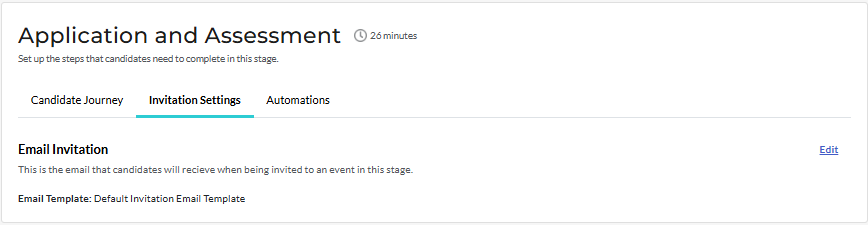
To add an invitation email template specific to this stage in the job's workflow, go to the Invitation Settings tab. Click Edit next to Email Invitation.
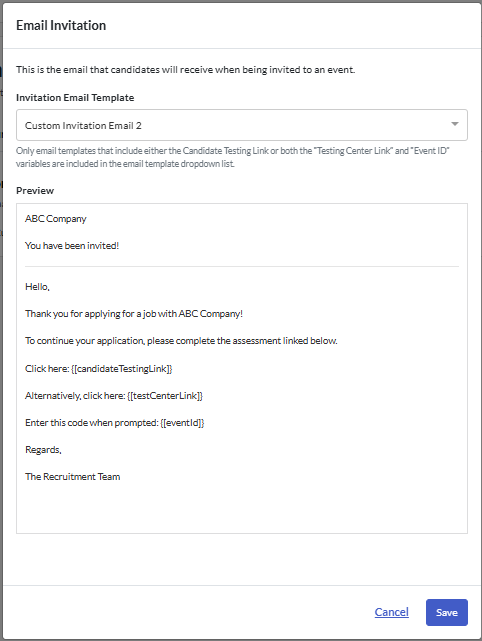
Select the invitation email template for this stage, then click Save.
Event expiration and reminder email
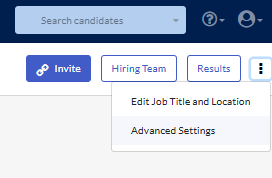
Click the hamburger icon in the top right and select Advanced Settings from the dropdown menu.
Click Edit next to Event Expiration.
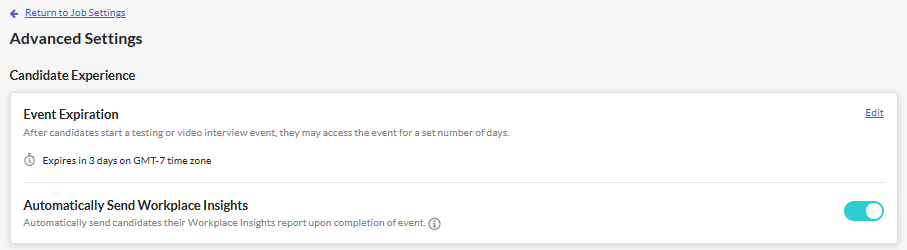
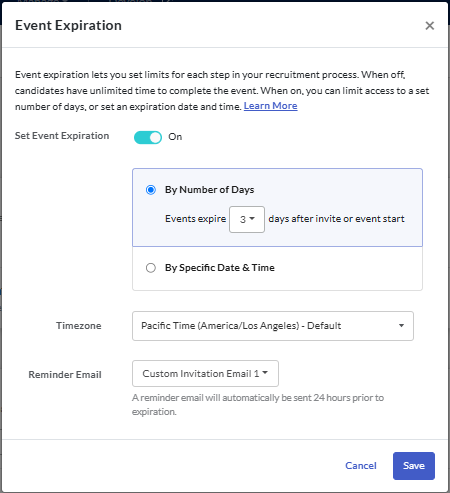
If expiry dates are to be used for the job, check that this is toggled on. Select whether the Event Expiration will be for a specific date or for a set number of days. Chose the time zone the candidates' invitation will be displayed in and select a reminder email template. Click Save.
Workplace Insights Report
If you would like to automatically send your candidates a copy of their Workplace Insights Report when they finish completing the assessments, toggle Automatically Send Workplace Insights on in Advanced Settings (hamburger icon).

Classic Job Settings
Once you have added all the evaluation tasks, it's time to set up the candidate experience.
Invitation email
To set a default invitation email for the job, click Edit next to Email. You can also set a different email template for different stages in the pipeline.

Event expiration and reminder email
If you have set an expiration date for your candidates' invitations, you can set the time zone that candidates will see in their invitation emails and when they access the candidate assessment center.
Click Edit next to Event Expiration.

Select how long to provide the candidates to complete the task, the time zone the invitation will be displayed in and the reminder email template that will be sent to candidates 24 hours before the expiry time. Click Save.
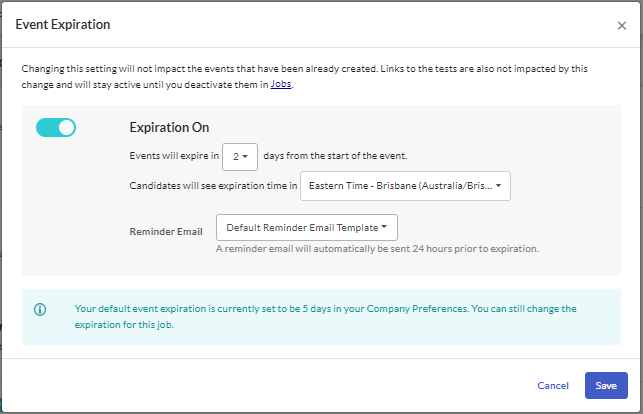
All candidate tasks or Events will have the same number of days until expiration.
For example, if you set the expiration at 14 days, the candidate will have 14 days from the time the Event is created to complete all tasks associated with that Event. If you have Application Form and Assessments in Stage 1 and Video Interview in Stage 2, they will have 14 days to complete the Application and Assessments, then 14 days to complete the Video Interview.
Workplace Insights Report
If you would like to automatically send your candidates a copy of their Workplace Insights Report when they finish completing the assessments, toggle Automatically Send Workplace Insights on in Advanced Settings (hamburger icon).
Landing and exit pages
Candidate Journey Builder
Create custom landing and exit pages to enhance your candidates' experience. The landing page is the first thing candidates will see when they click on the link. The exit page provides an opportunity to create a final impression of your organisation for the candidate.
A different landing and exit page can be set for each stage of the candidate journey.
The Candidate Journey tab shows the steps that candidates will complete, in order from top to bottom.
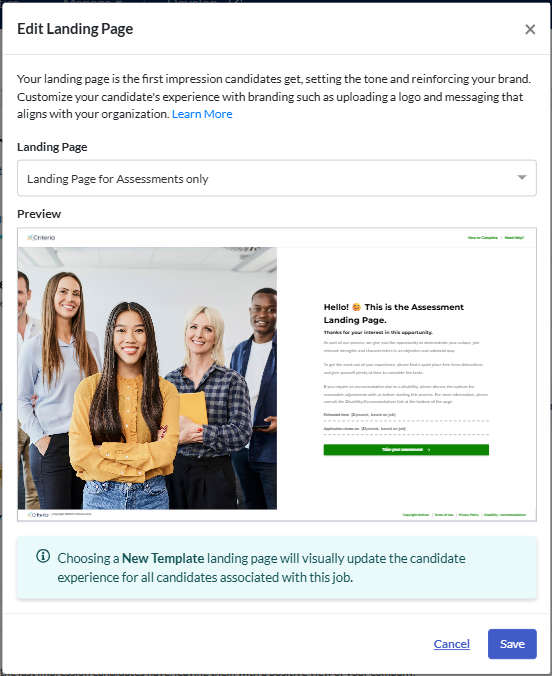
Landing page
Click Edit next to Landing Page.
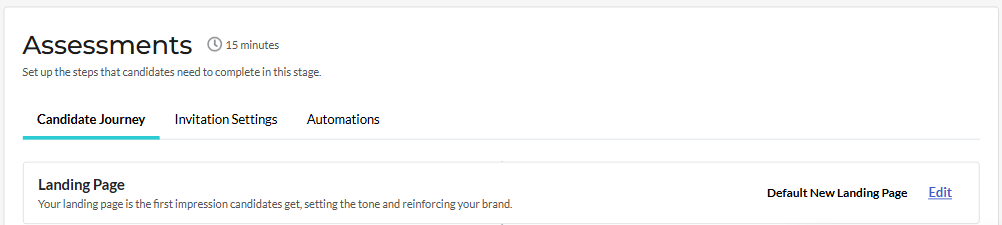
Select the landing page candidates will see for this stage, then click Save.
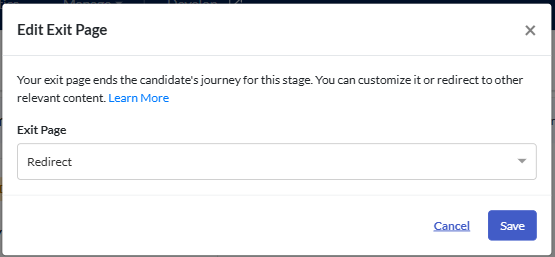
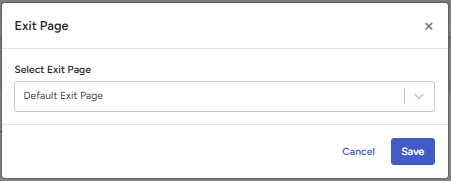
Exit page
To change the exit page for this stage, click Edit next to Exit Page.

Select the exit page from the list, then click Save.
Classic Job Settings
Create custom landing and exit pages to enhance your candidates' experience. The landing page is the first thing candidates will see when they click on the link. The exit page provides an opportunity to create a final impression of your organisation for the candidate.
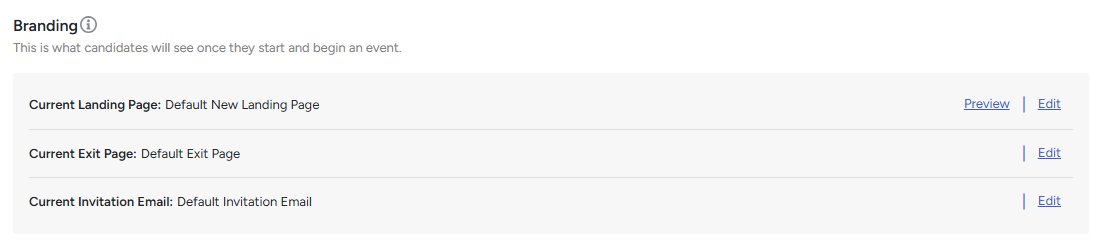
To change the landing page and exit page in your job from your Criteria account's default option, go to Branding in the Candidate Experience section.
Landing page
Click Edit next to Current Landing Page.
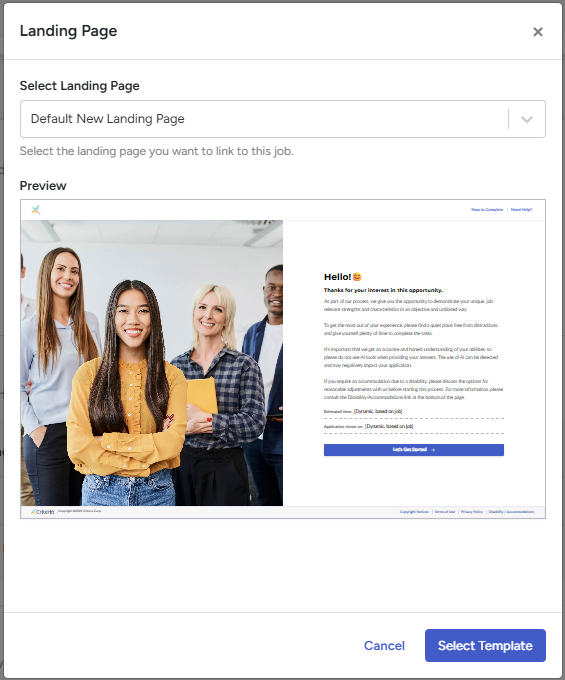
Select the landing page from the list, then click Select Template.
Exit page
To change the exit page for this stage, click Edit next to Exit Page.
Select the exit page from the list, then click Save.
Who has access to the job?
The answer will depend on their access role and the tasks they need to complete.
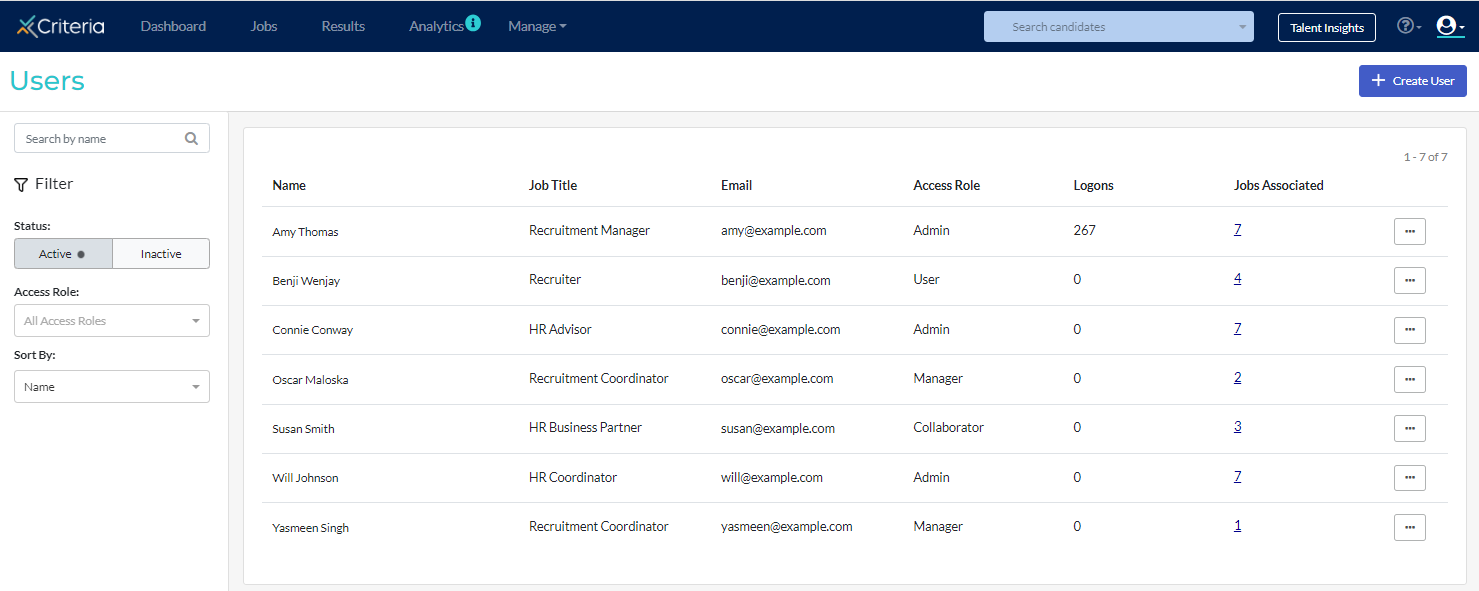
- Admin users: Admin users will automatically have access to the job. If they wish to receive notifications for jobs they did not create, they can share the job with themselves.
- Video Interview Evaluators: If they will only be evaluating your candidates' video interview responses, these users do not need to have the job shared with them (unless you want them to have access to the full candidate details). Pre-selected evaluators will need to be assigned to the video interview in the job. Guest evaluators only need to have the link shared with them.
- Other users: All other types of users will need to have the job shared with them.
Rating System
Set up a custom rating system for your team to evaluate each candidate's suitability for the job. To add the rating system to your job:
- Candidate Journey Builder: Click the hamburger (3 vertical dots) icon. Select Advanced Settings. Go to Rating System in the Results Management section.
- Classic Job Settings: Click Settings. Go to Rating System in the Candidate Management section.
Internal Reference Name and Location
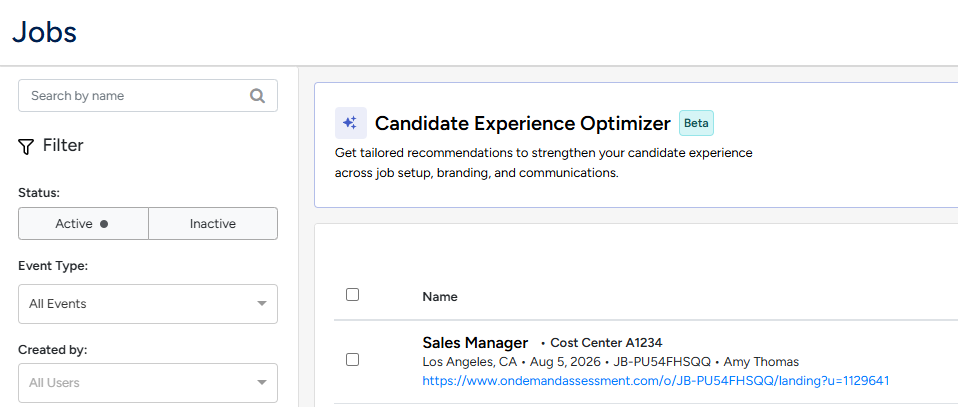
Add an Internal Reference Name and Location to your job to help distinguish between jobs with the same title. This can also be used to track jobs belonging to different locations or cost centres.
- Internal Reference Name: This free text field is only visible to users who are logged into your Criteria account and not to your candidates.
- Location: This field must be entered in the format of City, State, Country. (City, XX, XX)
- To add or update the Internal Reference Name and Location, go to:
- Candidate Journey Builder: Click the hamburger (3 vertical dots) icon. Select Edit Job Title and Location.
- Classic Job Settings: Click Settings. Click Edit under the job title in the top left corner.

- Add values that are relevant to your organization.
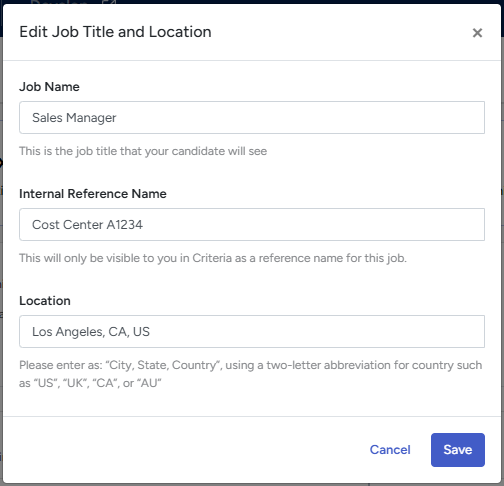
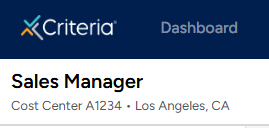
- Click Save. This information will be visible in the top left corner while you are in the job, and on the Jobs screen.
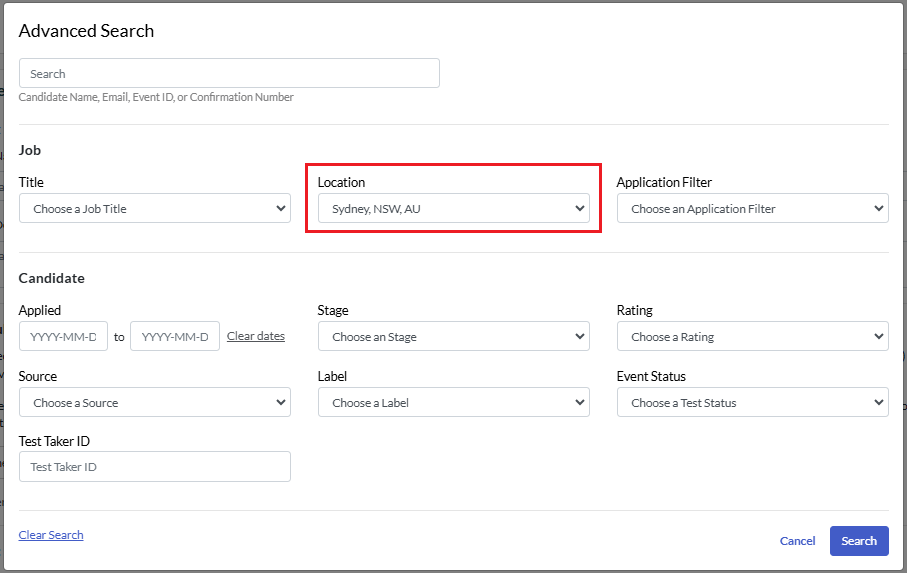
You can search for candidates base on Location using the Advanced Search function.
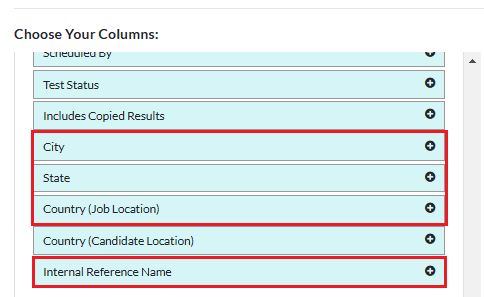
The Location and Internal Reference Name data can also be added to a report in the Reports function.