Jobvite Integration Guide
 Updated
by
Integrations Team
Updated
by
Integrations Team
- Activating the Integration

Activating the Integration
- Contact your Criteria Corp Customer Success Manager (CSM) about enabling the integration with Jobvite.
- Determine the workflow status values and custom field names to be used by the integration and populate them into the provided tables.
- Provide 2 tables with status and custom field names to your Jobvite rep and request the Criteria integration be enabled with these values.
- Jobvite configures your Jobvite account with the workflow statuses and custom field names provided by you.
- Jobvite rep provides you with an API Key and Secret.
- (Optional) You can set up Custom Fields in Jobvite to hold specific Criteria Scores of your choosing.
- Provide the API Key, Secret, Workflow Status Names, and standard Custom Field names to your Criteria CSM.
- (Optional) Provide the Custom Field "Field Code" values to your Criteria CSM along with which scores you would like mapped to those fields.
- Once the integration is configured by Criteria’s integration team, your Criteria CSM will notify you that integration is complete.
- Test the integration with a dummy candidate.
- Ongoing, use the Criteria Platform to adjust integration configuration if any status values or custom fields change.
My chosen Status and Custom Field names
Take a copy of the following 2 tables and update them to use the names you have chosen to use. Provide this to your Jobvite rep and Criteria to use in the integration setup.
Use the sections below to help you complete this table with the names you wish to use. Use the default names or choose your own. If you are not using 2 rounds of testing, leave the fields blank so they will not be created.
Note: this documentation will refer to the default names, substitute your custom names as appropriate. There are some status names which will not be required in Round 1 and are optional statuses.
Default Status Name | My Chosen Status Name |
Round 1 (Required) | |
Criteria - Invite for Testing |
|
Criteria - Invited |
|
Criteria - Interview Requires Evaluation (Optional status) |
|
Criteria - Completed |
|
Criteria - Completed - In Range (Optional status) |
|
Round 2 (Optional) | |
Criteria - Invite for Testing R2 |
|
Criteria - Invited R2 |
|
Criteria - Interview Requires Evaluation R2 |
|
Criteria - Completed R2 |
|
Criteria - Completed R2 - In Range |
|
Object | Default Field Name | My Chosen Field Name |
Round 1 (required) | ||
Requisition | Criteria Test Link |
|
Candidate | Criteria Assessment Status (Multi-line Text filed type) |
|
Candidate | Criteria Assessment Report (Hyperlink field type. Whitelisted domain name: criteriacorp.com) |
|
Round 2 (optional) | ||
Requisition | Criteria Test Link R2 |
|
Candidate | Criteria Assessment Status R2 (Multi-line Text filed type) |
|
Candidate | Criteria Assessment Report R2 (Hyperlink field type. Whitelisted domain name: criteriacorp.com) |
|
Identify Workflow Status Values
Status values will need to be created in Jobvite to be used by the Criteria Integration. The Jobvite user will move the candidate into a status to trigger testing, and then Criteria will move the candidate into different status values to show the progress of the Criteria testing.
Use the following table to identify the status values that you will need to use in your integration, based on the Criteria assessments and interviews you plan to use. Choose an appropriate name for each status. These workflow status names are suggestions, you can use whatever status names make sense to your recruitment team.
Suggested Status Name | Purpose |
Criteria - Invite for Testing | Move candidates into this status to automatically trigger Criteria testing. If you wish to trigger testing automatically on application, you do not need to create a status for this purpose, the existing 'New Applicant' status will be used. |
Criteria - Invited | Candidates will be automatically moved to this status when they have been invited in Criteria. This status is recommended to help you easily see who has been successfully invited. Your integration will also perform better as Criteria must look at all candidates in the 'Invite for Testing' status every 15 minutes to determine candidates that are ready to be invited. If successfully invited candidates are moved out of that status there are less for Criteria to look at each time. |
Criteria - Interview Requires Evaluation | Candidates will be automatically moved to this status when evaluators are reviewing a Video/Live Interview. The candidate will remain in this status prior to a final score being available. This status is recommended if you are using Video Interviewing, to allow you to differentiate between the candidate phase and evaluator phase of the interview. This status will not be used for Assessments. This status is less important for Live Interviews as there are no tasks for the candidate to complete. |
Criteria - Completed | Candidates will be automatically moved to this status when their testing is completed / when their Interview has enough evaluations to generate a score and report. If the 'Completed - In Range' status is used, candidates will only be moved to this status if there are no Score Ranges in place or the candidate did not meet the Score Ranges |
Criteria - Completed - In Range | Candidates will be automatically moved to this status when their testing is completed, and they met all the score ranges on the Criteria assessments. This status is recommended if you use score ranges on your Assessments in Criteria, to easily filter candidates who met the Score Ranges. This status will not be used for Video and Live Interview Jobs as they do not have score ranges. |
Each candidate's invitation will be to a specific Criteria Job which may contain Assessments, a Video Interview, Assessments and a Video Interview together or a Live Interview.
This integration supports issuing 1 round or 2 rounds of Criteria testing per candidate. If you plan to utilize 2 rounds of testing per candidate (e.g., 2 Criteria Jobs with assessments or 1 with assessments and 1 with an interview), you will need separate status values for the round 2 testing.
Only the 'Invite for Testing' status is required to be different from round 1, however, it is recommended to create separate status values for all the round 2 stages so you can easily distinguish candidates in the different rounds.
Identify Custom Field Names
Some Custom Fields are required to be set up on the Jobvite requisition and candidate for the Criteria integration to function. You will put the Criteria Job information into the field on the requisition to instruct Criteria which testing to invite the candidate to complete. Criteria will populate the fields on the candidate to show the results and report when the testing is completed.
These custom field names in this table are suggestions, you can use whatever names make sense to your recruitment team. Enter your chosen names into the table that you copied above.
3 custom fields are required to facilitate a round of testing.
Object | Suggested Custom Field Name | Purpose |
Requisition | Criteria Test Link | This field will hold the Open Link or Job Code for the Criteria Job that the candidates are to be invited to complete. You will copy the Open Link or Job Code from the Criteria Platform and paste it into this field in the Jobvite Requisition to enable Criteria testing for that requisition. |
Candidate | Criteria Assessment Status | This candidate field will be auto populated by Criteria with status updates and the results as the candidate progresses through the testing process. If the invitation is not able to be processed, the error message will be displayed here. This field should be set up as a Multi-line Text filed type, so the results can be displayed over multiple lines. |
Candidate | Criteria Assessment Report | This candidate field will be auto populated by Criteria with the Criteria report link when the candidate has completed testing. This field should be set up as a Hyperlink field type, so the link is clickable. (Whitelisted domain name: criteriacorp.com) |
If you plan to utilize 2 rounds of Criteria testing per candidate, you will need 3 separate custom fields to hold the settings and results for round 2 testing. Enter you chosen names for Round 2 into the table.
Provide data to Jobvite rep
Reach out to your Jobvite rep and provide them with the 2 tables with your status and field names.
Jobvite will create the status and fields in your Jobvite account.
Jobvite will provide you with an API key and secret for you to pass onto Criteria.
(Optional) Identify Custom Fields for Score Mappings
The integration will automatically display all the candidate result data in a single custom field against the candidate. Since all the score data is within 1 text field, you will be unable to use this to sort/filter candidates by their individual test scores.
If you'd like to be able to sort and/or filter candidates by a specific Criteria test score within Jobvite, you need to create Custom Fields in Jobvite for those score fields.
Work with your Criteria CSM if you need help choosing which scores should be mapped to fields in Jobvite based on the assessments and interviews you are using in Criteria.
Once you have identified which fields you would like to use, follow the instructions below to create these custom fields in Jobvite.
For these custom fields, you will need to provide Criteria with the Field Code that is automatically generated when the custom field is created. Make a list of these values and provide them to Criteria once the fields are all created. If the name is not self-explanatory, also advise Criteria which score is to be populated into each of the fields.
Fields that can be mapped to Jobvite
The following Criteria fields can be mapped to custom fields in your Jobvite integration. Choose which field(s) you would like to use.
Description | Data Type for Custom Field |
Talent Signal | Number |
Met All Score Ranges Possible values: Yes, No | Text, or Drop-down list |
Proctoring Overall result Possible Values: Pass, Flag, Fail | Text, or Drop-down list |
There are fields available for each test. Usually, Percentile is the main one, but it will differ for each test. Refer to the 2 'Score Fields' sections in the Criteria REST API document to see the fields that are able to be mapped for Assessments and Structured Interviewing. The data type mentioned in the API doc will match the data type you should use in Jobvite, with the exception of Invalid fields. These will always have the possible values of Yes and No. | If the value is always a number, use Number. If the value is always text or may sometimes contain text, use Text. If there are a limited sub-set of values available, it could be added as Drop-down list. Examples: Percentile -> Number Raw Score -> Number Recommendation -> Text Invalid -> Use Text or Drop-down list with values of 'Yes' and 'No'. EPP Percent Match -> Use Number if you always choose a Job Family in the Score Range. Otherwise use Text to avoid scores of ‘0’ when there is no Job Family. |
Create Custom Fields in Jobvite
Your Jobvite rep will do the initial setup of these status values for you, using the status names you provide. If you choose to create some additional/optional custom fields to map Criteria scores, you will need to create these yourself. For these custom fields, you will need to provide the Field Code (not name) to Criteria to initialize in your integration.
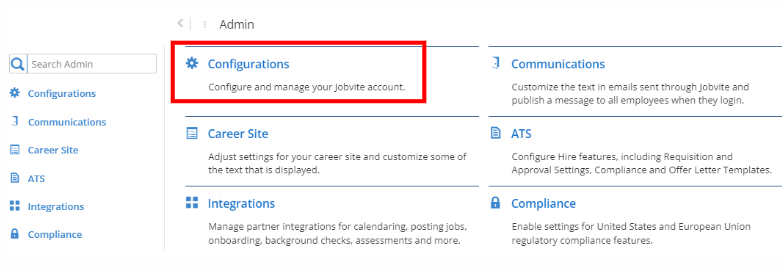
To set up custom fields in Jobvite, go to Admin > Configurations
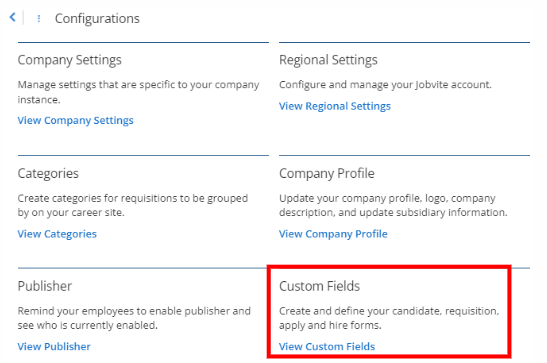
Then into View Custom Fields
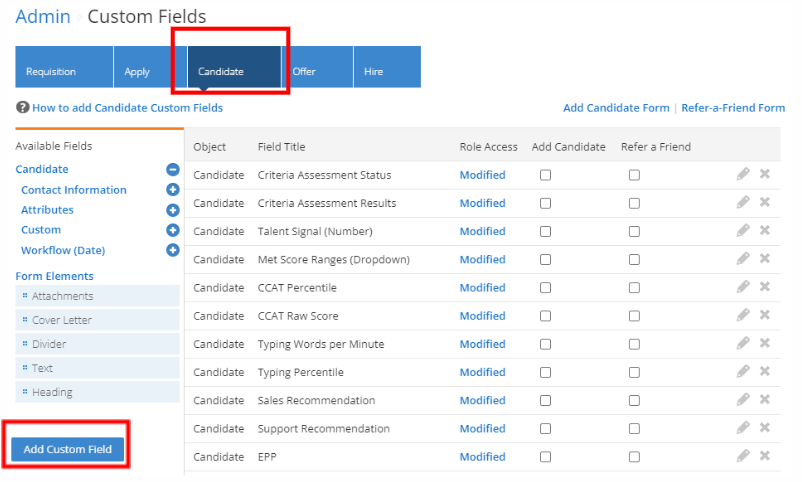
Select the Candidate tab. The screen will list all the current custom fields for Candidates. Use the 'Add Custom Field' button on the left to create a new custom field.
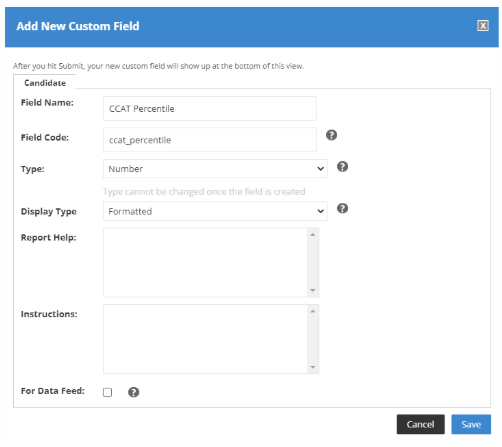
Field Name - this is the name that will be displayed on the candidate card, choose an appropriate name that describes the Criteria score /value that will be shown in this field. Choose a name that makes sense to your team.
Field Code - this will populate automatically when you enter the Field Name value. When adding optional Custom Fields, take a copy of this value as you will need to provide this to Criteria to configure your integration.
Type -
- Multi-line Text - choose this when you are adding the required custom field to hold the status updates from Criteria. This needs to be a multi-line field as the results will take up a few lines.
- Hyperlink - choose this when you are adding the required custom field to hold the report URL from Criteria. You will also need to add a Whitelisted Domain Names value to tell Jobvite which URL can be clickable. When adding the field for the Criteria report, add the following as a whitelisted domain name: criteriacorp.com
- Number - choose this for a field that will be mapped to a Criteria score field value is a number e.g. Talent Signal, Percentile or Raw Score.
- Drop-down list - choose this for a field that will be mapped to a Criteria score field that has pre-defined values e.g., Met All Score Ranges will either be 'Yes' or 'No'. You will need to add all the possible values into the 'Values' field. Ask Criteria for the possible values for the score field you are mapping.
- Text - use this if the above options aren't appropriate.
There is no need to edit any other fields on this page.
Click Save to create the custom field.
Provide data to Criteria
Provide the following to Criteria to complete the setup of the integration in Criteria
- The 2 tables you gave Jobvite with your chosen status and field names
- The API key and secret you received from Jobvite
- If you choose to create additional/optional custom fields, provide the Field Code for the fields you created
Configure Jobvite to display Criteria data in the Candidate list
The candidate list may be configured to show 6 fields of your choice. Candidates may be sorted by the columns displayed in the candidate list. Criteria recommends you edit these fields to display the fields that will help you to review and shortlist your candidates.
You may want to display the Criteria Assessment Status custom field in this list to easily see the status and/or results from Criteria directly from the candidate list.
If you have chosen to map some additional custom fields to specific Criteria test scores, you may choose to display these scores as columns in the list so you can sort the candidates by the score value.
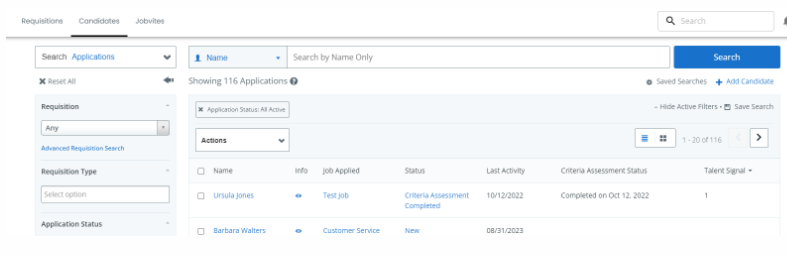
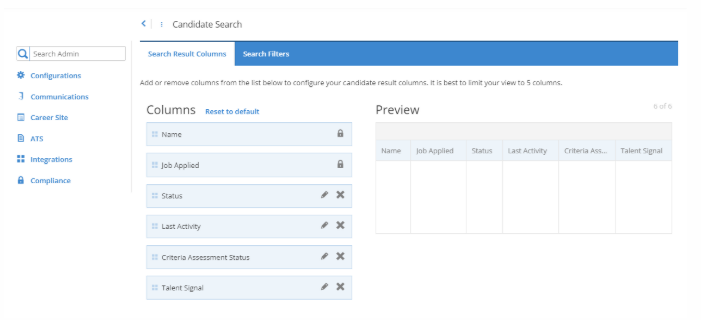
Set this up in Jobvite > Admin > ATS > Candidate Search. Edit the Search Results Columns list.
Using the Integration
Note: this documentation will refer to the default status and custom field names, substitute your custom names as appropriate.
Associating Criteria Testing with a Jobvite Requisition
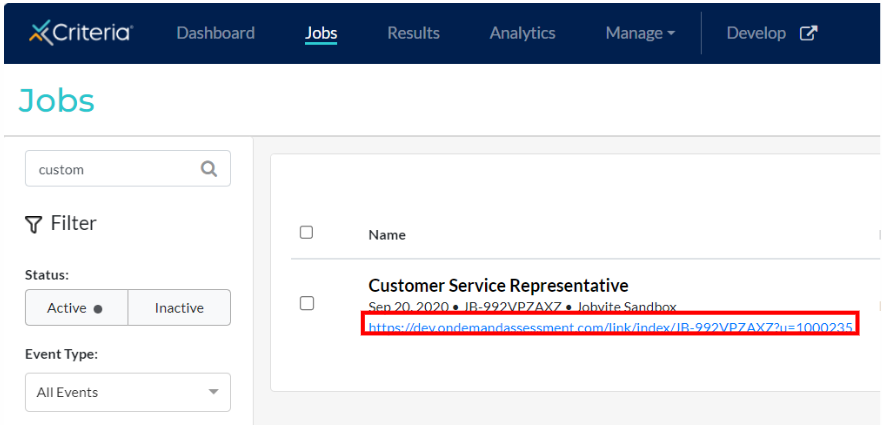
To associate a Criteria Job with a Jobvite Job Requisition, you will first need to get the Open Link for the Criteria Job.
In Criteria, go to the Jobs list, locate the Job you are interested in.
Copy the Open Link URL underneath that Job, or you may choose to just copy the Job Code (JB-XXX) if you prefer. In the case of a Live Interviewing Criteria Job, there is no Open Link so you will need to copy the Job Code in that instance.
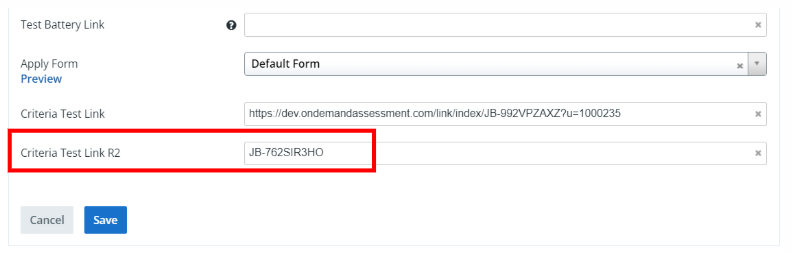
In Jobvite, go to the Details tab for the requisition and click Edit. Scroll down to the Criteria Test Link field and paste in the Open Link or Job Code copied from the Criteria Platform and click Save.
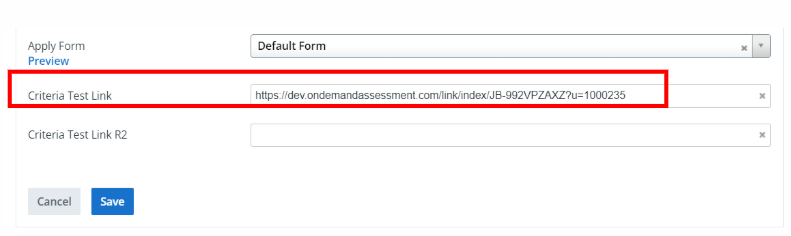
If you will be using two rounds of testing, repeat the process and paste in the Open Link or Job Code for the Criteria Job you wish to issue as the round 2 testing into the Criteria Test Link R2 field, and Save.
This requisition has now been set up for Criteria testing. When candidates are moved into the Round 1 or Round 2 status that triggers testing, they will be invited to the Criteria Job as indicated in these fields.
Send Criteria Testing on Application
If your integration is configured to trigger testing on the New status, as soon as a candidate applies they will be placed in the New status and that will be the trigger for Criteria to invite the candidate for testing. Criteria will check for and process any candidates in the New status every 15 minutes.
The candidate will be invited to the Criteria Job as indicated by the Link in the Criteria Test Link field for round 1 testing. The Criteria Job Settings will be used to determine the expiry date, invitation email template, time adjustments etc. to be applied to the new invitation.
The Criteria Assessment Status field on the candidate will show that the candidate has been successfully invited. This message will also include the Criteria Event ID if you need to locate the candidate in Criteria
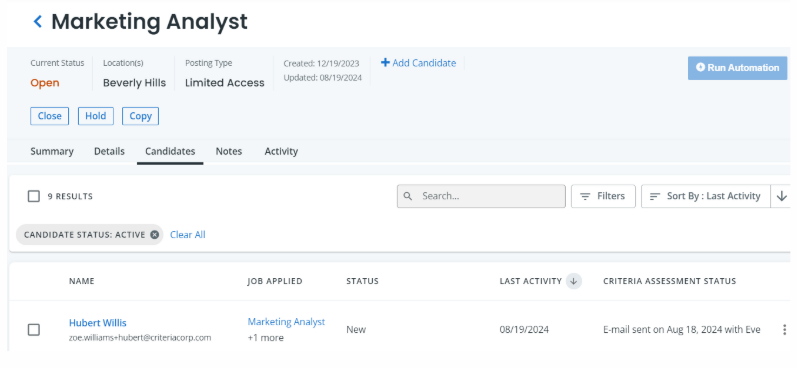
If configured, the candidate list may also show the Criteria Assessment Status field.
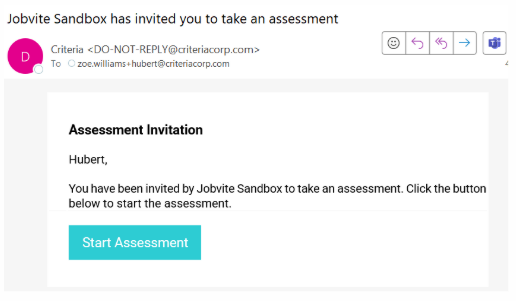
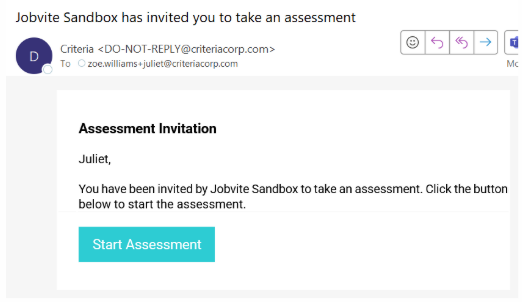
The candidate will receive an invitation email from Criteria to complete the testing. If you have SMS enabled in your Criteria account, and the candidate has a valid mobile number in Jobvite (including country code) they will also receive an invitation SMS.
When inviting an applicant to a Live Interview, Criteria will automatically email the evaluators to conduct the Live Interview. Please ensure the evaluators are aware of this interview as they will be receiving the email from Criteria. As there is no action for the candidate to complete at this stage of the Live Interview, Criteria will not send the invitation email to the candidate.

Send Criteria Testing via Workflow Step
If your integration is configured to trigger Criteria testing on a status other than New, or if you are using 2 rounds of testing, you will need to move the candidate into the relevant status to trigger testing. As soon as a candidate is placed into a status that is configured in your integration, that will be the trigger for Criteria to invite the candidate for testing. Criteria will check for and process any candidates in the configured status values every 15 minutes.
Go into the candidate record for the candidate who is to be invited for testing and move them into the Workflow Step that is associated with Criteria Testing in your integration.
Within 15 minutes, Criteria will identify that the candidate is in the requisite status for testing and will process the invitation. The Job Settings will be used to determine the expiry date, invitation email template, time adjustments etc. to be applied to the new invitation.
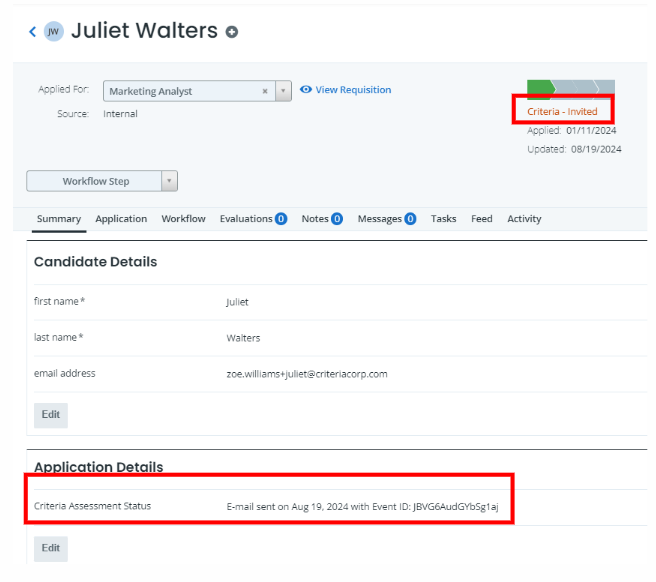
If your integration has the Scheduled status configured, the candidate will be moved into the Scheduled status once they have been successfully invited in Criteria.
A comment will be written into the Criteria Assessment Status field indicating the candidate has been successfully invited. This message will also include the Criteria Event ID if you need to locate the candidate in Criteria.
The candidate will receive an invitation email from Criteria with a link to complete testing. If you have SMS enabled in your Criteria account, and the candidate has a valid mobile number in Jobvite (including country code) they will also receive an invitation SMS.
When inviting a candidate to a Live Interview, Criteria will automatically send an email to the evaluators to conduct the interview once the status change is submitted. Please ensure the evaluators are informed in advance, as they will receive the email from Criteria.
Since there is no action required from the candidate at this stage, Criteria will not send an email to the candidate.
Send Criteria Testing via Workflow Step – In Bulk
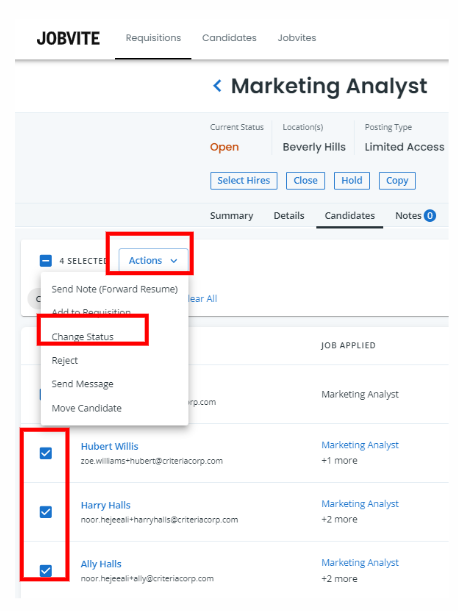
It is possible to trigger Criteria testing for multiple candidates at the same time via the Workflow Step in Jobvite. This can be done either within the candidate list for a job or Candidates menu. If it is done within the Candidates menu, the candidates must be in the same requisition to bulk invite candidates.
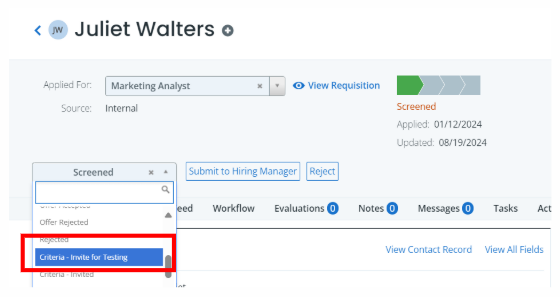
From the Candidate list, check the boxes next to the candidates who you’d like to send Criteria Testing to, then click the Actions button and select Change Status.
Select the workflow step which Criteria Testing is associated with from the drop-down menu and click Change Status.
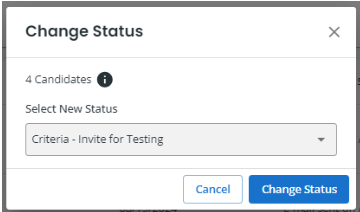
Once the status has been changed, a message notifying the status has been updated will be displayed at the bottom of the page.

Within 15 minutes, Criteria will identify the candidates who are ready for testing and will process all the invitations. The Job Settings will be used to determine the expiry date, invitation email template, time adjustments etc. to be applied to the new invitation. Criteria will send the invitation email, and SMS if enabled, to the candidates and will update Jobvite with the Scheduled status (if configured) and write a comment on the candidate profile to indicate they were invited.
Viewing Status Updates and Results
Assessments
Once the Criteria testing has been fully completed by the candidate, the results will appear in Jobvite immediately.
The candidate will be moved into the “Complete once testing is completed. If the “Completed – In Range” status is set up and candidate has met all the score ranges, the candidate will be moved into the “Completed – In Range” status.
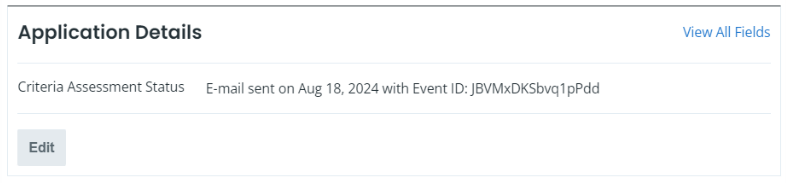
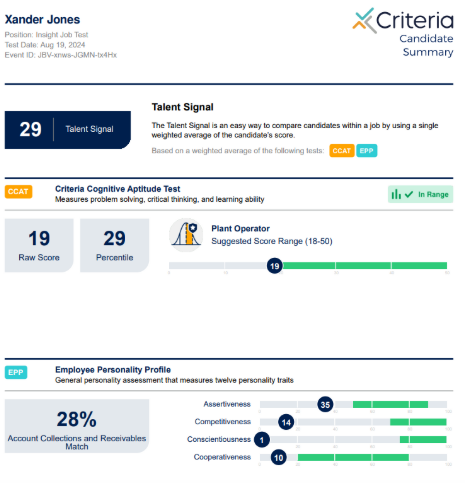
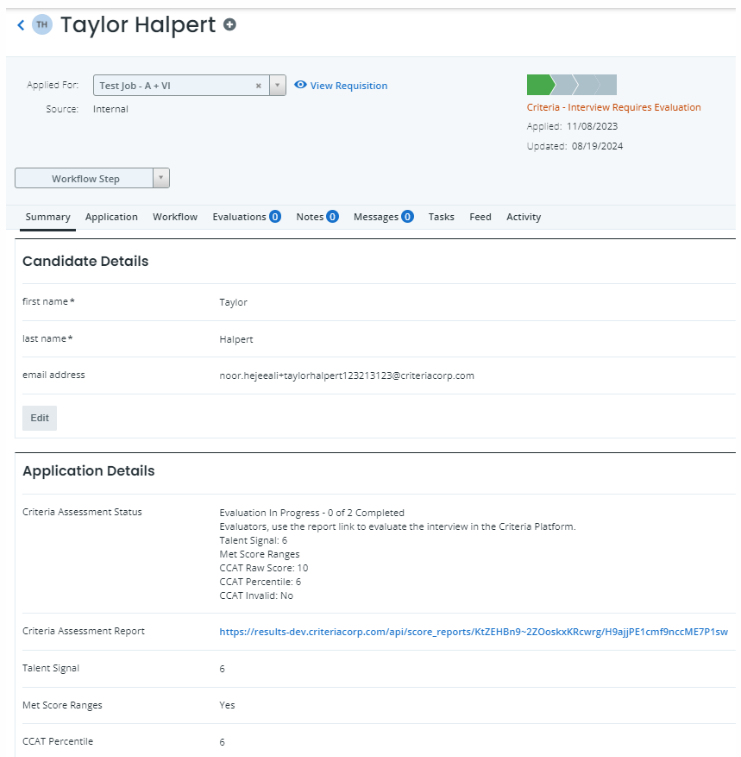
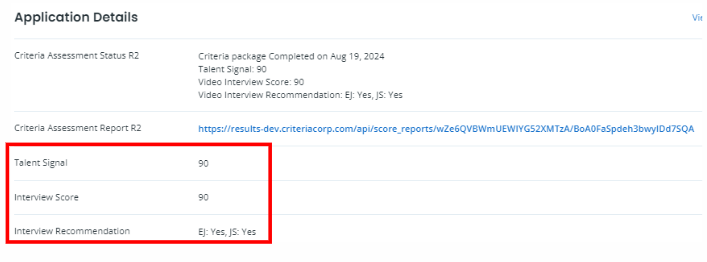
The candidate scores and a link to their Criteria score report will be available in the Application Details section of their candidate record.
The score data shown in the Status field will depend on the assessments completed by the candidate. This will include the Talent Signal, whether they met score ranges and the main overall score/s per assessment.
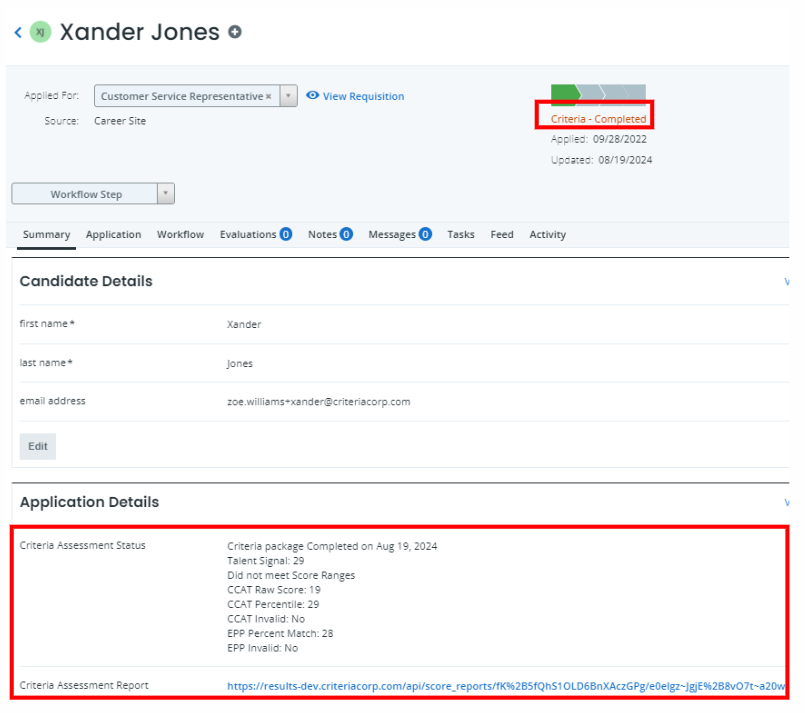
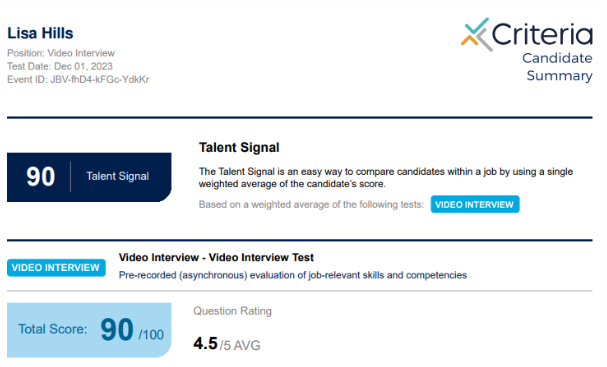
When the hyperlinked report link is clicked, the Criteria Score Report will open in a new browser tab as a PDF or the Criteria Dynamic Score Report, according to your company settings in Criteria.
If you have chosen to map the Talent Signal, Met Score Ranges, or any individual assessment scores to custom fields in Jobvite, the custom fields will also be shown in the 'Application Details' section on the candidate card in Jobvite. This information will be populated when the candidate has completed testing and Criteria sends the results to Jobvite.

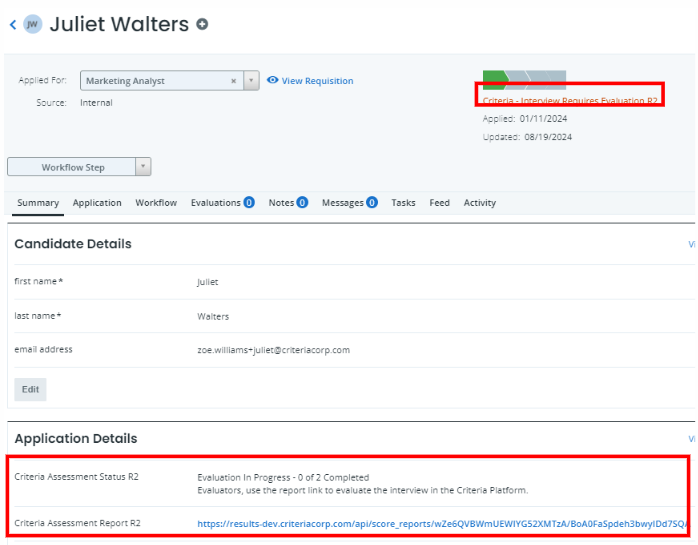
Video Interview
If the candidate was invited to complete a Video Interview, once they complete the video interview the candidate will be moved into the appropriate ‘Interview Requires Evaluation’ status, if this is set up. The evaluator/s will receive an email from Criteria to complete the evaluation.
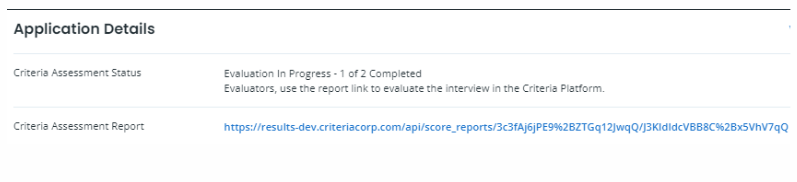
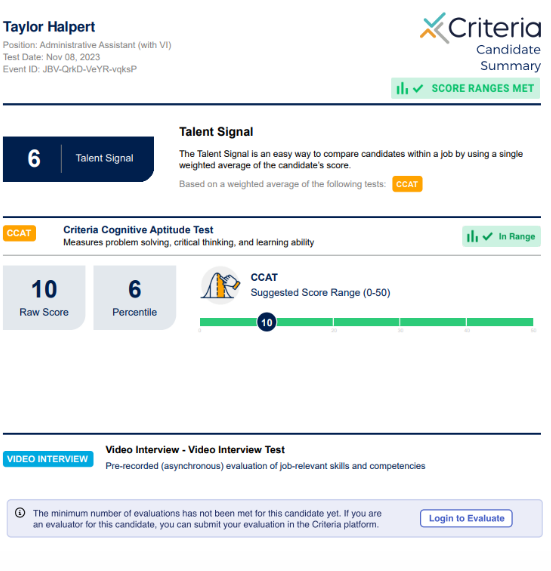
The Evaluation in Progress status message will be displayed in the Criteria Assessment Status field in Jobvite.
The evaluators may use the link in their email, or the link contained within the report presented in the Criteria Assessment Report link to complete their evaluation.
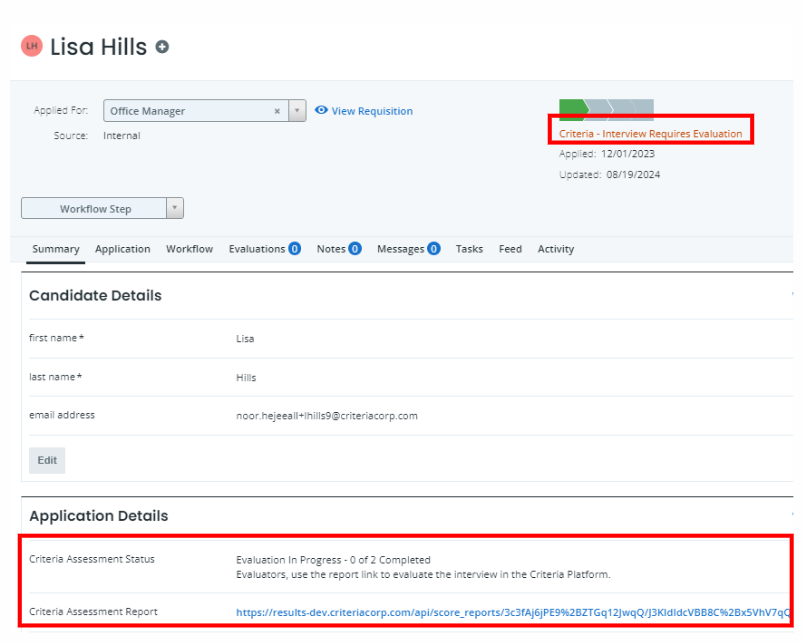
The counters in the Criteria Assessment Status message will be updated each time an evaluator submits their evaluation.
Once the minimum number of evaluators complete their reviews on a Video Interview, the results will appear in Jobvite automatically. The candidate will be moved into the appropriate Completed status.
The candidate scores will be available in the Criteria Assessment Status field. A link to their Criteria Score Report will be available in the Criteria Assessment Report field.
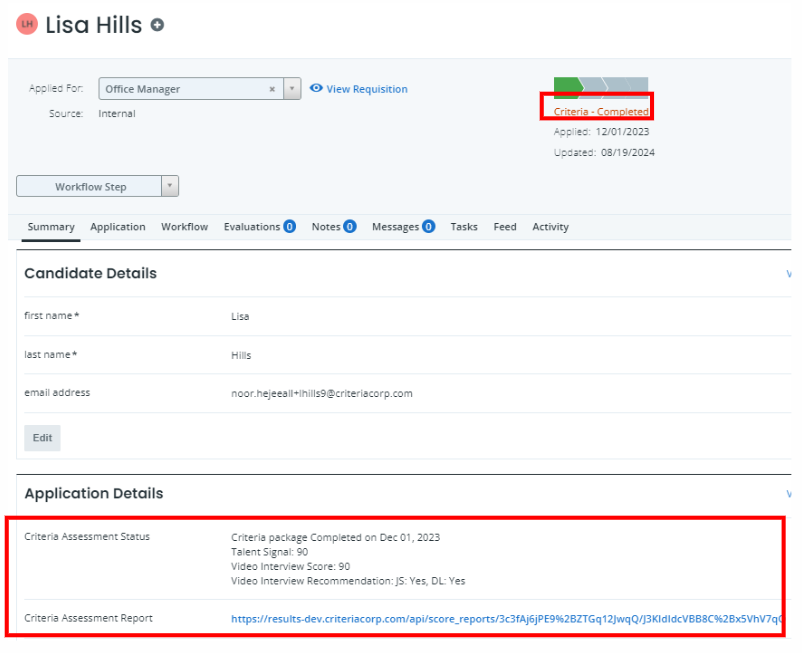
The report link is hyperlinked and will open in a new tab when selected.
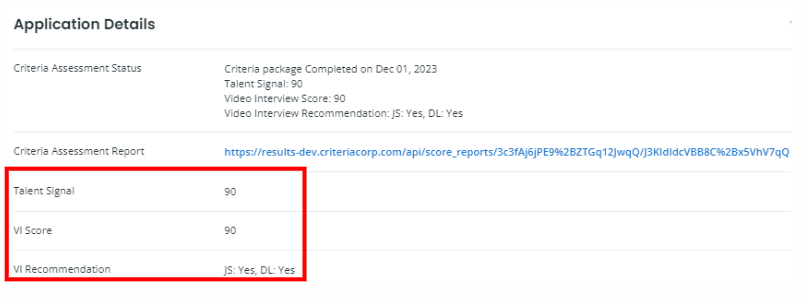
If you have chosen to map the Talent Signal, Interview Score and/or Interview Recommendation values to custom fields in Jobvite, these custom fields will also be shown in the 'Application Details' section on the candidate card in Jobvite. This information will be populated when Criteria sends the results to Jobvite.
Video Interview and Assessments
When Video Interviewing and Assessments are used together in the same invitation, the process will be like the Video Interview process. The candidate profile will show the evaluation message once the candidate completes the testing. However, the assessment results will be available at this time.
The Talent Signal will only reflect the scores from the assessments as the video interview does not have a score yet.
If you have chosen to map any assessment score fields to custom fields in Jobvite, they will be displayed with the assessment results. Any mapped fields related to the Video Interview will not be shown yet.
The Criteria report will include the assessment results, while the Video Interview section will include a link for evaluators to use.
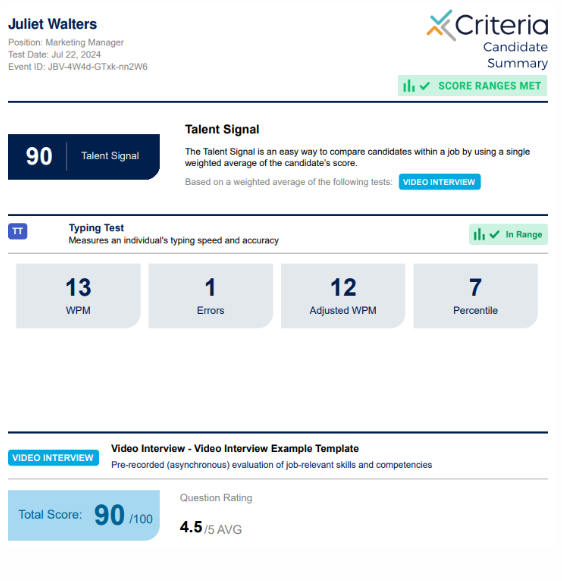
Once the minimum number of evaluations has been reached for the Video Interview, the results will be updated in Jobvite to include the Video Interview Score. The candidate will be moved into the appropriate "Completed", or "Completed - In Rage" status if they met all the score ranges on the Assessments.
The Criteria Assessment Status field will be updated to include the Video Interview Score and Recommendation. The Talent Signal will be updated if the configuration in Criteria indicates that the Video Interview Score is to be included.
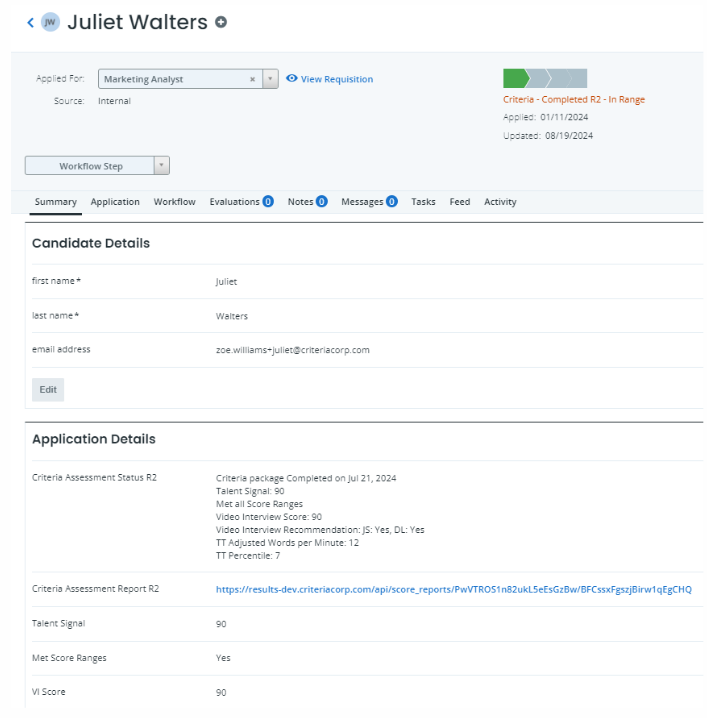
The Criteria Assessment Report field will include a link to the Criteria Score Report for the candidate. When the report link is clicked, the Criteria Score Report will open in a new browser tab as a PDF or the Criteria Dynamic Score Report, according to your company settings in Criteria.
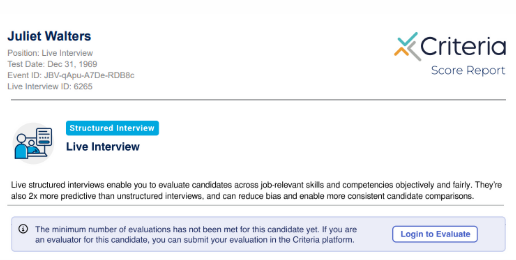
Live Interview
When the first evaluation is submitted, the candidate status will move to the Requires Evaluation state, and the Evaluation in Progress status message will be displayed in the Criteria Assessment Status field in Jobvite.
The counters in the Criteria Assessment Status message will be updated each time an evaluator submits their evaluation.

The evaluators may use the link in their email, or the link contained within the report presented in the Criteria Assessment Report link to complete their evaluation.
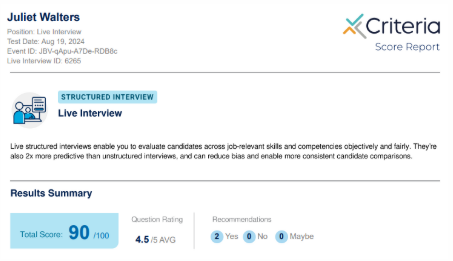
Once the minimum number of evaluators complete their reviews on a Live Interview, the results will appear in Jobvite automatically. The candidate will be moved into the Completed status.
The candidate scores will be available in the Criteria Assessment Status field. A link to their Criteria Score Report will be available in the Criteria Assessment Report field.
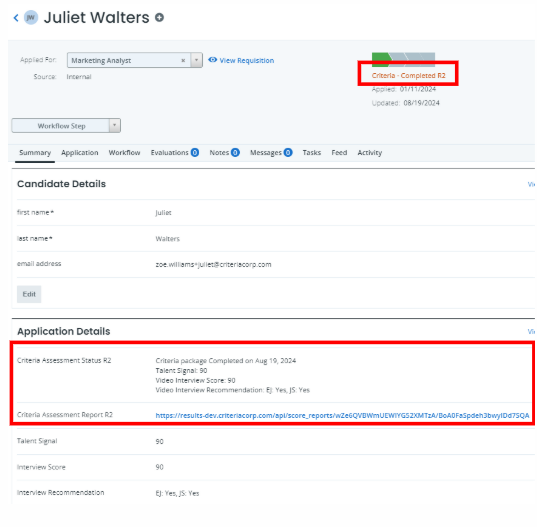
The report link is hyperlinked and will open in a new tab when selected.
If you have chosen to map the Talent Signal, Interview Score and/or Interview Recommendation values to custom fields in Jobvite, these custom fields will also be shown in the 'Application Details' section on the candidate card in Jobvite. This information will be populated when Criteria sends the results to Jobvite.
Filtering Candidates by Custom Field values
Note: This section only applies if you choose the option to set up Custom Fields in Jobvite to hold Criteria scores of your choosing
The candidate list for a Requisition allows you to filter the candidates based on their custom field data.
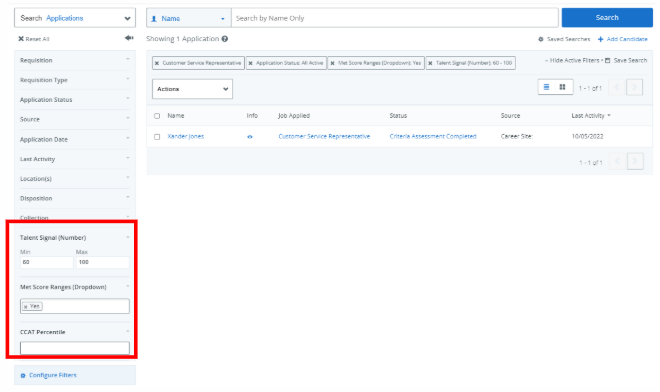
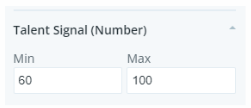
Custom fields configured with the 'Number' type will allow you to enter a range of values to filter on. Use this to filter on candidates who have scored in a particular range.
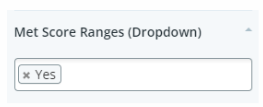
Custom fields configured with the 'Drop-down list' type will allow you to select which pre-defined value/s to filter on. Use this to filter on candidates with the chosen results for that field.
Ongoing
Maintain Workflow Status Values in Jobvite
Your Jobvite rep will do the initial setup of these status values for you, using the status names you provide. If you wish to change the status values in the future, use these instructions to make the change and then immediately notify Criteria of the old name and the corresponding new name so the integration can be updated.
In Jobvite, go to Admin > ATS > View Workflows
Click the name of the Workflow to edit
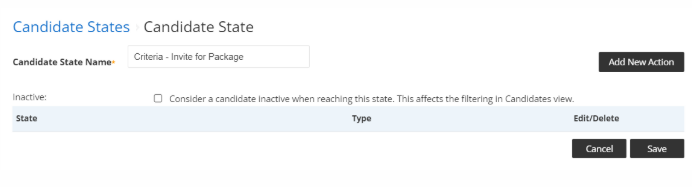
Click Add Custom State to create a new status. Repeat for each status to add.
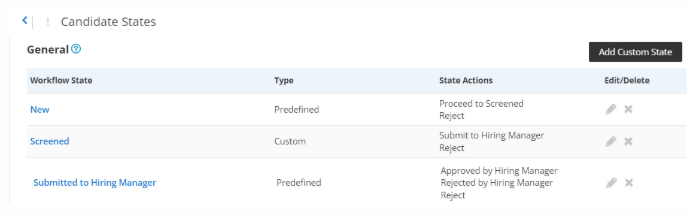
To edit an existing status, click the pencil icon next to the status you wish to edit.
Make the change to the Candidate State Name and click Save.
Modify Integration via Criteria Platform
After the initial setup by Criteria, it is possible for you to adjust the integration configuration yourself via the Criteria Platform if you rename a status or a custom field in Jobvite.
Note: you can only adjust the standard integration configuration, if you have created additional custom fields to map specific scores, this will need to be maintained by Criteria.
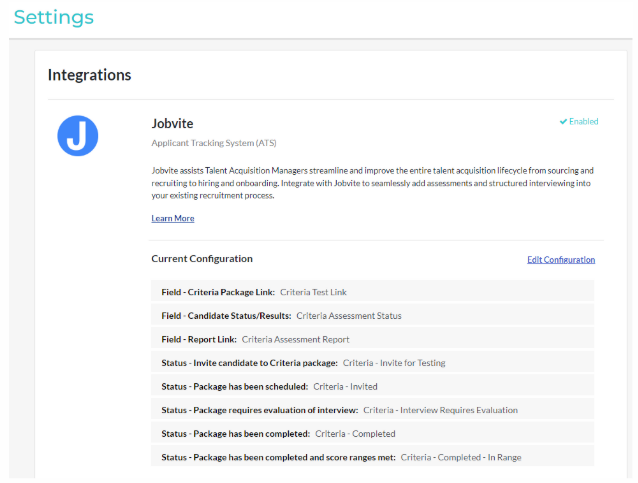
In Criteria go to your avatar at the top right and choose the Integrations menu.
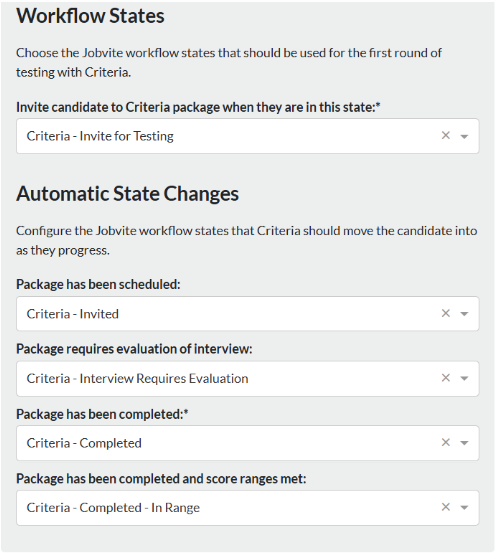
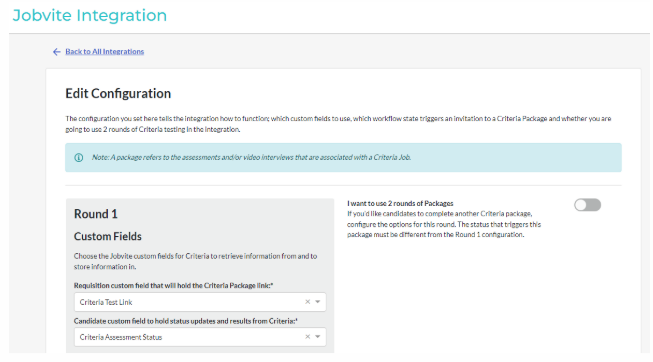
The Jobvite section will appear automatically with your current integration configuration. Click Edit Configuration to adjust any of the fields or status names.
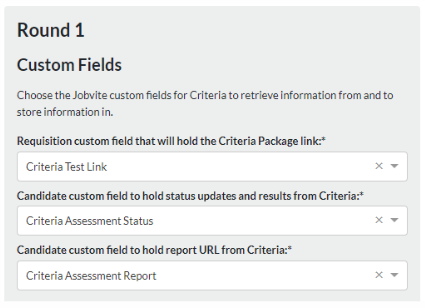
To adjust the configuration for round 1, make the adjustments down the left side of the screen, choosing the appropriate fields and status values from your Jobvite system.
Note: If Criteria has permission to read the custom field and status values from Jobvite, the selections will be shown as a drop-down list for easy selection. However, if Criteria does not have access via the integration, the fields will be shown as text fields, and you will need to copy and paste the values from Jobvite. Be sure to copy them exactly to ensure the integration works correctly. If you would like to see the options in a drop-down, you could reach out to Jobvite Support and ask the following – please add "Workflow Get API" and "Custom Field API" access to the Criteria Corp API key on our account so Criteria can read our workflow steps and custom field names.
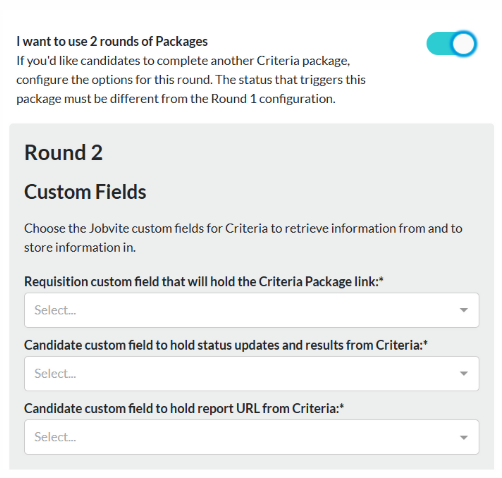
If you wish to use 2 rounds of testing, toggle on the section on the right if it is not already enabled. You should only do this if you have already created the custom fields and status values in Jobvite to be used by round 2.
Once toggled on, the configuration fields, like Round 1 will be shown for you to make your selections.
Press the Save button when you have completed your selections. The changes will take effect immediately.
Troubleshooting
Criteria is unable to invite candidate
Error message: "Criteria is unable to invite candidate, Check value of Criteria Test Link R2 in Requisition. Once this error is resolved, delete this message for Criteria to attempt invitation again"
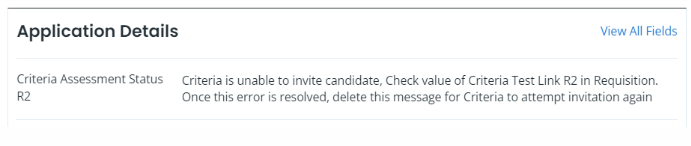
This error message indicates that the candidate has been moved into the status that triggers testing, however, there was no Criteria Open Link or Job Code in the requisition for that round of testing, so the candidate was not able to be invited.
In this case, the error message is written into custom field called Criteria Assessment Status R2 and the message is directing the user to check the Criteria Test Link R2 field on the requisition, therefore, this is a failed invitation to the Round 2 testing.
When this error message is shown, check the field on the requisition as indicated by the error message text. Add the missing Criteria Open Link or Job Code and then return to the candidate I Jobvite and delete the error message so their invitation can be attempted again on the next run.