Cornerstone Recruiting Integration Guide
 Updated
by
Integrations Team
Updated
by
Integrations Team

Setting Up Your Integration
- Contact your Criteria Customer Success Manager (CSM) and advise that you would like to integrate with Cornerstone.
- You will generate the Callback Access Key from the Assessment Connector in Cornerstone.
- You will need to provide Criteria with the Callback Access Key.
- Criteria will provide you with the Username, Password, and Base Service URL.
- You will use the Assessment Connector in Cornerstone to enable the Criteria integration and enter the Username, Password, and Base Service URL from Criteria.
- Follow the Activating the Integration process below to activate the integration from Cornerstone.
- We encourage all customers to put through a few test candidates to ensure the integration is working as intended, before going live.
Activating the Integration
Pre-requisite: Verify there is a user who has System Administrator privileges to complete the set up
Summary of the activation process:
- Enable the Assessment Connector in Cornerstone
- Provide the Callback Access Key from the Assessment Connector to Criteria
- Complete the setup of the Assessment Connector using the details provided by Criteria
The following demo shows the activation process in action (open the demo in a new window).
Enable the Assessment Connector in Cornerstone
This integration uses the Cornerstone Assessment Connector which can be enabled from the Edge Marketplace.
In Cornerstone, Go to Admin > Configuration Tools > Edge.
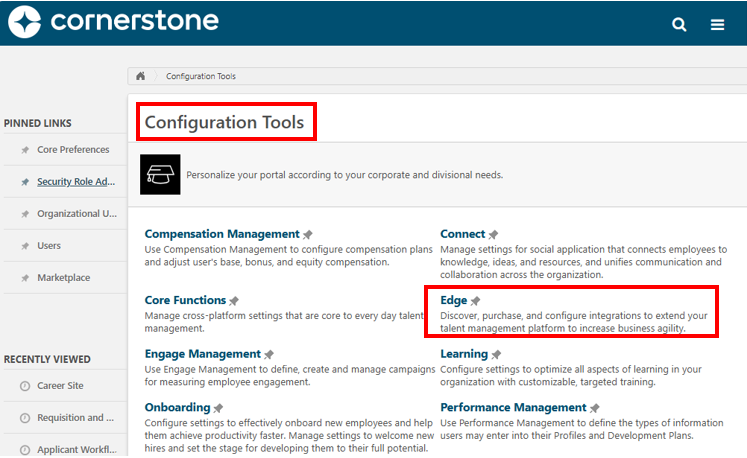
Click to enter the Marketplace.

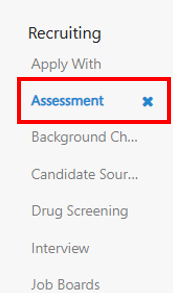
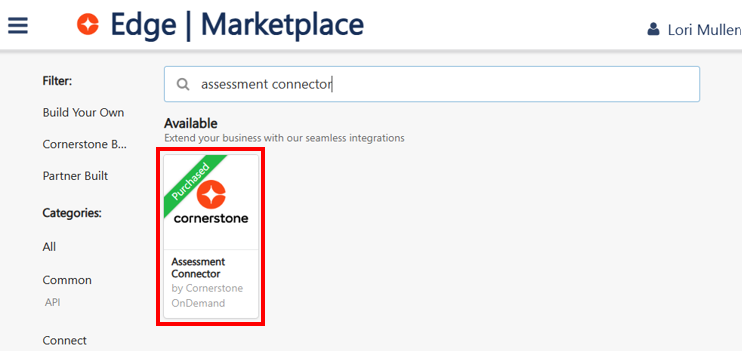
Use the Search bar at the top to search for the text Assessment Connector, or use the left sidebar, scroll down and click on Assessment in the Recruiting section to just see the Assessment integrations.
The list of Available Assessment integrations will be shown. You will need to enable/purchase the Assessment Connector to utilize the integration with Criteria.
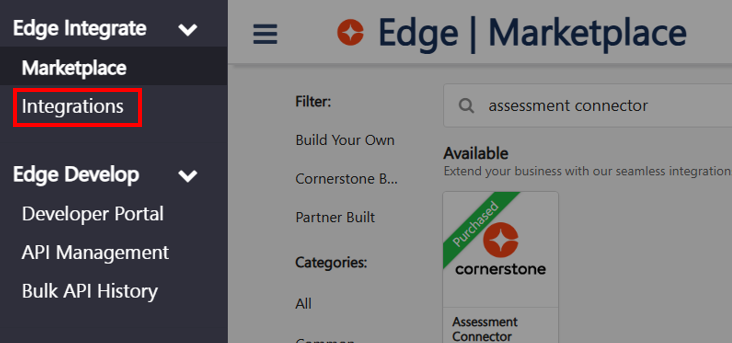
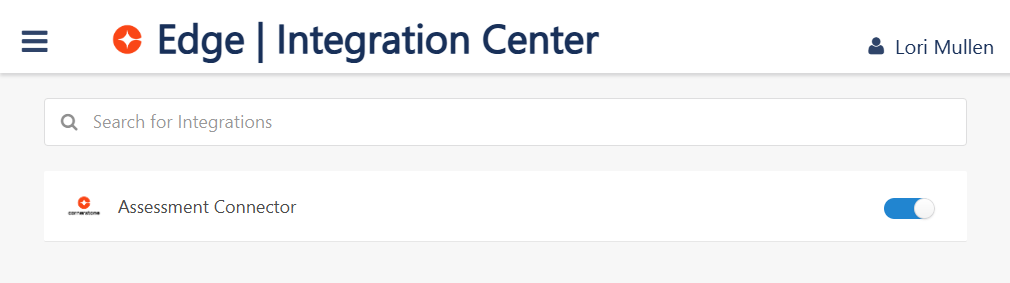
Once it is enabled, the Assessment Connector will be available in the Edge | Integrations Center, accessible via the sidebar.
The Assessment Connector will need to be toggled on. If the Assessment Connector is toggled off, toggle the Assessment Connector on.

Provide the Callback Access Key to Criteria
You will need to provide Criteria with the Callback Access Key from the Assessment Connector to allow the integration to be initialized in your Criteria account.
To access the Assessment Connector in Cornerstone, go to: Admin > Configuration Tools > Edge.

Then choose the Integrations menu.
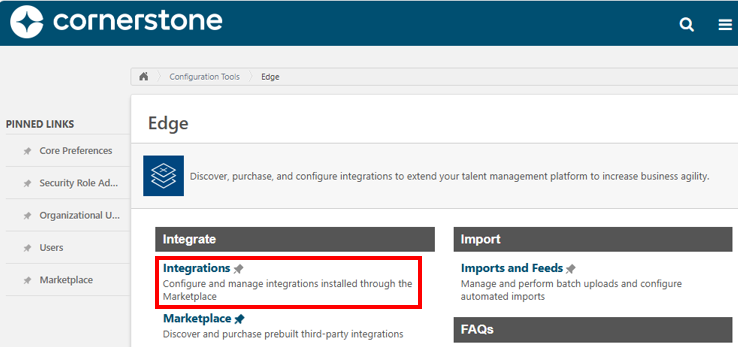
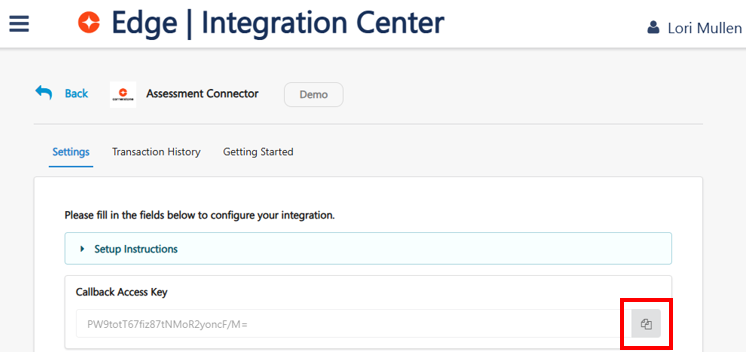
Click on the Assessment Connector.
Copy the Callback Access Key, using the Copy icon, and provide this to Criteria.
Configure Assessment Connector
Once Criteria has completed the integration setup, they will provide you with the details to configure the Assessment Connector in Cornerstone.
Ensure Criteria has provided you with the following information to complete this setup:
- Username
- Password
- Base Service URL
To access the Assessment Connector in Cornerstone, go to: Admin > Configuration Tools > Edge
Then choose the Integrations menu.
Click on the Assessment Connector.
Enter the Username, Password and Base Service URL provided by Criteria. Be careful not to include any additional spaces at the beginning/end of the values you paste in.
The Base Service URL should be as follows:
Criteria Corp (North America) customers - https://integrations.criteriacorp.com/api/v1/cornerstone
Criteria Australia customers - https://integrations-au.criteriacorp.com/api/v1/cornerstone
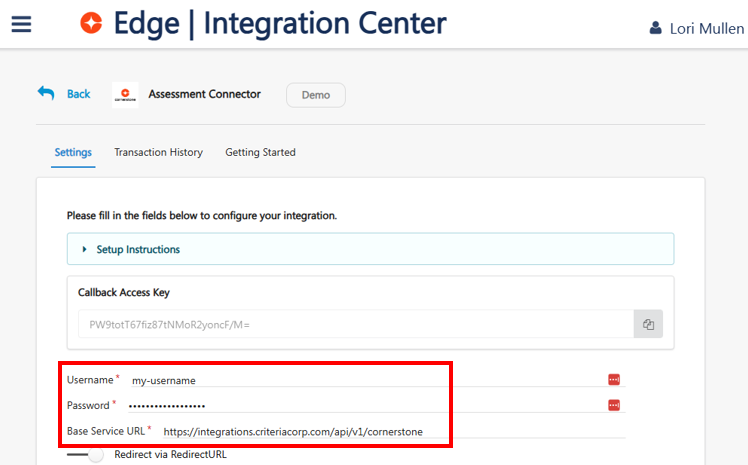
If you plan to use Inline testing for all your jobs, Criteria recommends enabling the Redirect via Redirect URL toggle on. For all other testing methods or combinations, it’s best to keep this toggle disabled.
When Redirect via Redirect URL is enabled, Criteria testing opens in the same browser tab as the Cornerstone application during the application process. Once the candidate completes the test, they are automatically redirected back to their Cornerstone application, creating a smoother experience. However, if the testing is triggered via an invitation email, the candidate will still be redirected to Cornerstone after completing the test—but they will land on the Cornerstone login page, which may be confusing if they are not already signed in. Because of this, enabling the redirect feature is best suited for Inline testing only.
When the Redirect via Redirect URL toggle is disabled, candidates are not redirected anywhere after completing the Criteria test. Instead, they will land on the Criteria Exit Page. For Inline testing, the assessment opens in a new browser tab, and candidates will need to manually return to the Cornerstone tab to complete and submit their application. In this case, you can use the Criteria Exit Page to provide instructions reminding them to go back and finish the application. This setup is better suited for testing that is launched through an invitation email.
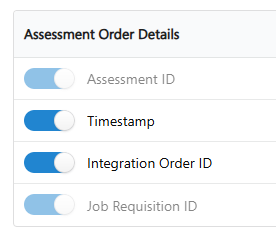
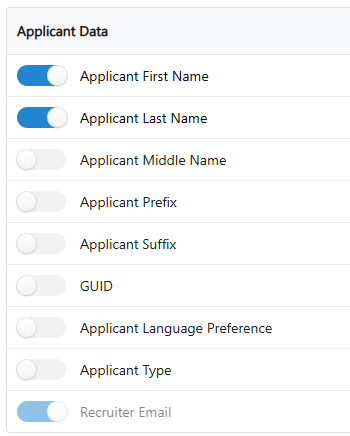
In the Field Configuration section, please slide the bar to the ON position i.e. blue, for the following fields.
Assessment Order Details
- Assessment ID - this will always be on
- Timestamp
- Integration Order ID
- Job Requisition ID - this will always be on
Applicant Data
- Applicant First Name
- Applicant Last Name
- Recruiter Email - this will always be on
Applicant Contact Information
- Applicant Email

Once all the settings are in place, click Save Settings at the bottom of the page to save the Criteria settings and the permissions.
If you get any warning messages when you click the Save Settings button, refer to the Troubleshooting section below for assistance.
Create Custom Status for Criteria Testing
If you choose to trigger Criteria Testing automatically via a custom status, you'll need to create that custom status within the Cornerstone applicant workflow. When a candidate is moved into this status, testing will be triggered automatically.
Alternatively, the same custom status can be used to manually invite candidates to complete testing. In this case, you would move the candidate into the custom status when you're ready for them to begin testing, and then move them to a subsequent status after reviewing their results.
The following demo shows how to create a custom status (open the demo in a new window).
Create Custom Applicant Status
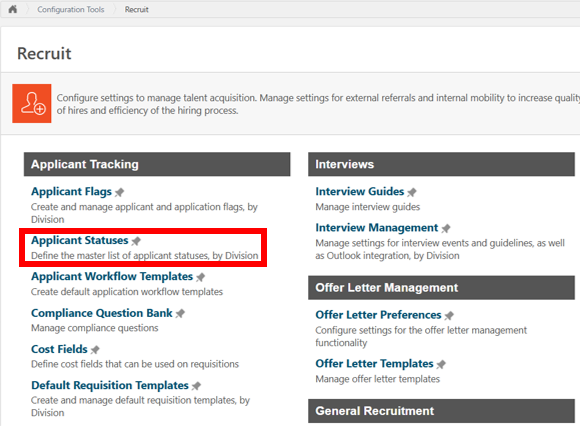
To create a custom status in Cornerstone, go to Admin > Tools > Recruit > Applicant Status
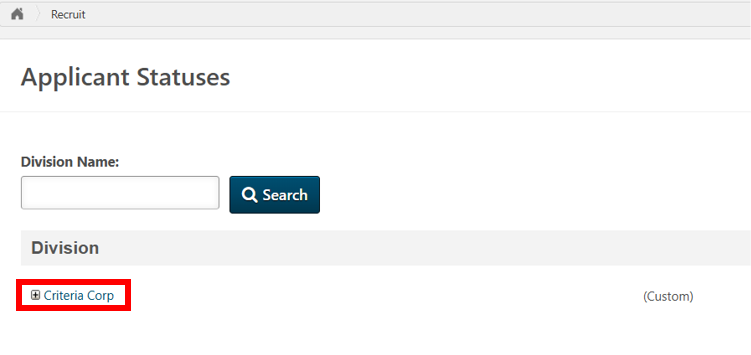
Select Criteria Corp (or the appropriate division)
Select Create Custom Status.

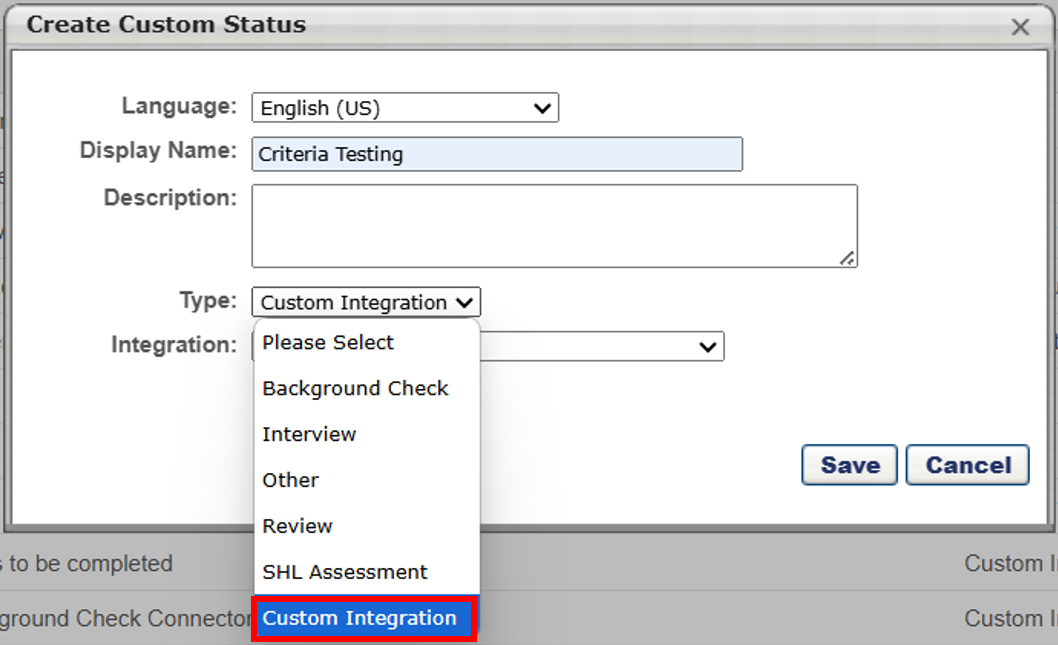
A window will pop up. Add a Display Name and Description to your custom status. Select Custom Integration for Type. In this example, we have used Criteria Testing as the name of the custom status.
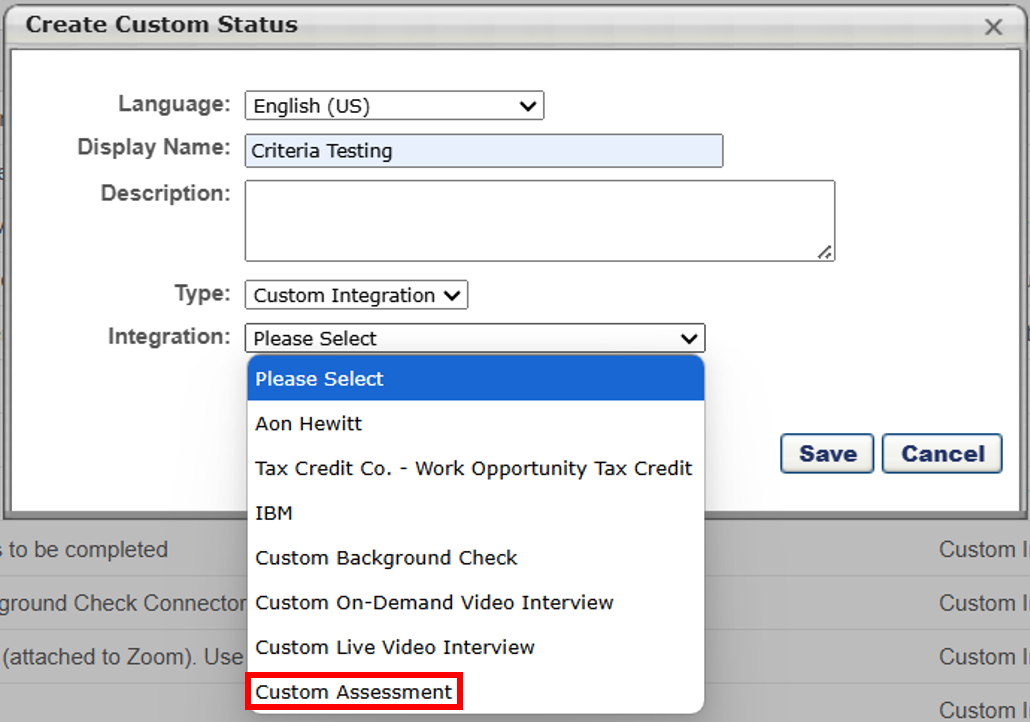
Select Custom Assessment for Integration.
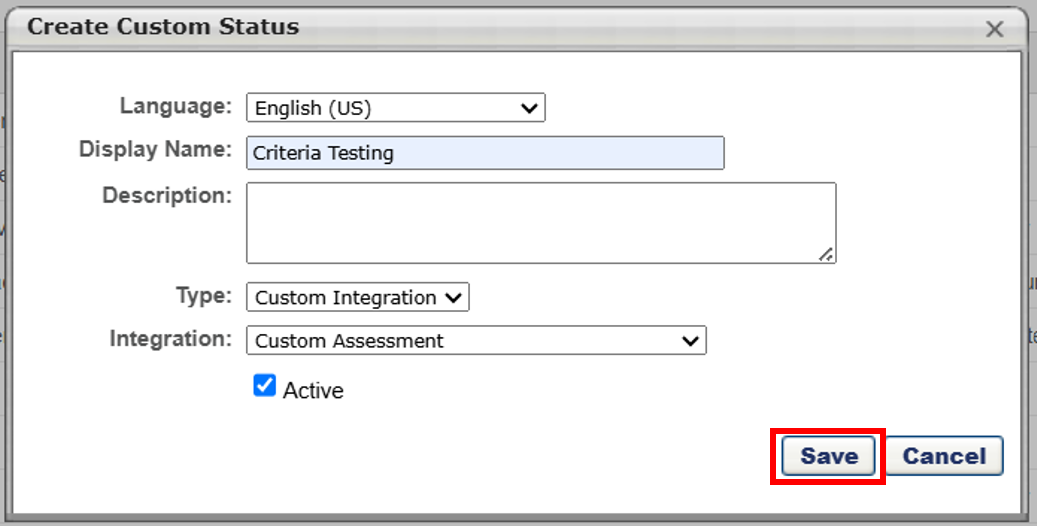
Click on Save to close the Create Custom Status box.
You will be navigated back to the Manage Applicant Statuses page. Select Save at the bottom of the page to save your changes.
Assign Custom Applicant Status to Job Requisition
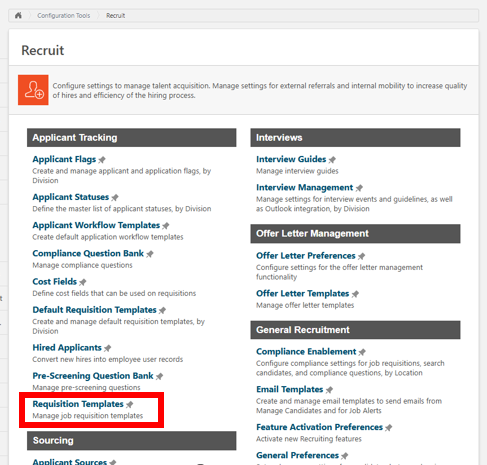
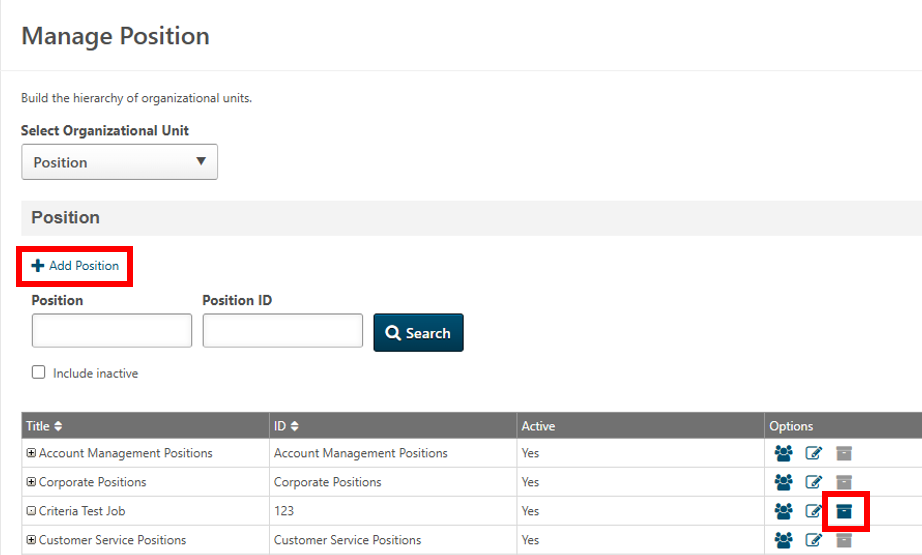
To associate a Custom Status with a Job Requisition, navigate to Admin > Tools > Recruit > Requisition Templates.
Find the position you would like to add the custom status to and click on the "Manage Requisition Templates" icon.
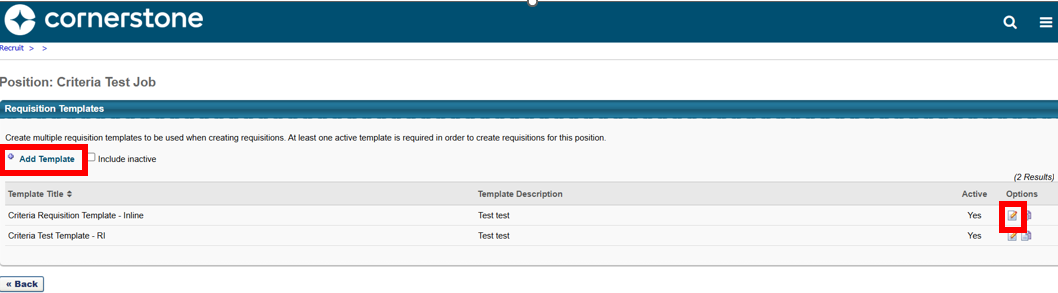
If a template has not already been created, select Add Template. If the template already has been created, select the Edit button.
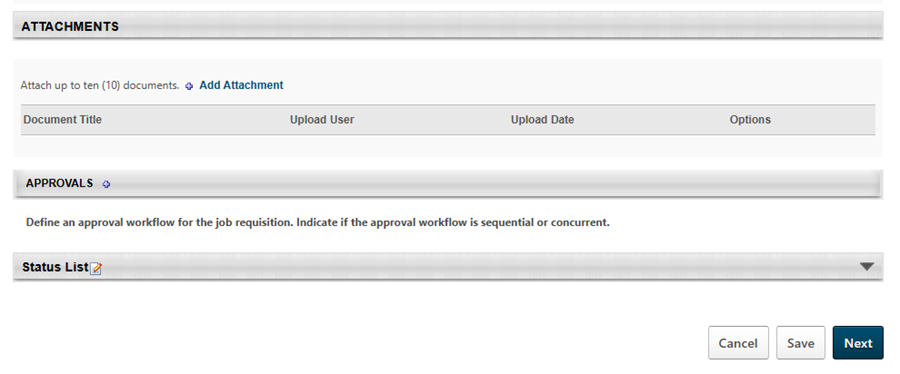
After filling in the necessary requisition details, click on the Edit icon besides Status List to add in the custom status.
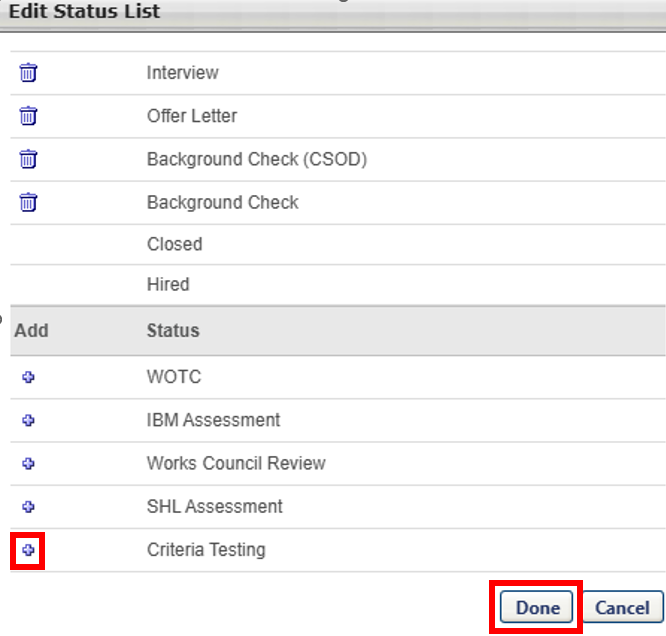
Click the "+" icon to add the custom status you created to this job requisition. Click on Done and proceed with associating an integration package with the custom status.
Select the integration package you would like the candidate to be invited to from the Auto-Assign Pre-Employment Verification drop down. Select the Required and Auto Progression boxes so the candidate will be invited to testing when they are moved into the custom status.

Click Save once the job requisition template is ready.

Creating an Email Template
Cornerstone sends the invitation email to candidates. This email template will need to be created within Cornerstone. The email template can be customized to your needs.
The following demo shows how to create an email template (open the demo in a new window).
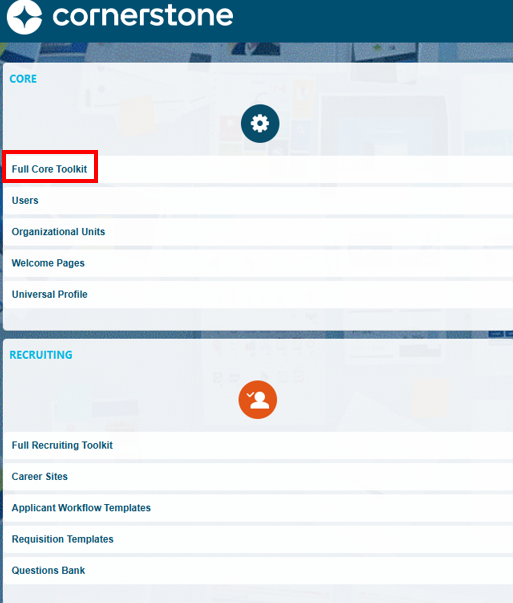
Within Cornerstone, select Full Core Toolkit from the Home screen.
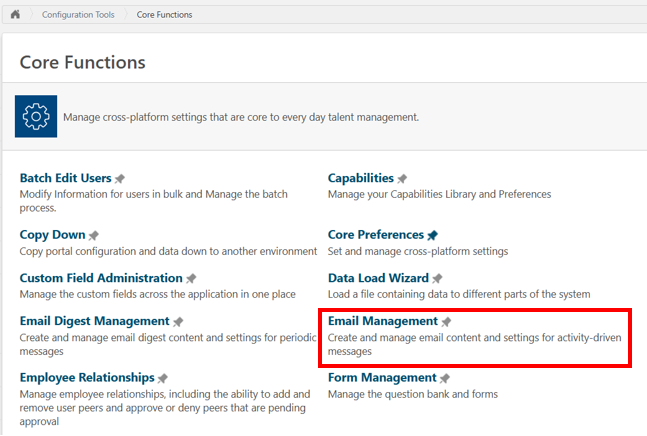
Select Email Management in Core Functions.
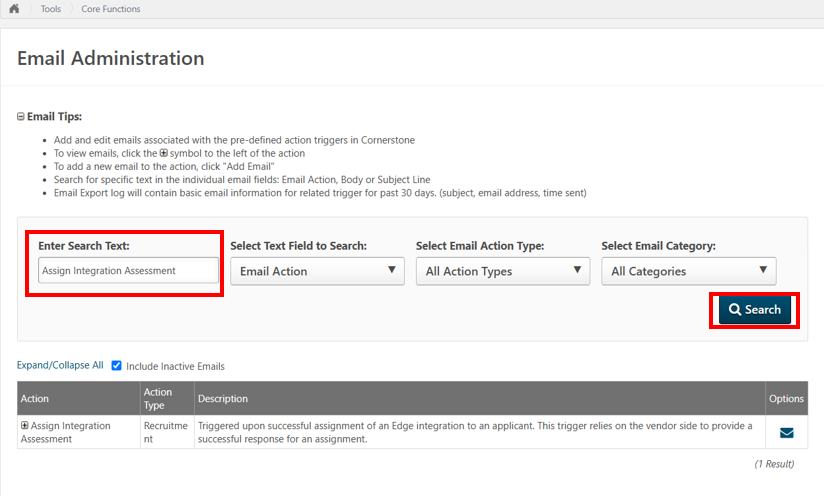
In Enter Search Text type Assign Integration Assessment and select Search.
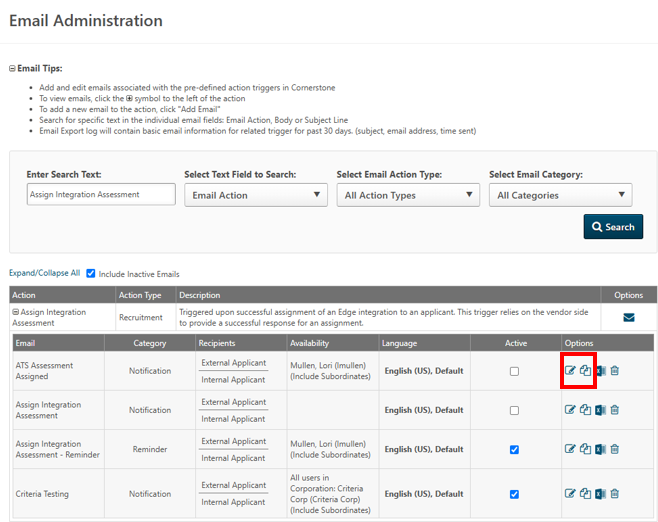
Select + to expand the drop down.

An existing template can be edited by selecting the Edit button or you can copy an existing template.
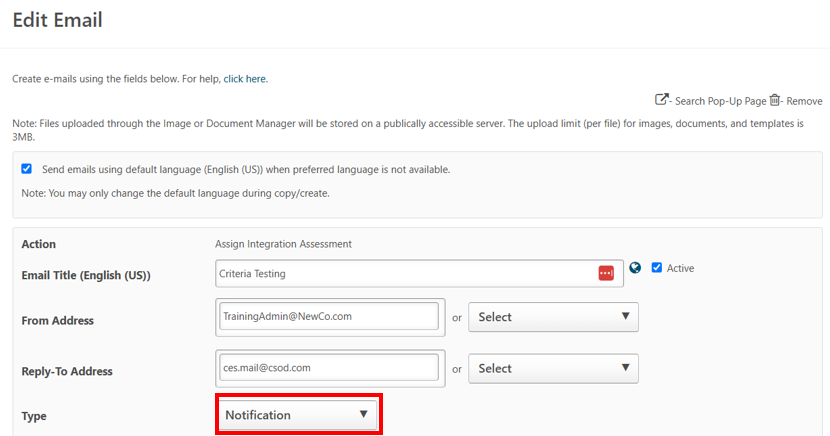
You will need to fill out the required information. Select Notification from the Type dropdown.
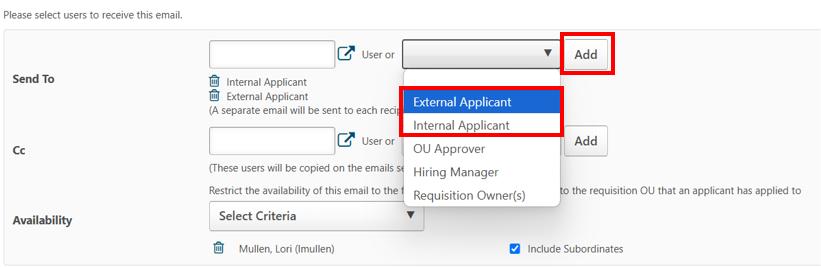
Select External Applicant and/or Internal Application depending on who you would like to send Criteria Testing to. Click Add.
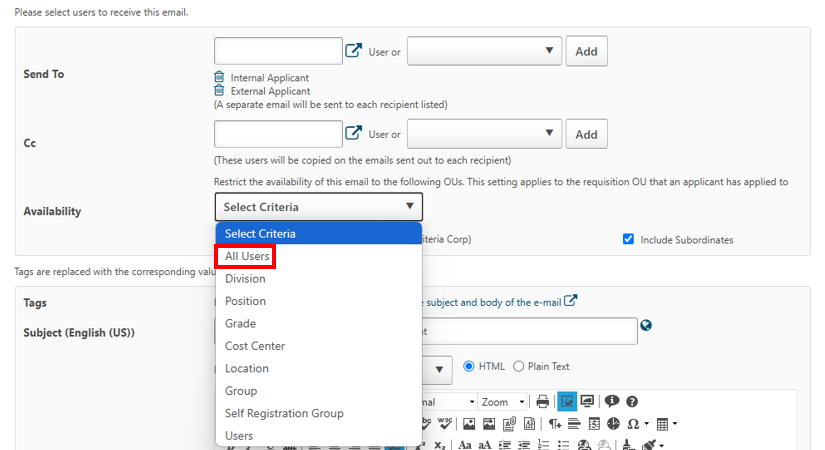
Select All Users within the Availability field
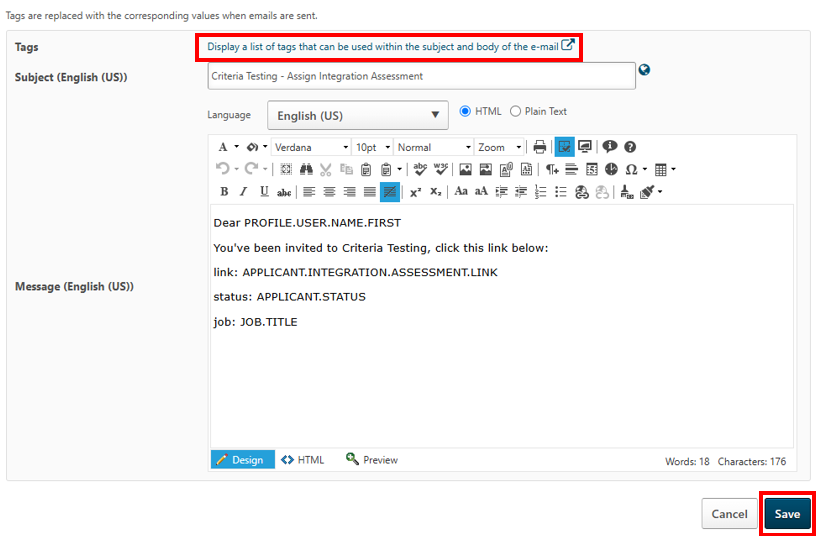
The Message field will contain the email text which is sent to candidates. This can be customized.
Select Display a list of tags that can be used within the subject and body of the e-mail to see the available options. The APPLICANT.INTEGRATION.ASSESSMENT.LINK will need to be included since this is the field which will contain the Criteria Testing Link. Once this is completed, select Save to save your changes.
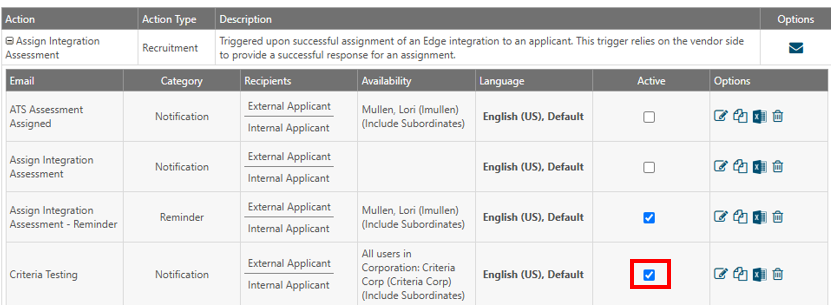
You will be taken back to the Email Administration screen. Make sure the Active box is ticked for the appropriate email
Using the Integration
Configure Criteria Testing on your Requisition
After installing and configuring the Assessment Connector in your Cornerstone Portal, you can start to use the integration.
Within a requisition in Cornerstone, you have the ability to choose an integration package of Criteria assessments and/or structured interview to issue to candidates. The available integration packages to choose will be the active Jobs in your Criteria account.
There are three ways to assign Criteria testing to a candidate: Inline Testing, Manual Invitation, or Automatic Invitation via Custom Status.
Inline Testing
If you wish for candidates to complete Criteria testing as part of the application process, you will need to configure the Cornerstone requisition with the appropriate integration package that the candidate should complete.
The following demo shows the inline testing process in action (open the demo in a new window).
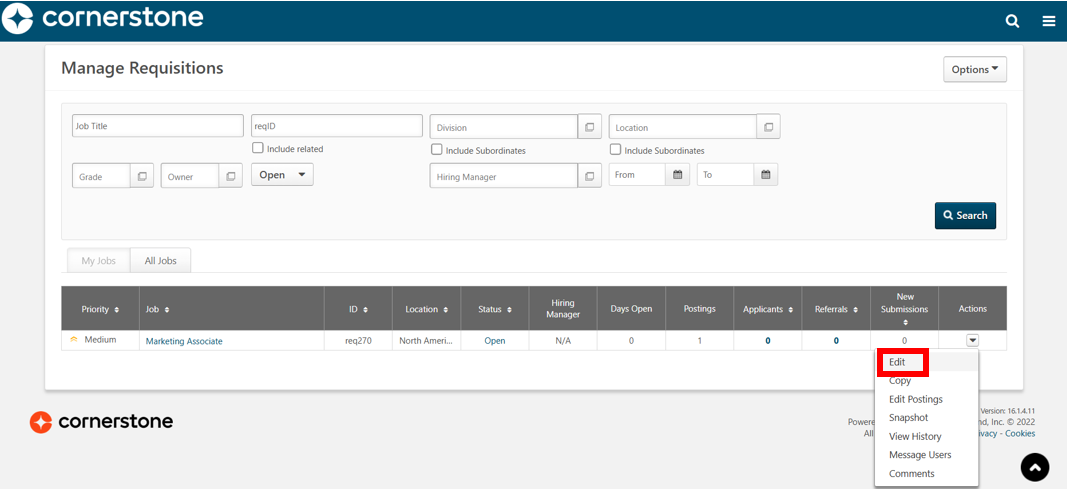
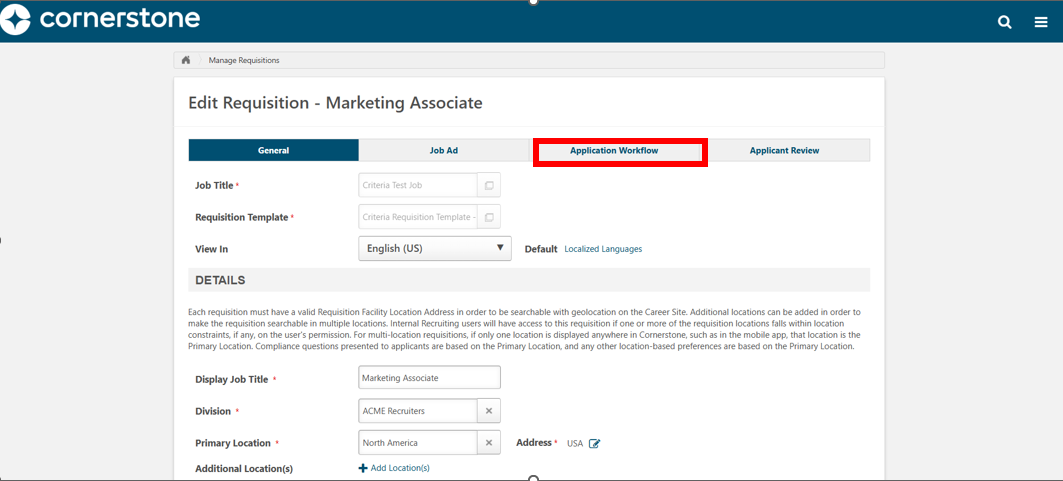
Edit the requisition in Cornerstone.
Select the Application Workflow tab.
Select Edit Workflow.
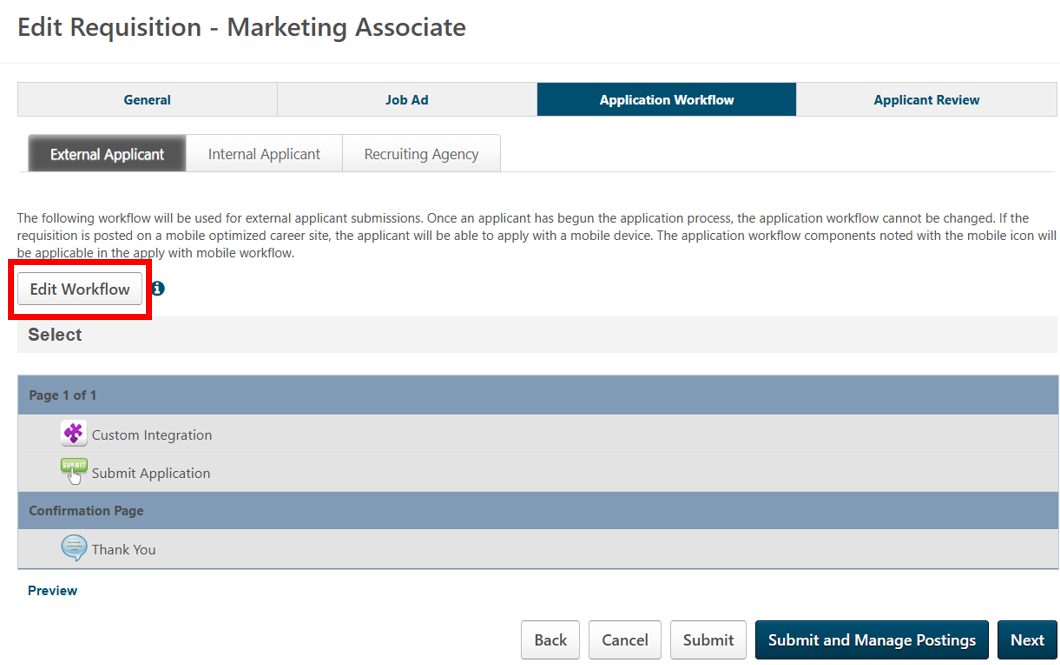
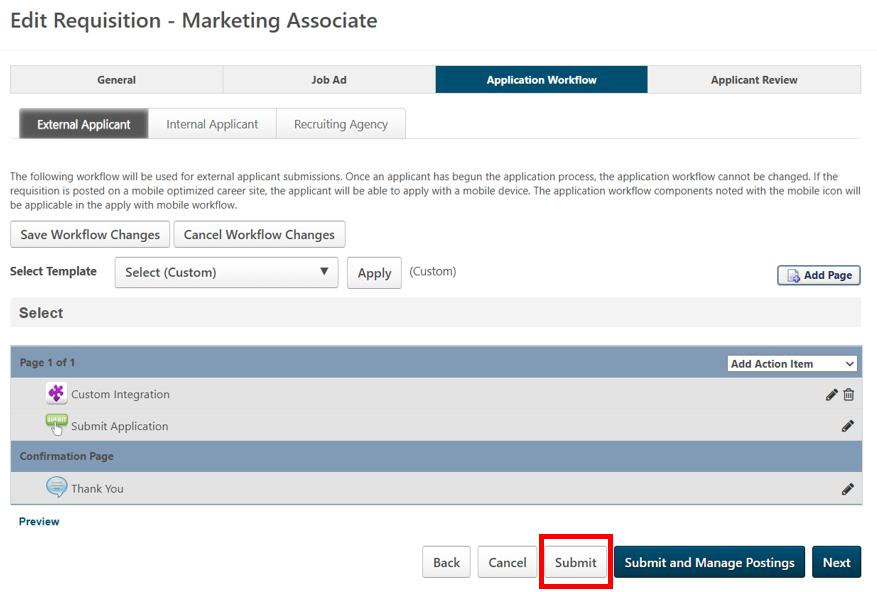
Expand the Add Action Item drop-down on the right and select Custom Integration. If you have multiple pages in your application form, be sure to use the Add Action Item drop-down for the page where you wish testing to be completed.
Once the Custom Integration item has been added, click the pencil icon to edit it.

Select Custom Assessment from the Integration drop-down and then select the Criteria package you would like the candidate to complete during the application process.
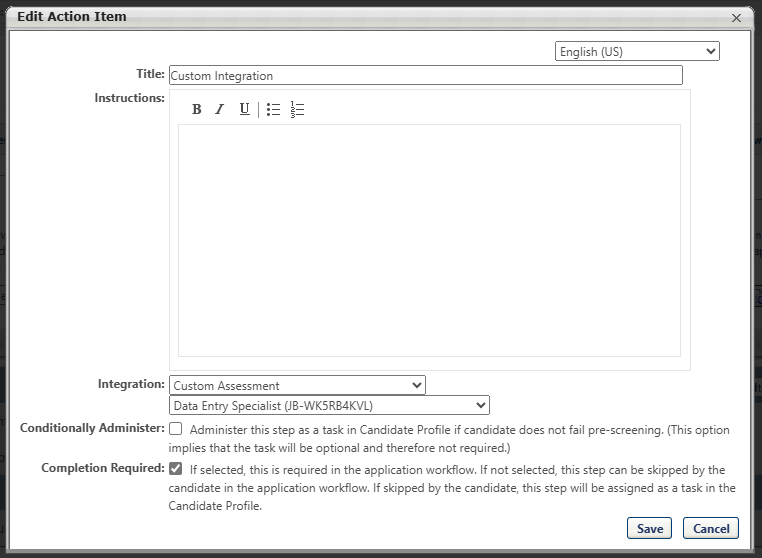
If you would like to make the Criteria testing mandatory, tick the Completion Required box to ensure every candidate is forced to complete the testing and cannot skip that step during the application. Select Save once this is completed.
You will be redirected back to the Edit Requisition screen. Select Submit.
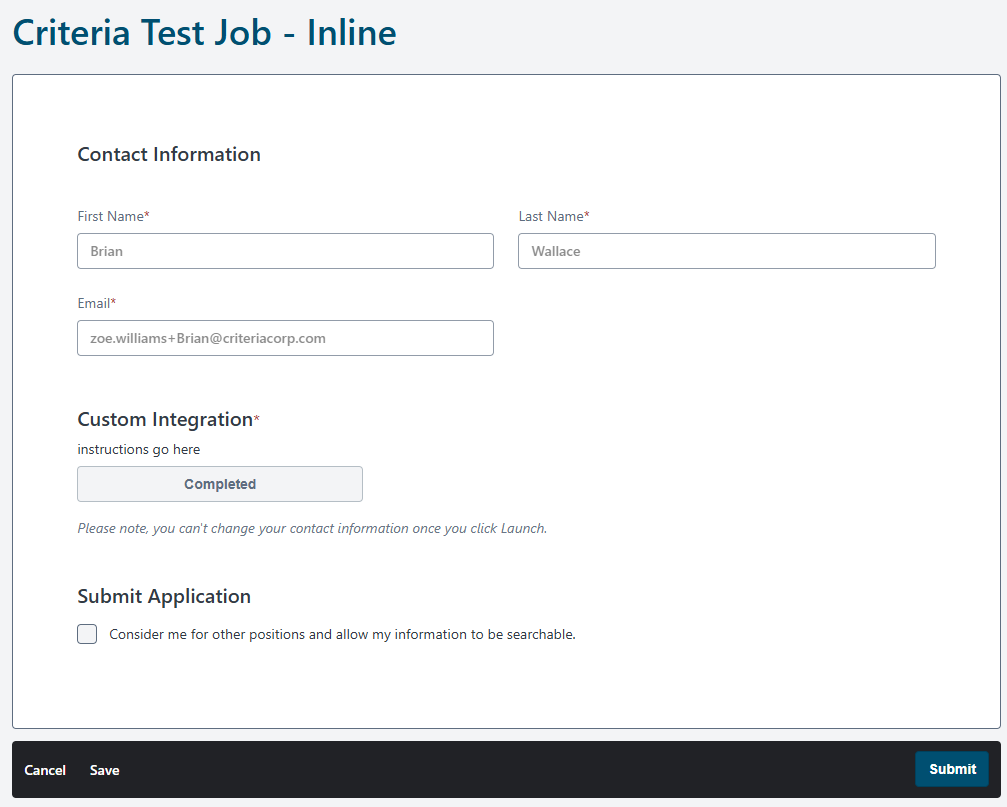
When the candidate is applying, they will see a Launch button under the Custom Integration heading where you chose to insert the Criteria testing in your application form.
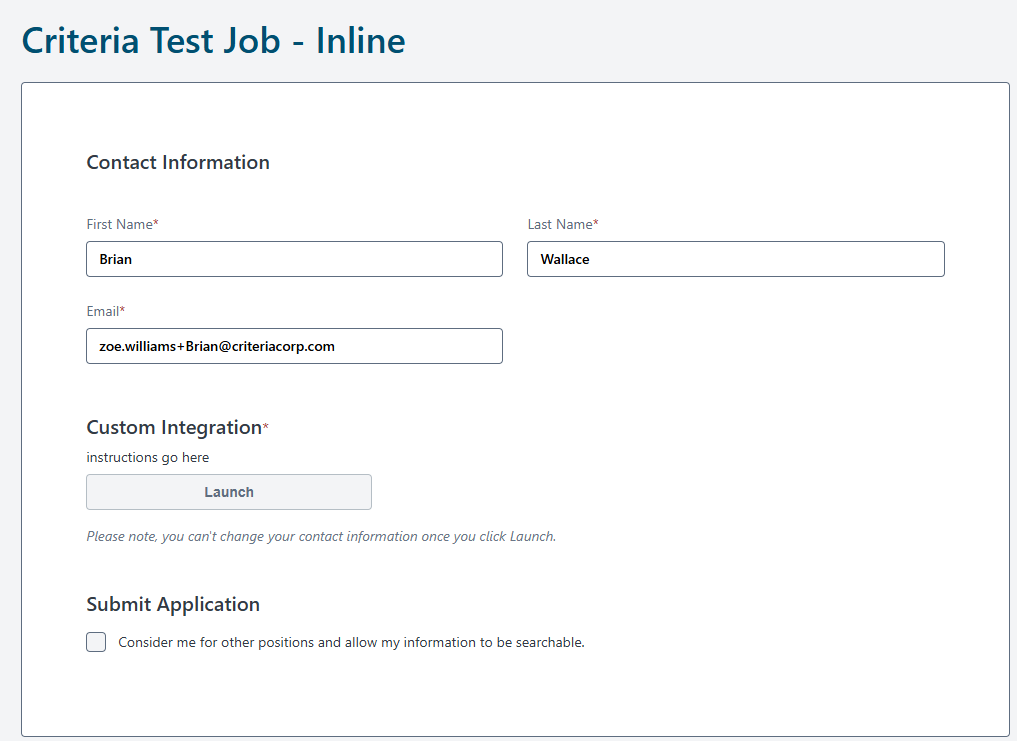
If the Redirect via Redirect URL is toggled on in the Assessment Connector then when the Launch button is selected, the candidate will be redirected to Criteria to complete their testing. Otherwise Criteria will open in a new tab.
If you ticked the Completion Required box in the application setup, the candidate will be unable to submit their application unless Criteria Testing is completed. If the candidate tries to submit their application prior to completing Criteria Testing, "Assessment is required" will be shown.
If the Redirect via Redirect URL is toggled on in the Assessment Connector, the candidate will be redirected back to their Cornerstone application form on the completion of testing. Otherwise the candidate will need to exit out of the Criteria Testing screen in order to submit their application.
The Launch button has been replaced with a Continue button which will change to Completed once Cornerstone has received confirmation from Criteria that the testing has been completed. While the Continue button is shown, the candidate may click this to return to Criteria to complete the testing.
Once the Completed button is shown, the candidate can continue to submit their application form
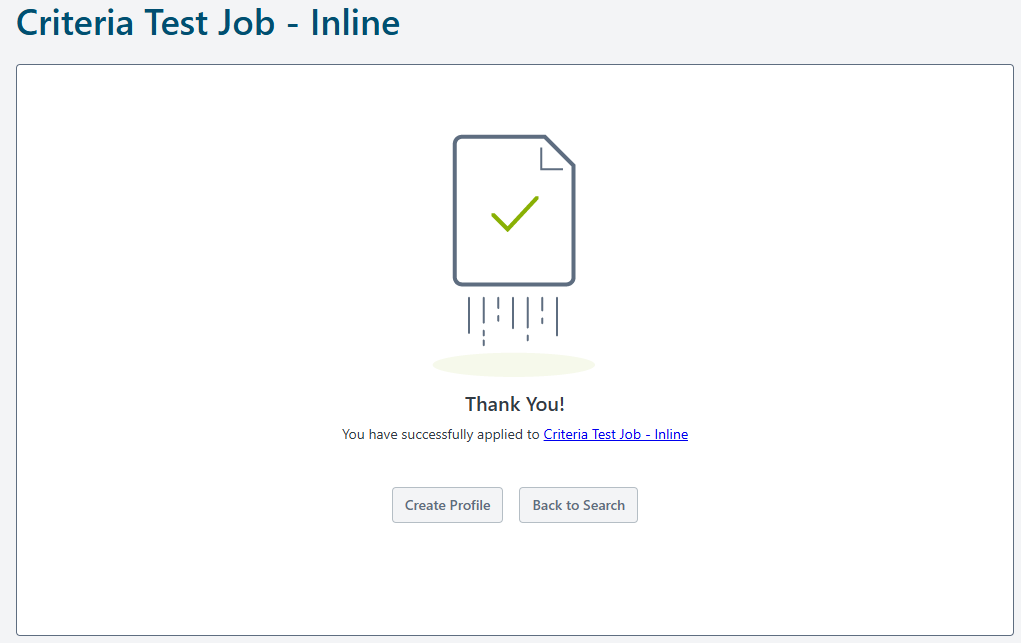
The candidate will be taken to the Thank You screen.
After the candidate submits their application, their results will appear within the candidate profile in Cornerstone.
Manual Invitation
The following demo shows the manual invitation process in action (open the demo in a new window).
A candidate may be invited via Assign Integration from the candidate list.
If a custom applicant status has been set up, select the candidate(s) you you are ready to invite for Criteria testing and select Change Status. Select the custom applicant status related to Criteria testing. Select Save.

Select the candidate(s) which you wish to invite and select Assign Integration from the More drop-down.
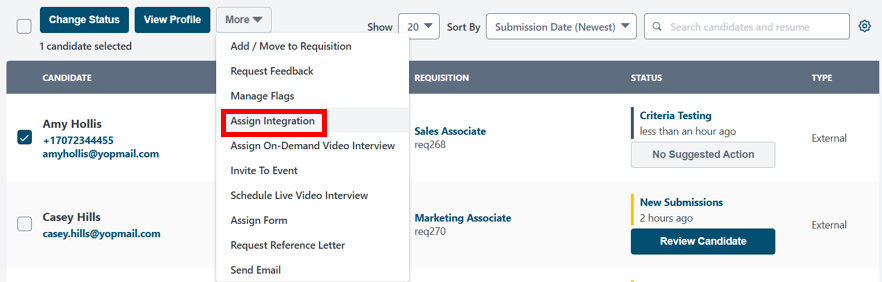
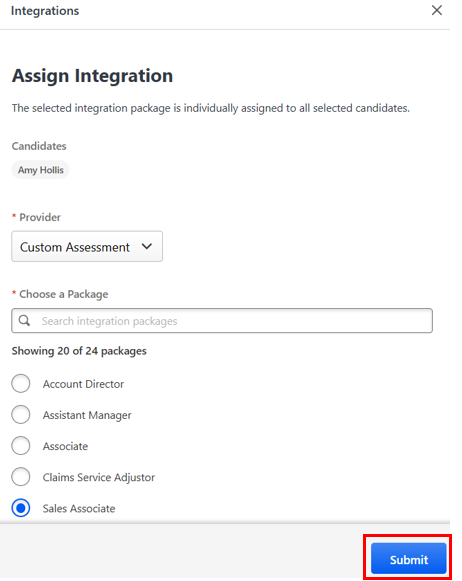
Select Custom Assessment from the Provider drop-down. Select the Criteria Package which you would like to invite the candidate(s) too and click Submit.
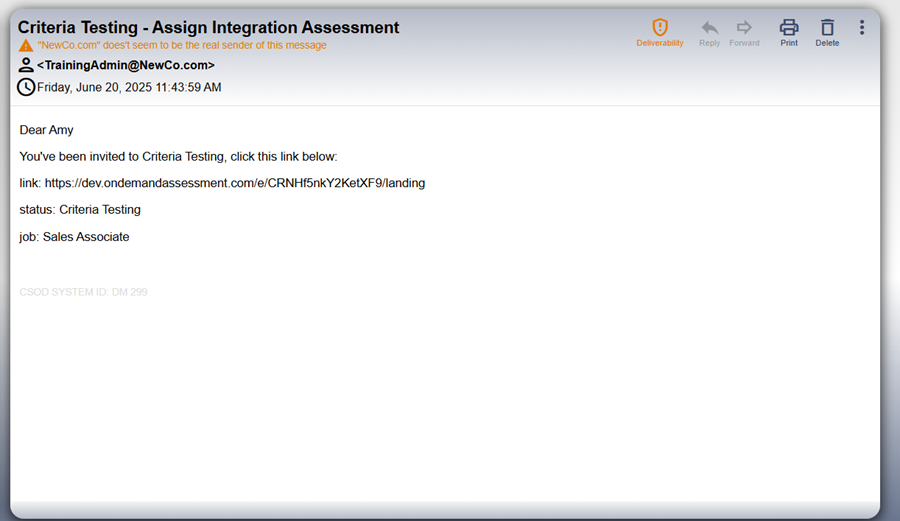
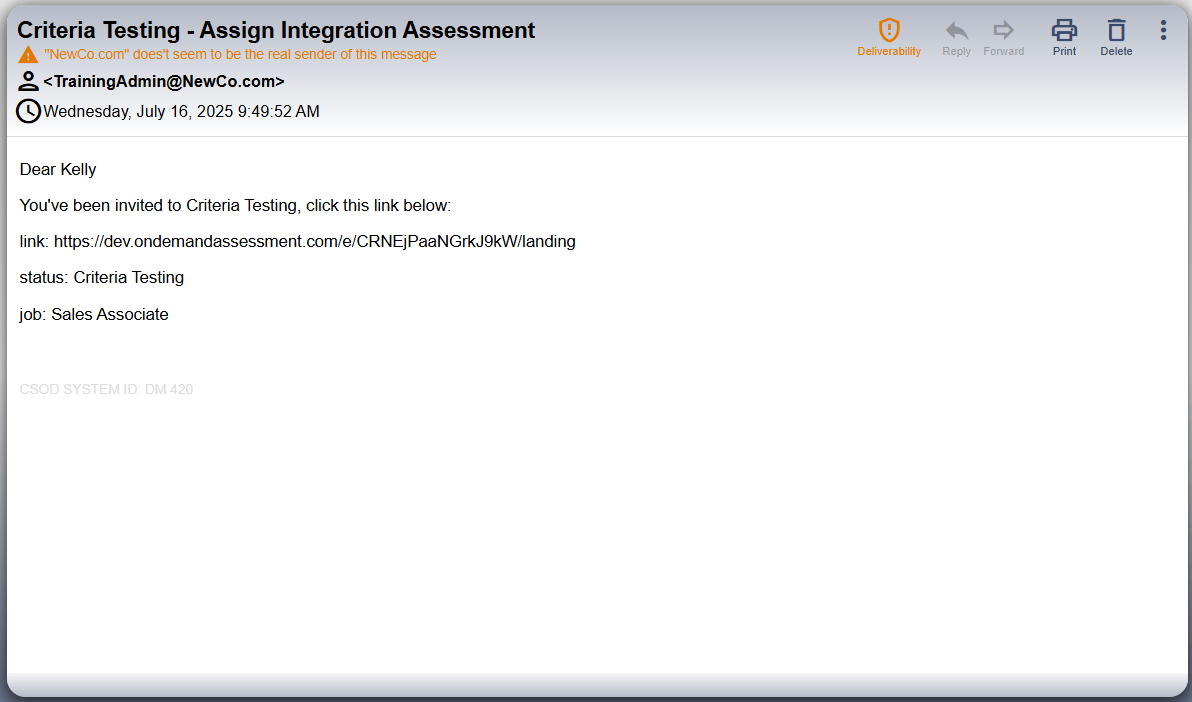
The candidate will receive an invitation email from Cornerstone at this time. The email will include a link directly to Criteria to complete the testing.
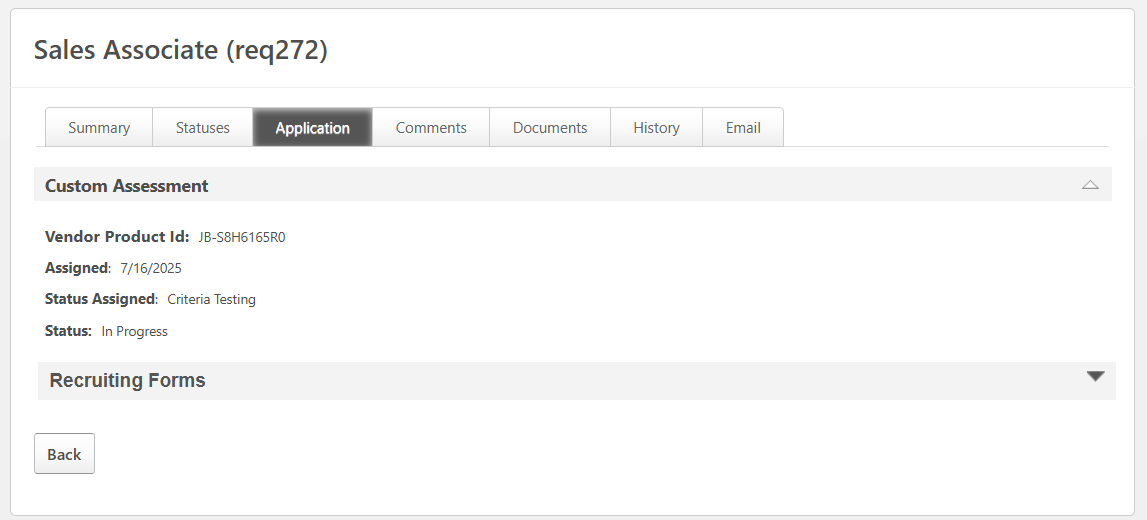
Within the candidate profile in the Application column, the status will be updated to In Progress to indicate the candidate has been invited.
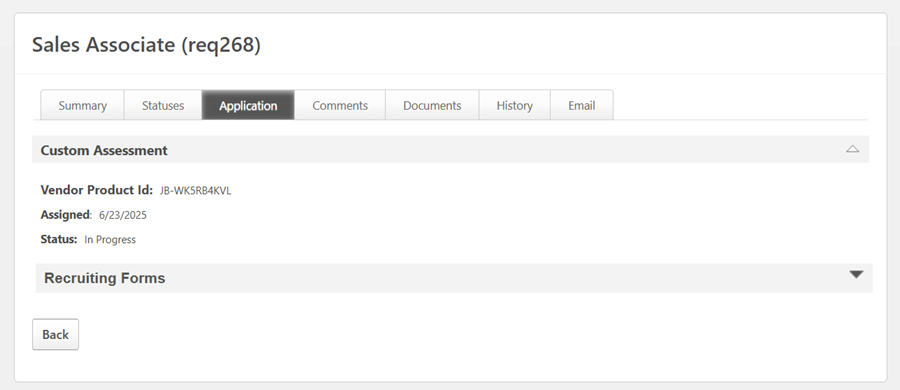
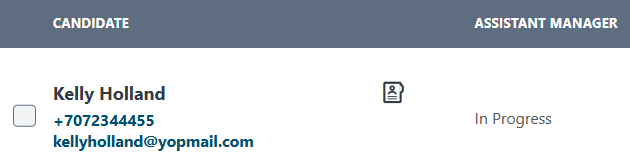
In Progress will be shown in the candidate list as well.

Automatic Invite via Custom Status
Criteria testing can be triggered automatically when a candidate is moved into the Custom Status.
In order for Criteria testing to be triggered automatically when a candidate is moved into the Custom Status, ensure Custom Status is set up and an integration package is associated with the Requisition Template.
The following demo shows how the automatic invite process in action (open the demo in a new window).
Select the candidate(s) you are ready to invite for Criteria testing and select Change Status.

Select the custom status related to Criteria testing. Select Save.

A pop-up message will be shown indicating the status has changed for the candidate.

The candidate will receive an invitation email from Cornerstone at this time. The email will include a link directly to Criteria to complete the testing.
Within the candidate profile in the Application column, the status will be updated to In Progress to indicate the has been invited.
In Progress will be shown in the candidate list as well.
Viewing Results
Assessment Results
The following demo shows how Assessment results appear in Cornerstone (open the demo in a new window).
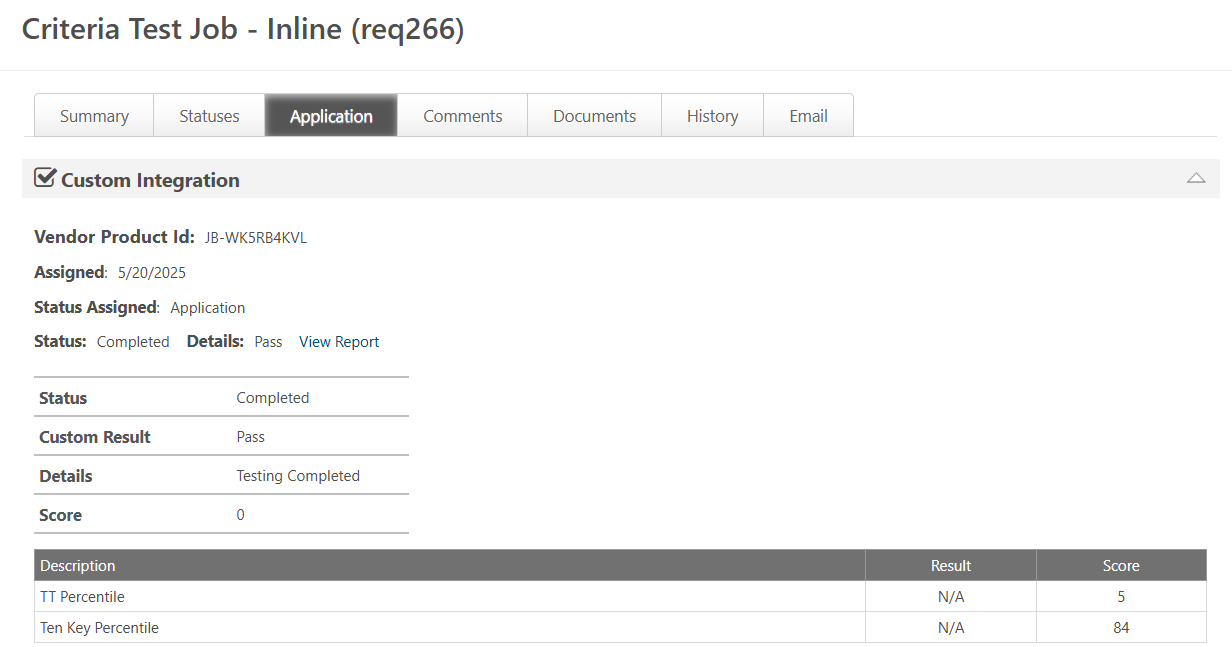
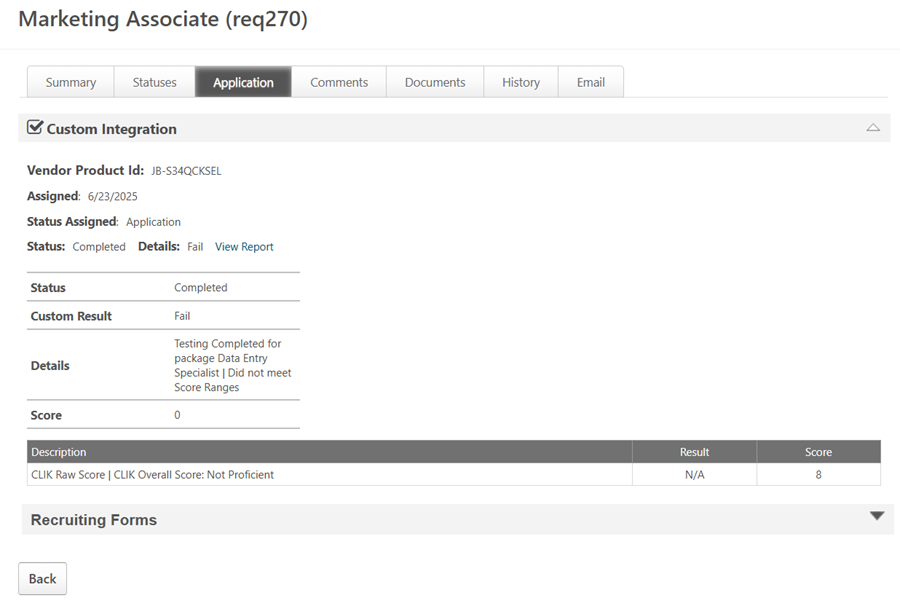
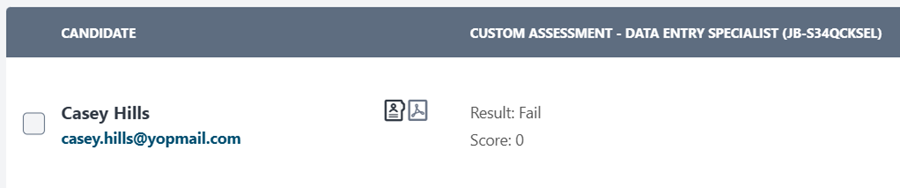
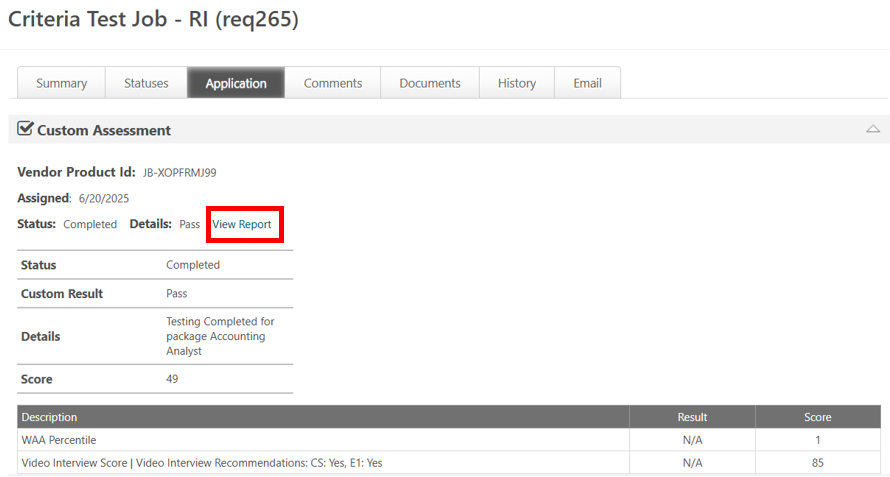
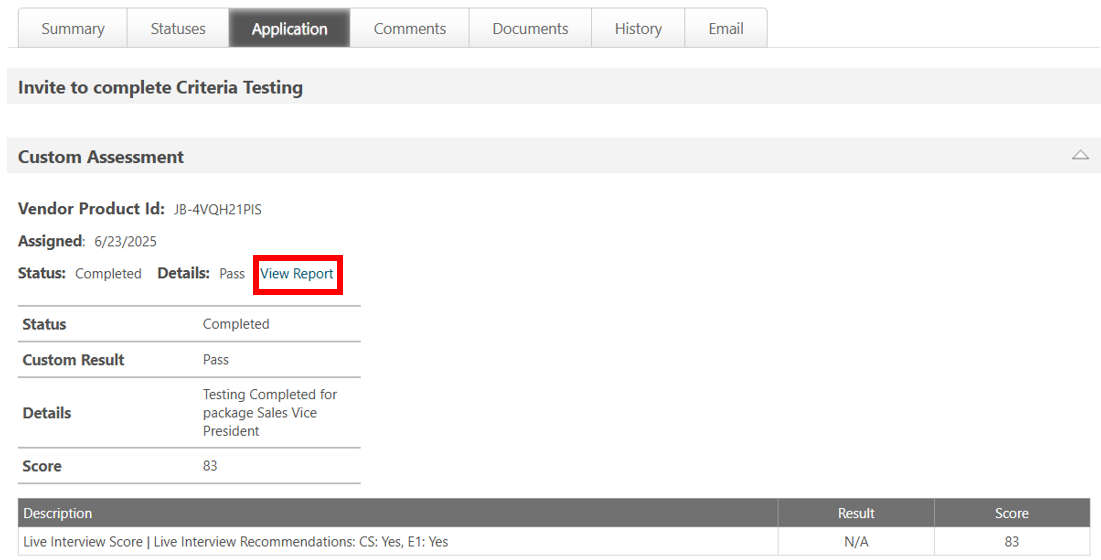
Results will appear in Cornerstone when a candidate completes testing in Criteria. The Status will be updated to Completed.
If Score Ranges have been configured in Criteria, Pass or Fail will be shown in the Custom Result field. If no Score Ranges have been configured in Criteria, Pass will still be shown in the Custom Result field.
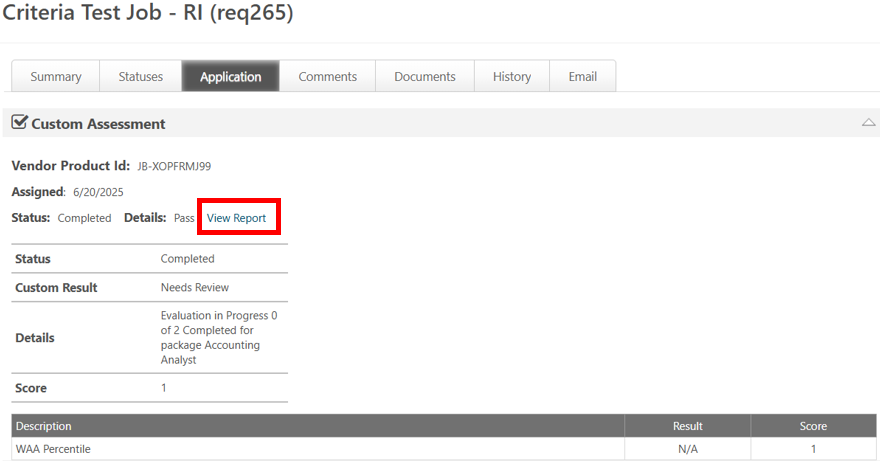
The Details field will show a summary that indicates the testing is completed, the package name and the score ranges message.
If the integration package completed includes Talent Signal, this will be shown in the Score field.
The overall score/s per assessment will be shown in the table.
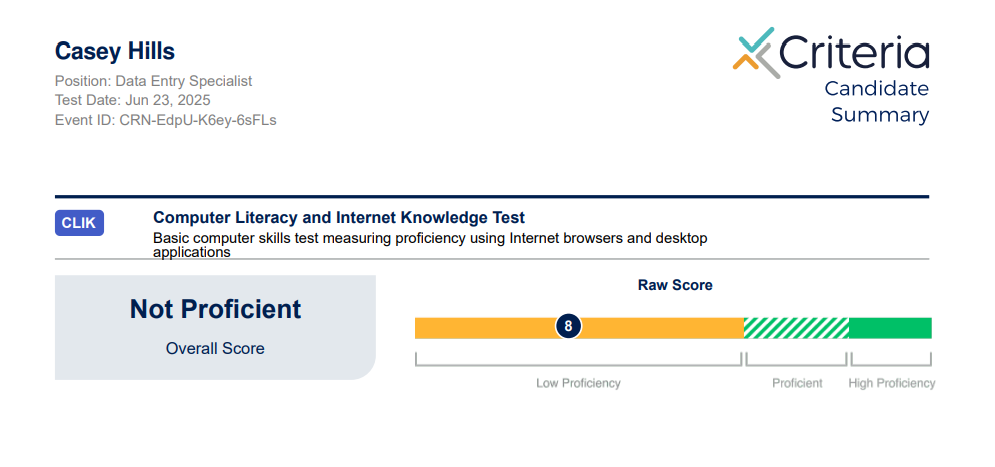
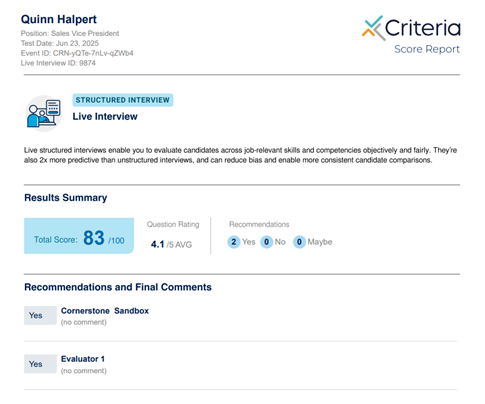
Select View Report to view the Criteria Score Report.
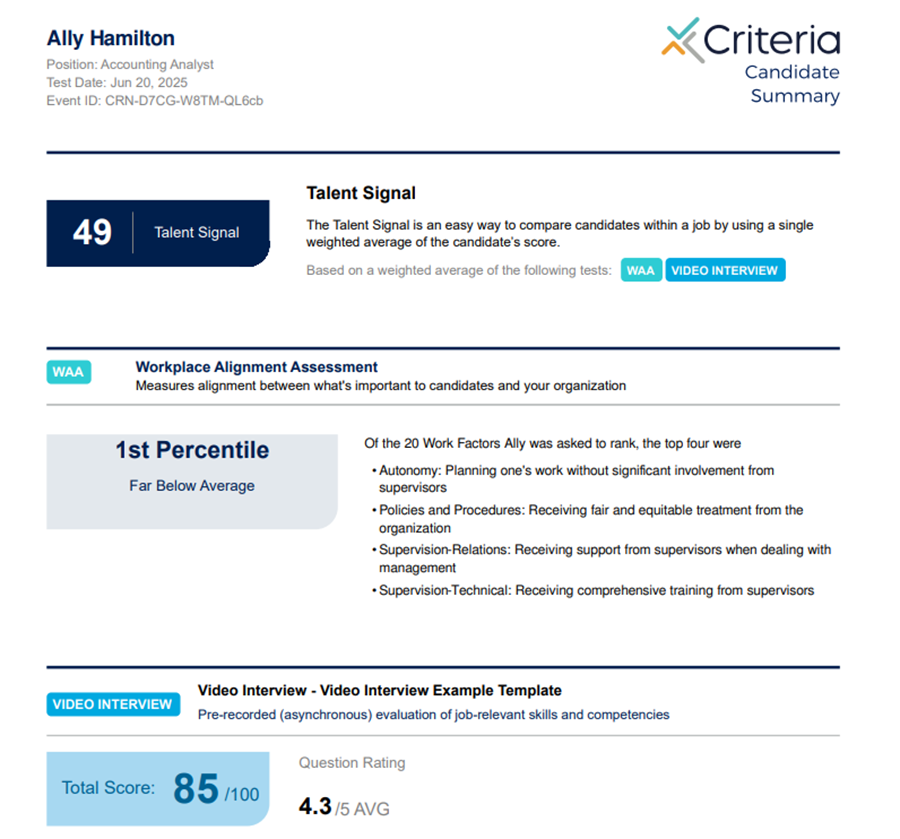
The Criteria Score Report will open as a PDF or as a Dynamic Score Report, according to your company settings in Criteria.
The Custom Result and Score fields are also available in the Candidate list.
Video Interview Results
The following demo shows how Video Interview results appear in Cornerstone (open the demo in a new window).
The Video Interview is not scored until the evaluators have submitted their evaluations.
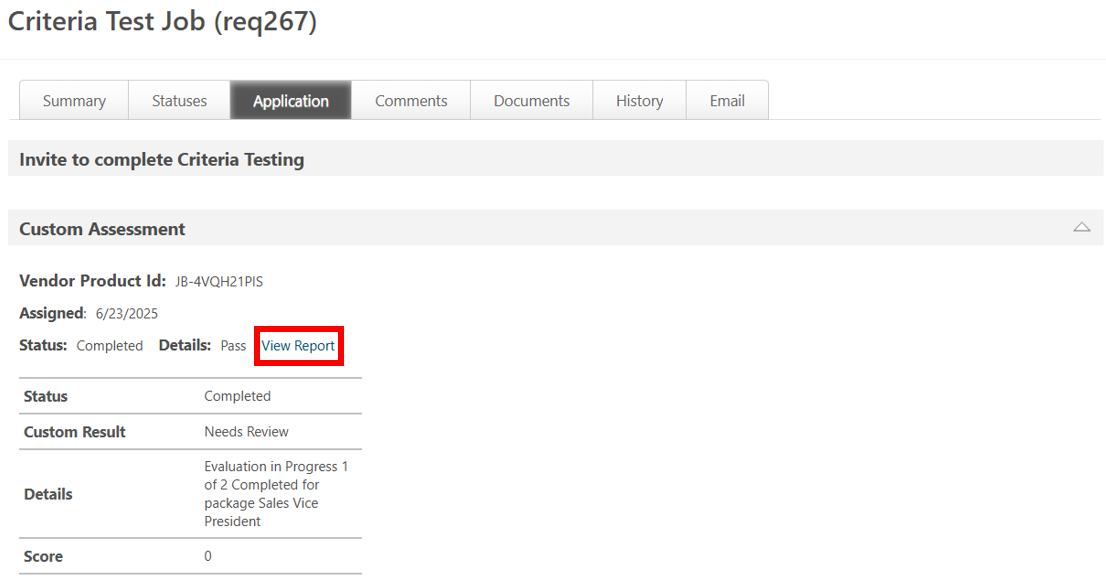
The recruiter can view the status of the the Video Interview within the candidate profile in Cornerstone.
Once the candidate completes the Video Interview, the Details field will keep you informed of the progress of the evaluation.
The Custom Result field will be updated to Needs Review to indicate minimum evaluators for Video Interview has not been reached.
If the candidate has completed assessments as part of the same Criteria package, the Talent Signal from the assessments will be visible in Score field and the assessment results displayed in the table.
The interim report can be accessed via the View Report button.
Evaluators may use the link within the report to gain easy access to submit their evaluation.
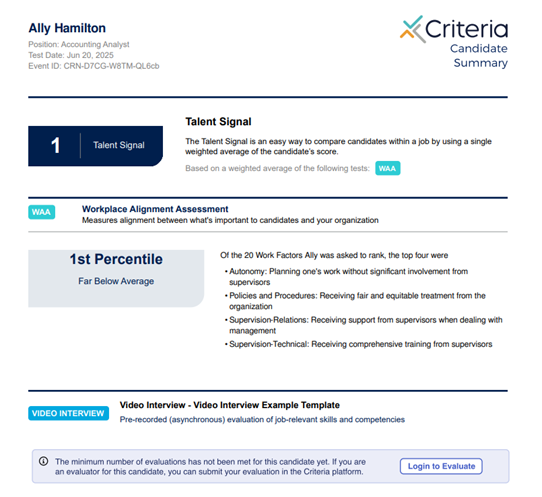
Once the minimum number of evaluators have submitted their evaluation, the Video Interview scores will be available. The Custom Result field will be updated to Completed. The Talent Signal will be shown in the Score field. The Video Interview Score and Recommendations will be shown in the table.
If the candidate completed assessments as part of the same Criteria package, the updated Talent Signal will be shown in the Score field and the table will now include all results - Assessments and Video Interview.
When the View Report button is selected, the updated Criteria Score Report will open in a new window. The Criteria Score Report will open as a PDF or as a Dynamic Score Report depending on you company settings.
Live Interview Results
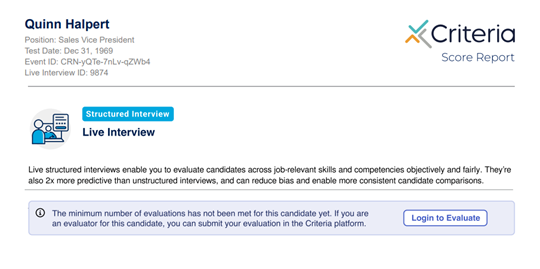
There are no actions required by a candidate when they are invited to a Live Interview. The evaluators are emailed and must conduct the Live Interview with the candidate and submit their evaluation in Criteria. The Status will be updated to In Progress when the evaluators are emailed successfully.

When the first evaluator submits their evaluation, the Custom Result field will show Needs Review. The Details field will show the status updates once the first evaluator submits their evaluation and will keep you informed of the progress of the evaluators.
The interim report will be available as soon as an evaluator completes the evaluation. Evaluators may use the link within this report to gain easy access to Criteria to submit their evaluation.
Once the minimum number of evaluators have submitted their evaluation, the Custom Result field will be updated to Pass. The Details field will be updated to indiate the testing is completed and show the package name. The Score field will contain the Live Interview Score. The table will display the Live Interview Score and Recommendations.
When View Report is selected, the Criteria Score Report will open in a new window. The Criteria Score Report will open as a PDF or Dynamic Score Report depending on your company settings.
Deactivate Integration
Contact Criteria if you do not wish to use this integration anymore.
Troubleshooting
"Please fix validation errors" when saving Assessment Connector
When you click Save Settings on the Assessment Connector screen, you may get some errors if any of the Criteria details are incorrect.
Look near the end of each item and it will show you the action that failed - Get Assessment or Initiate Assessment - and it will show the error code/message e.g. 404 (NotFound).
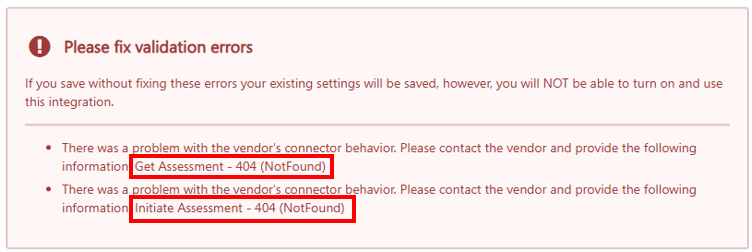
If the Error Code is 404 (NotFound) that indicates that the Base Service URL is invalid. Please check that you have copied it exactly from Criteria.
Criteria Corp (North America) customers - https://integrations.criteriacorp.com/api/v1/cornerstone
Criteria Australia customers - https://integrations-au.criteriacorp.com/api/v1/cornerstone
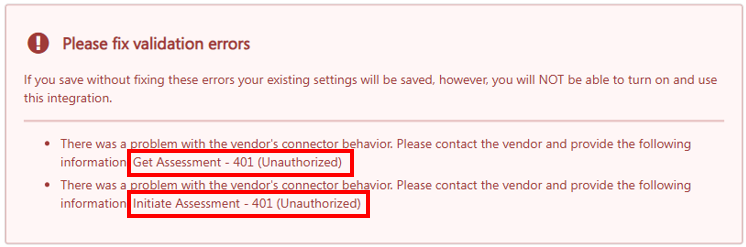
If the error is 401 (Unauthorized) that indicates that the Username or Password are incorrect. Please check that you have copied the username and password exactly from Criteria. Ensure there are no spaces or extra characters at the beginning or end of the values.
Once the adjustment have been made, click Save Settings again and check that the errors do not appear again.