JobAdder Integration Guide
 Updated
by
Integrations Team
Updated
by
Integrations Team

Implementation Process
These are the steps that are to be completed when setting up an integration between your JobAdder and Criteria accounts.
- Discuss your account configuration and assessment packages with your Criteria Customer Success Manager
- Discuss the integration process, workflows and JobAdder configurations with Criteria.
- Discuss whether you will use 2 rounds of testing or just wish to set up 1.
- Criteria will liaise with JobAdder Support on your behalf to initialize the integration in your JobAdder account.
- You will activate the integration in your Criteria Platform account.
- Each JobAdder user will display the new fields in the Job and Job Application lists.
- You will put through a test candidate to ensure it is all working properly
- Integration is ready to use
Before you begin - Pre-Requisite JobAdder Configuration
Create Application Status Values (required)
Determine the JobAdder Application Status values that will indicate the testing status of the candidate. You will need to set this up in JobAdder prior to activating the integration.
Purpose | Suggested Status Name | Required / Recommended? |
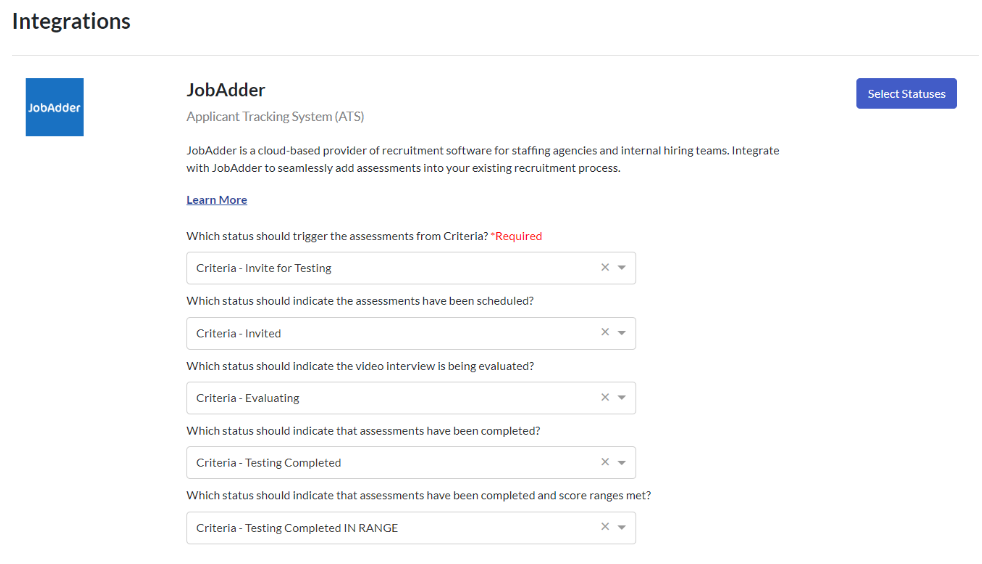
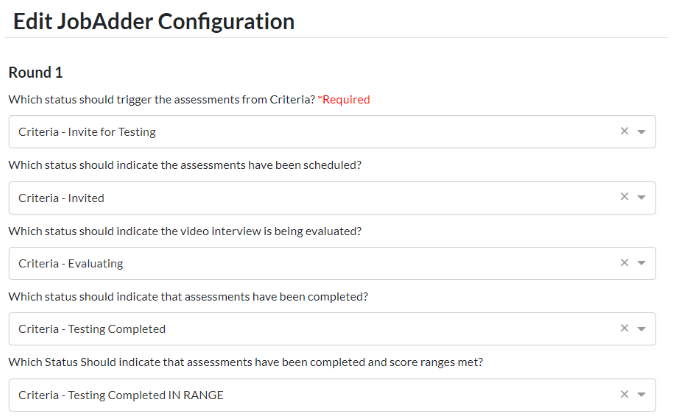
Which status should trigger the assessments from Criteria? | Criteria - Invite for Testing | Required |
Which status should indicate the assessments have been scheduled? | Criteria - Invited | Recommended |
Which status should indicate the video interview is being evaluated | Criteria - Evaluating | Recommended when using Video Interviewing |
Which status should indicate that assessments have been completed? | Criteria - Testing Completed | Recommended |
Which status should indicate that assessments have been completed and all score ranges met? | Criteria - Testing Completed + In Range | Recommended when using Score Ranges in Criteria |
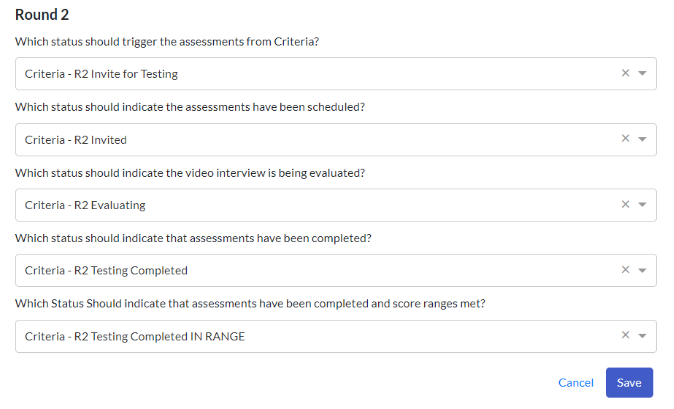
If you are using 2 rounds of testing, the same 5 status values should be created for round 2 with appropriate names to distinguish them from the round 1 status values.
New status values can be created in JobAdder in [Account > Admin > Job Application > Status] as appropriate. Be sure to associate the new status with a Stage in your workflow so it will be available for use when moving candidates.
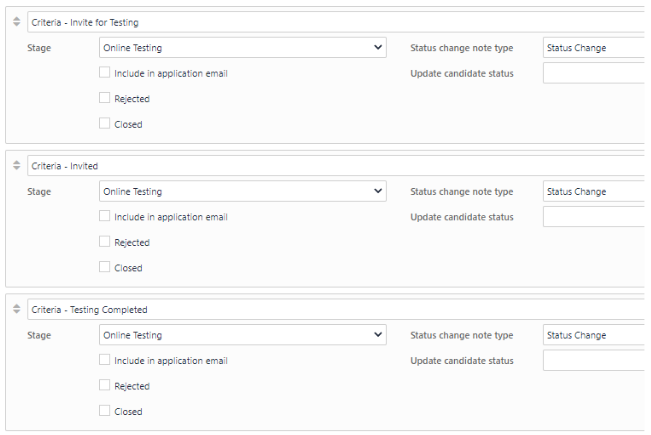
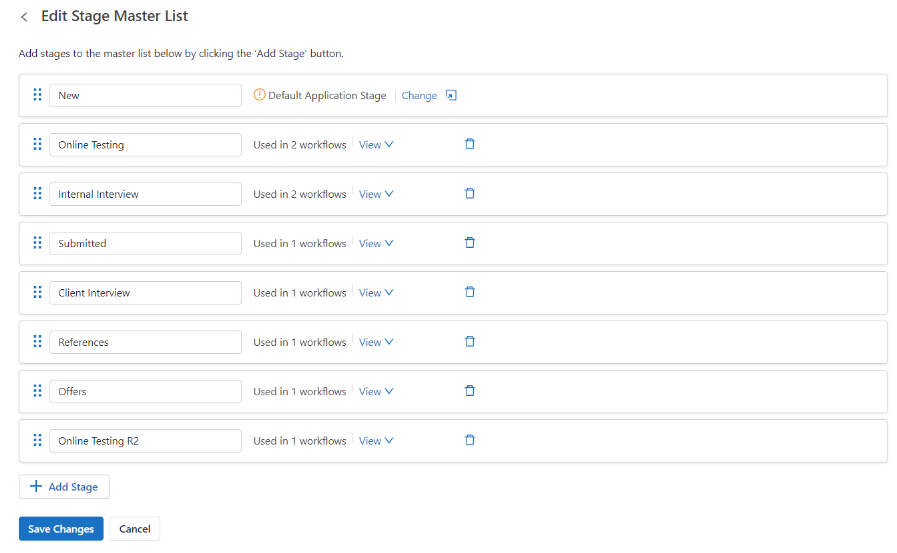
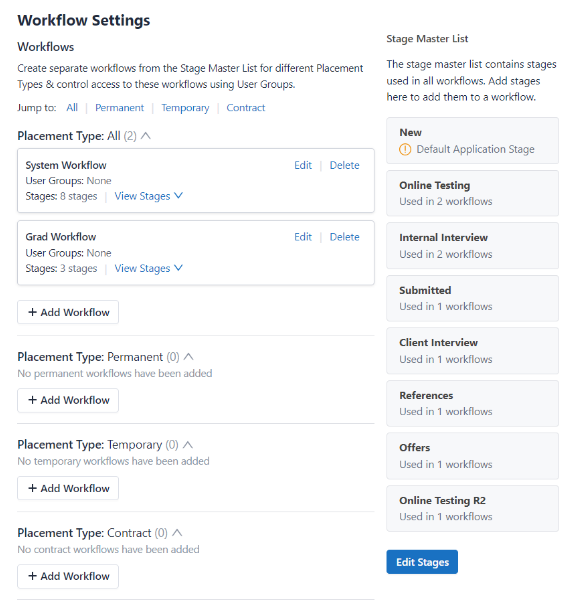
A new workflow stage can be created in [Account > Admin > Job Application > Workflow] if you wish to add e.g., 'Online Testing' as a separate stage in your workflow.
First add the new stage to the Stage Master List, then add the new Stage into the individual Workflow/s.
Request assistance from the JobAdder Support team with the Status/Stage/Workflow setup, if required.
Create an Integration User – recommended
If you have an available JobAdder User in your account, it is recommended that you create a user in JobAdder to use when you activate the integration. This user will be linked to Criteria and any actions performed by the integration will be attributed to this user. Using a dedicated user for the integration will also ensure that the integration remains active, even when you have staff changes.
Give the user a name that indicates their purpose e.g., 'Criteria Integration', and assign the Grant API access to integration partners permission.
Make a note of the username and password for this user as it will be required to activate the integration.
If JobAdder will charge for this additional user, skip this step to avoid additional costs.
Activating the Integration
Login to Criteria Platform & enable
Once Criteria has enabled access to the JobAdder integration on your account, login to the Criteria Platform and activate the integration.
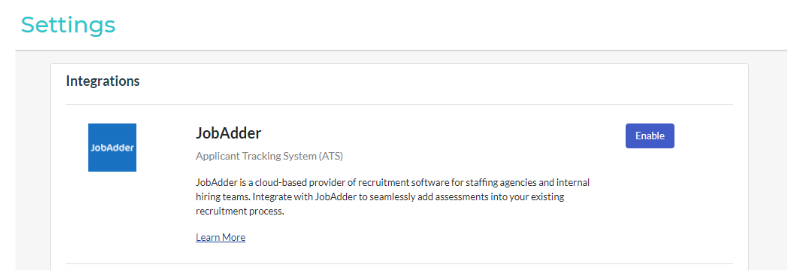
- In the Criteria Platform, go to the Settings menu at the top right, accessed by clicking on your profile icon, and select Integrations.
- Click the Enable button in the JobAdder section.
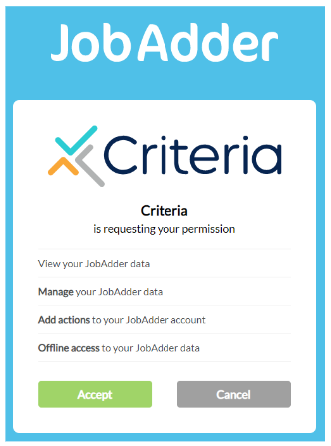
- You will be taken to the JobAdder login page. Login with the 'Criteria Integration' JobAdder user (if you did not create this user, login as yourself, ensure that you have the Grant API access to integration partners permission).
- The next screen will show the permissions that the integration will require. Click Accept.
If you click Cancel, you'll be returned to the Criteria Integrations page. You will be able to use the Enable button and start this process again when you are ready.
- You will be returned to the Criteria Integrations page, please wait while the integration is configured.
- You will then be asked to select the status values that relate to the different testing stages. The only mandatory status is the one that triggers testing; however, it is recommended that you configure all status values to improve visibility of candidate testing progress within JobAdder.
- Click Select Statuses to save your configuration.
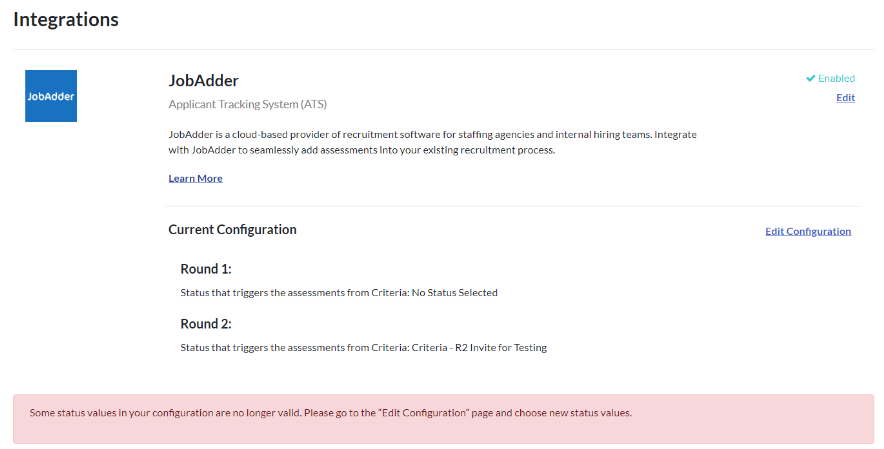
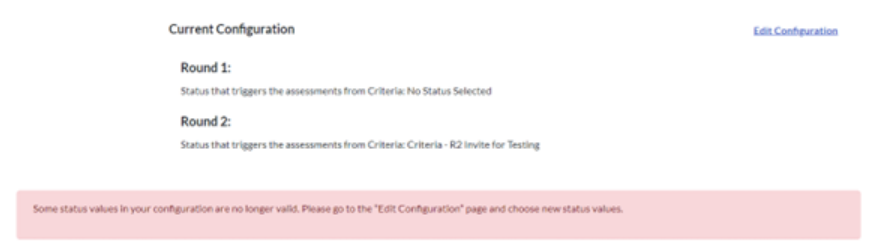
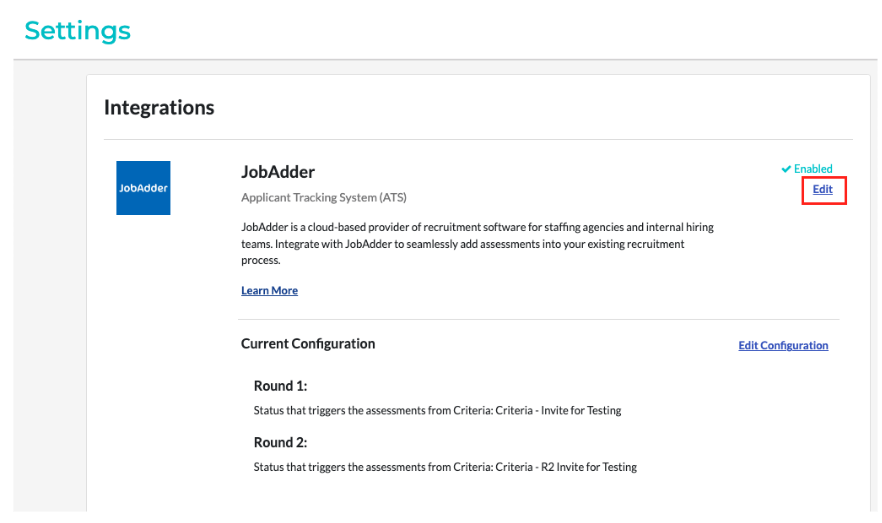
- The integration is now active, and the screen has been updated to show that the integration has been configured for 1 round of testing.
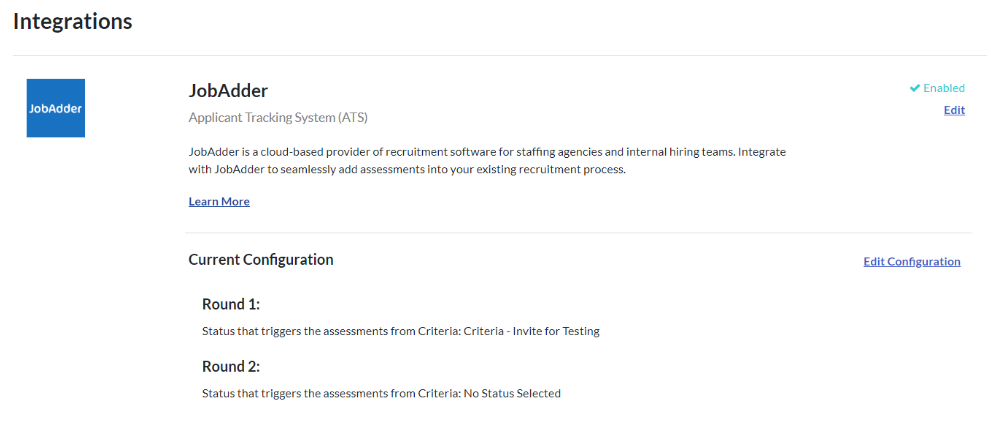
- If you are using 2 rounds of testing, click Edit Configuration to select the appropriate statuses for round 2 and then click Save to activate round 2. Like round 1, only the trigger status is required to activate this round of testing, however, it is recommended that you configure all status values to improve visibility of candidate testing progress within JobAdder.
If this is a new integration and you chose different names to use for the Round 2 fields, you will see this blue message after you initially activate the integration. Notify Criteria that you have done the initial setup so Criteria can enter your custom field names into the integration. Once this is done the round 2 functionality will become available for you to do the setup.
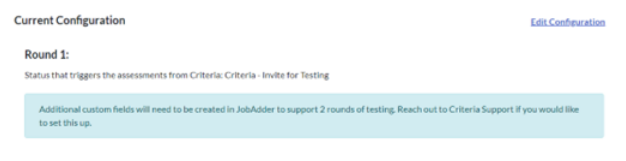
If you decided not to use round 2, or you haven't discussed round 2 with Criteria yet, you will always see the blue message on-screen as the round 2 status options won't be available. Reach out to Criteria if you'd like to set up round 2 in your integration.
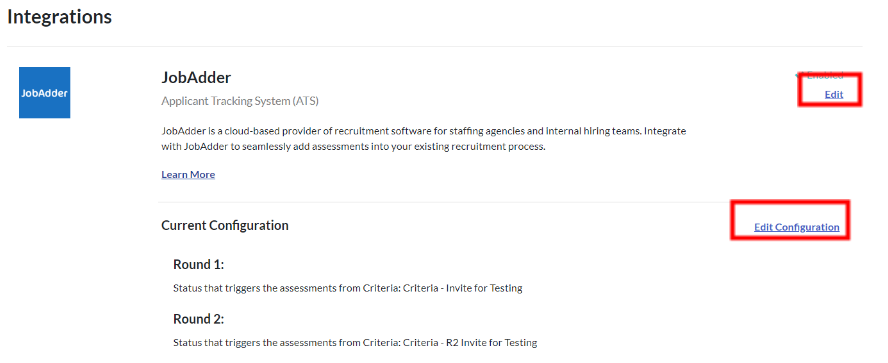
You can return to the Integrations screen in the Criteria platform to check the configuration at any time. Adjust the status values by using the Edit Configuration link. If the integration needs to be connected again due to the integration becoming disabled, use the Edit link to go through the setup process again.
If Criteria has detected an issue with the integration, an error message will be shown on this page. If the integration is not working as expected at any time, check this page to see if there is an issue you can easily resolve yourself.
Display Custom Fields on Job & Candidate list views (per user setting)
When you are ready to integrate, Criteria will liaise with JobAdder to create 3 custom fields on your account to hold information about the candidate status and results related to Criteria. (These exact names must be used.)
- Criteria Status
- Criteria Score
- Criteria Report
If you are using 2 rounds of testing, 3 additional custom fields will need to be created for round 2. You can choose what to name these fields, for example:
- Criteria Status 2
- Criteria Score 2
- Criteria Report 2
Note: A field called 'Criteria Action' will also be created automatically when the integration is activated.
Once the new fields have been created, you should configure the Job and Candidate lists in JobAdder to display these new fields to give you better visibility of the information from Criteria. This will need to be completed by each JobAdder user as each user is able to customize their own view.
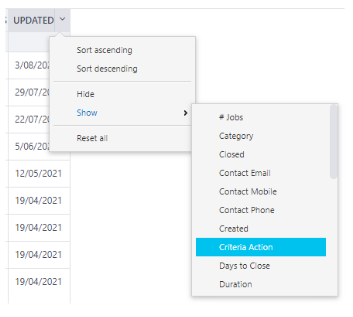
- On the Jobs page, display the Criteria Action column so you can see which Jobs have Criteria package/s associated.

- On the Candidate tab for a Job and/or on the Applications page, display the Criteria Status, Score and Report columns (Criteria Action is not needed here). If you are using 2 rounds of testing, also include the 3 columns created for round 2. This will allow you to see a summary of the candidate results in one place, sort candidates into score order and easily access the reports.
- To display a column in a JobAdder list, click the down-arrow icon on a column heading in that list. Choose Show and then select the appropriate field name the from the list. Repeat this process for each field you wish to show. You can then drag the column heading to rearrange the columns into your desired order.
- To hide a column, click the down-arrow on the column you wish to hide and choose Hide.
Using the Integration
Configuring Criteria Assessments on a JobAdder Job
Configure your JobAdder Jobs to be associated with a Criteria Package. When candidates are moved into the status that triggers testing, they will be automatically invited to the package configured for the Job.
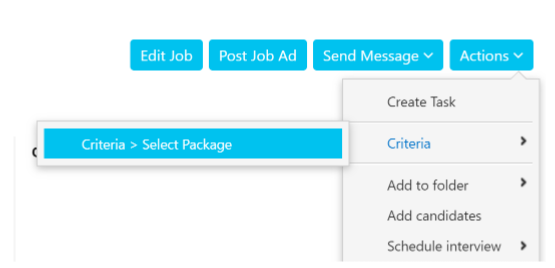
Go to [Actions > Criteria > Select Package] for your Job.
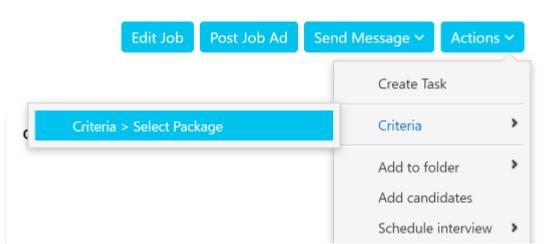
Select the appropriate package/s from the drop-down list and click Select. If you have not configured round 2 for your integration, the second section will not be shown.
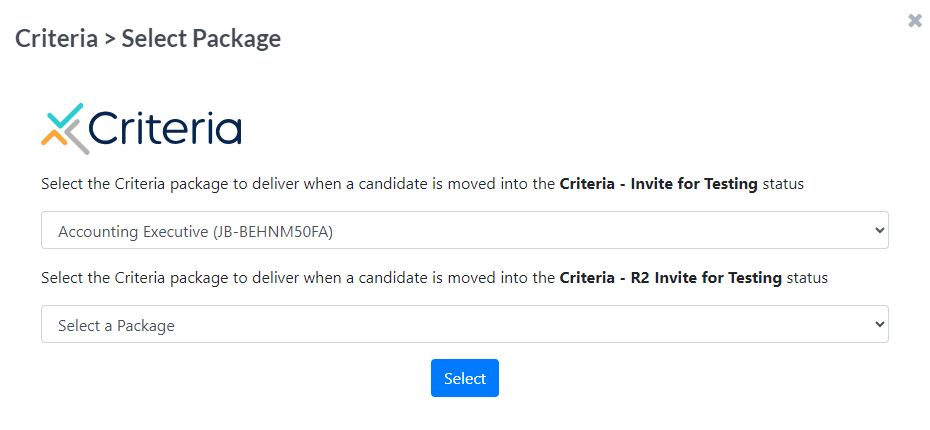
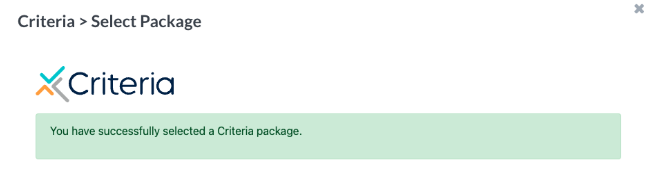
The message will indicate that the package/s were successfully saved.
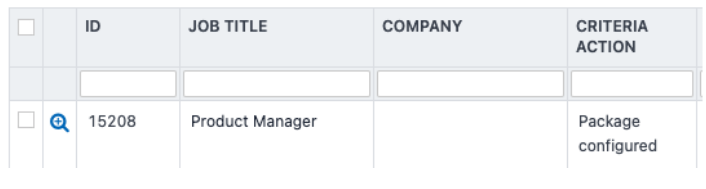
The Jobs List will show Package Configured in the Criteria Action column once a Criteria package has been selected on the Job.
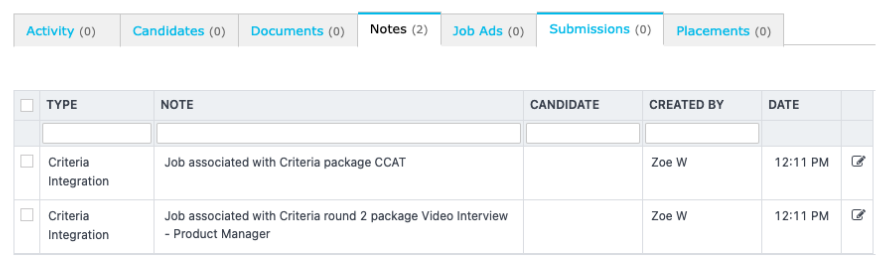
The notes on the Job will indicate the specific package that was chosen.
If you return to [Actions > Criteria > Select Package] for the Job, the drop-down list will pre-select the package that has already been configured on the Job.
Trigger Criteria Testing on Status Change
This should be your standard process to trigger candidates to be invited for testing to ensure that all candidates in the Job are invited to the same testing. This process allows you to trigger testing for one or more candidates at the same time.
The Job must already be configured with a Criteria package, as per above.
Click into the Job and select the candidate/s you wish to invite for testing.

Go to [Actions > Change application status] - this is the Job Application Status, not Job Status.
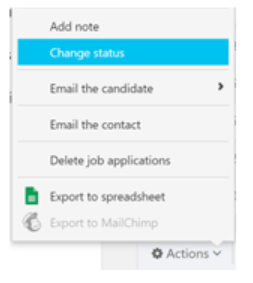
Select the Application Status that triggers the assessments from Criteria for your integration e.g., 'Criteria – Invite for Testing'. If you are ready to invite candidates to the round 2 package, choose your Application Status that triggers the Round 2 assessments.
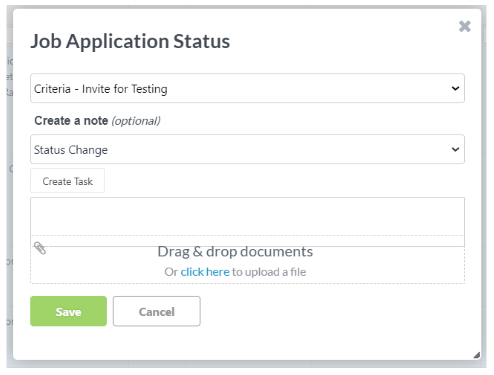
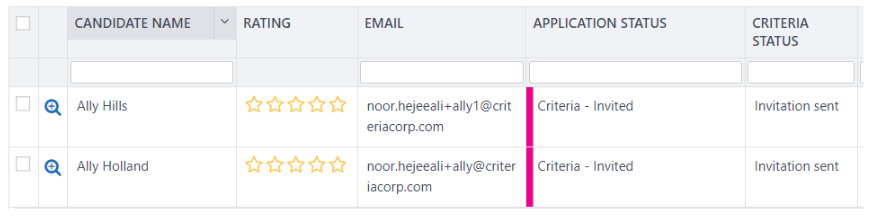
The Criteria Status column applicable for the testing round will indicate that the invitation was sent to the selected candidates.
If configured, the Application Status for the selected candidates will also be updated to the status that indicates the assessments have been scheduled for that testing round e.g., 'Invited'.
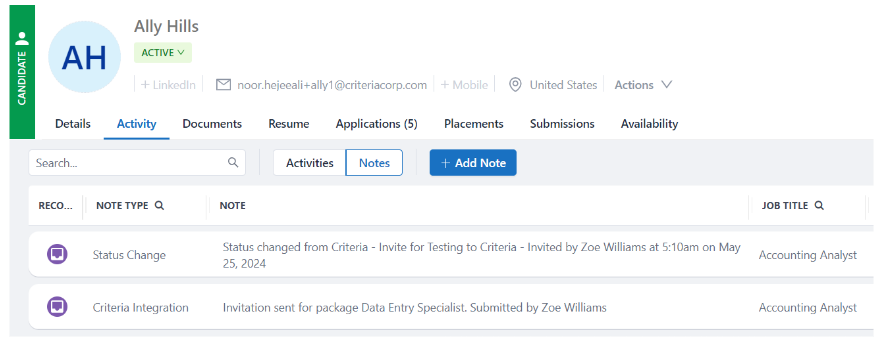
The notes on each candidate will indicate the package that the candidate was invited to complete.
Trigger Criteria Testing via ad-hoc method
Use this process if you wish to invite a candidate to a different package, e.g., this may be used to invite the candidate to the package that includes a time adjustment. This process can only be applied to 1 candidate at a time.
This process will treat the invitation as if it were a round 1 invitation; it will use your configured round 1 Application Status values and will update the Criteria columns applicable for round 1 to communicate the invitation progress.
Click into the Job and select the candidate you wish to invite for testing.
Go to [Actions > Criteria > Order Package]
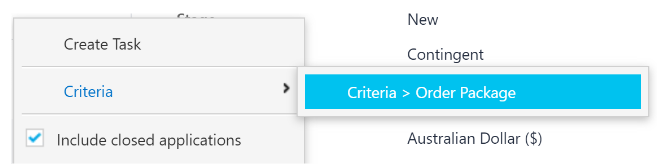
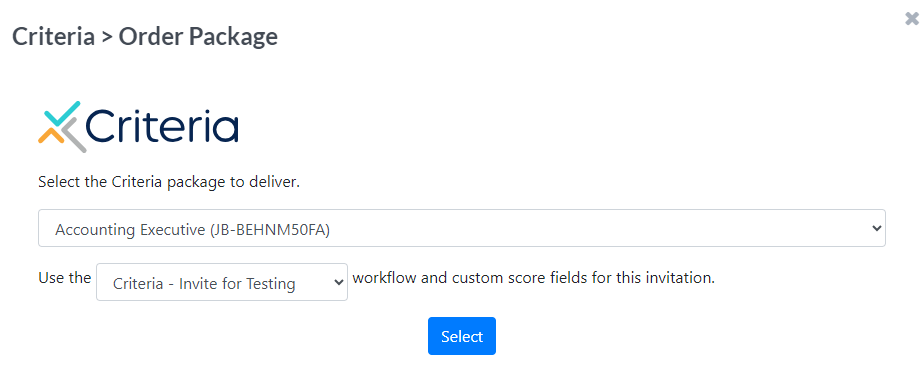
If the Job has a package associated, it will be selected by default, select the appropriate package for this candidate. If you have round 2 configured, choose what status values should be used for this new invitation to treat it as a Round 1 or Round 2 invitation. Click Select once you have made all your selections.
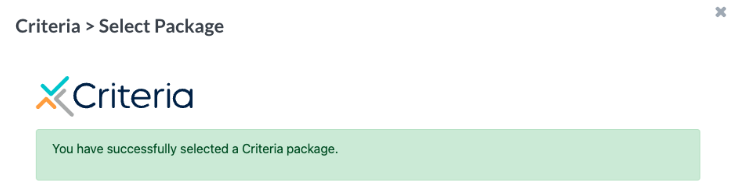
The message will indicate that the package was successfully selected for the candidate.
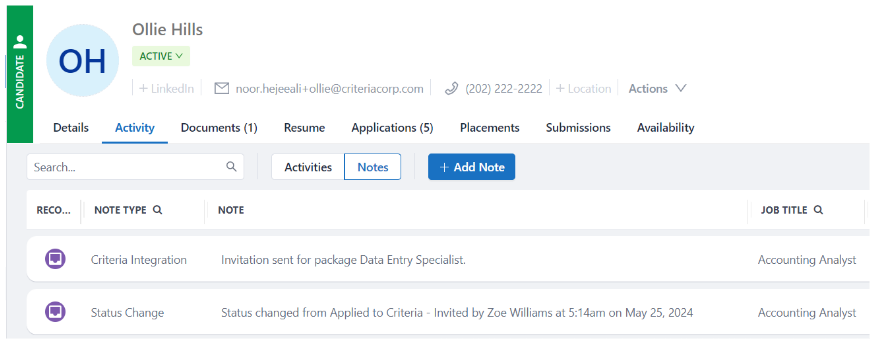
The Criteria Status column will indicate that the invitation was sent to the candidate.
If configured, the status for the candidate will also be updated to the status that indicates the assessments have been scheduled for round 1 e.g., 'Invited'.

A note will be logged against the candidate to indicate that they were invited for testing for the selected package.
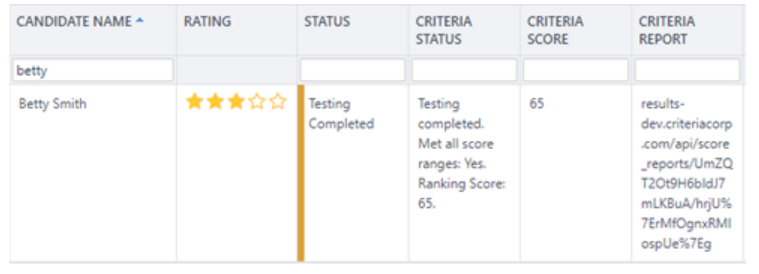
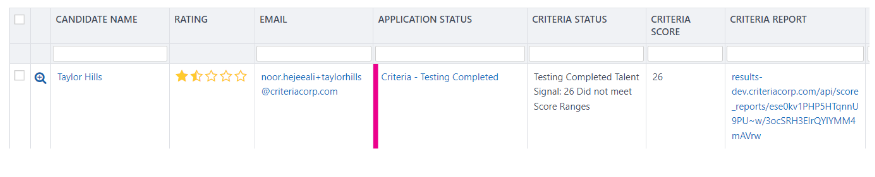
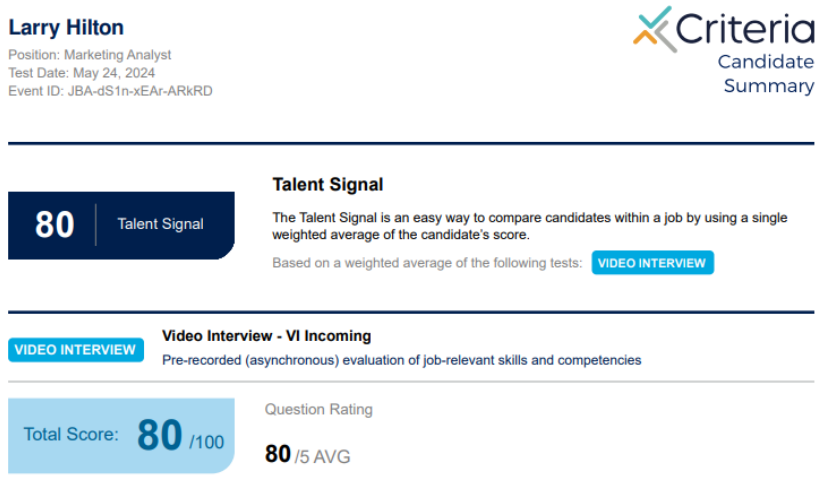
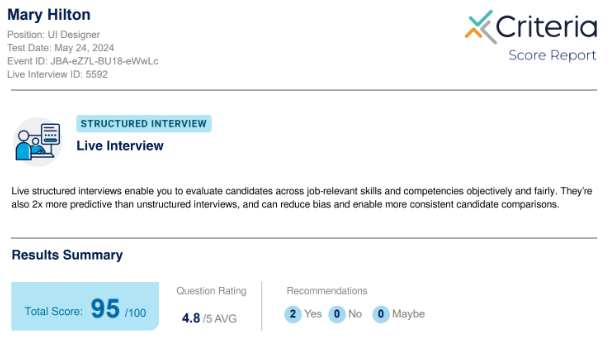
Viewing Assessment Results
Once testing is completed, the Criteria Status column applicable for the testing round will display Testing completed followed by a message about meeting the score ranges (if applicable), the Talent Signal (if applicable), and if any validity checks failed (if applicable).
The Talent Signal will also appear in the Criteria Score column to allow the candidates to be ranked/sorted by this value.
The Talent Signal will be used to color the appropriate number of Rating stars.
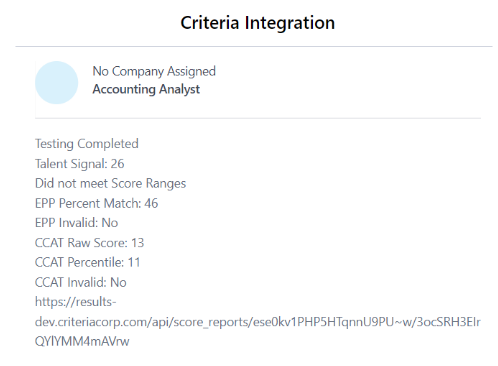
The Criteria Report column will contain a hyperlink to the Criteria Score Report for the candidate. The report will be opened in a new browser tab.
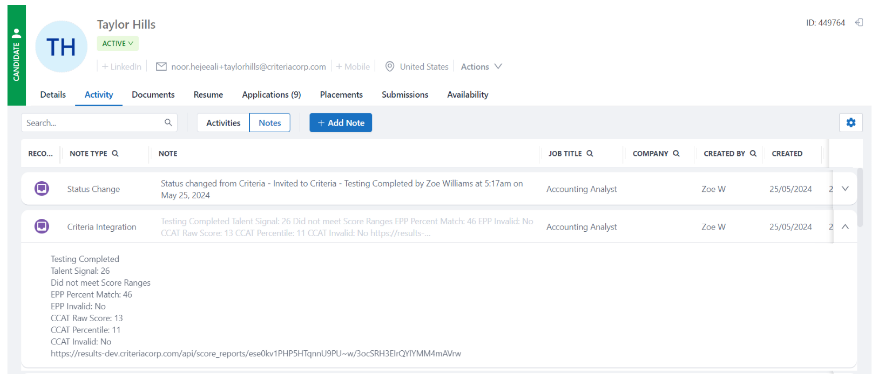
If configured, the status for the candidate will also be updated to the status that indicates the assessments have been completed for that round e.g. 'Testing Completed'.
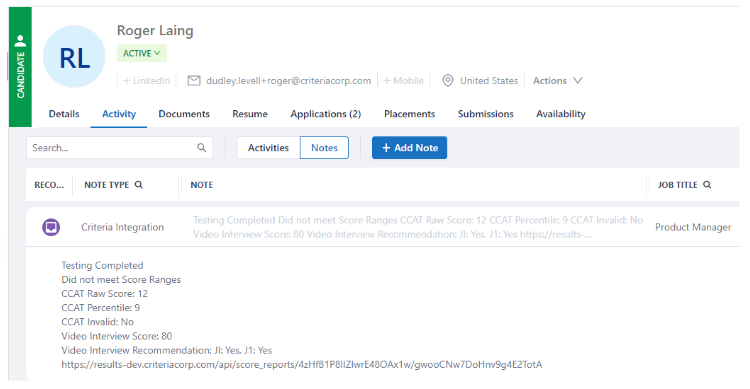
A note will be logged against the candidate to indicate their overall and per-assessment results.
Note: sometimes the down arrow icon must be used to expand the note to display the full text.
Video Interview Status Updates and Results
Once the candidate completes their video interview, the evaluators will be emailed to complete their evaluations.
If an Evaluation status is set up in your integration for this round of testing, then the candidate will be moved into the chosen Application Status.
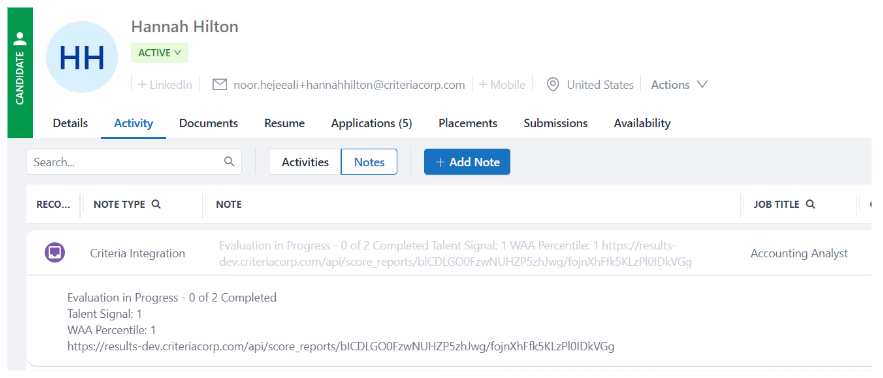
The Criteria Status field will display Evaluation in Progress X of Y Completed showing you the number of evaluations that have been submitted (X) and the minimum number of evaluations that must be completed before a Video Interview score is generated (Y).

The status message will also be visible in the candidate notes.

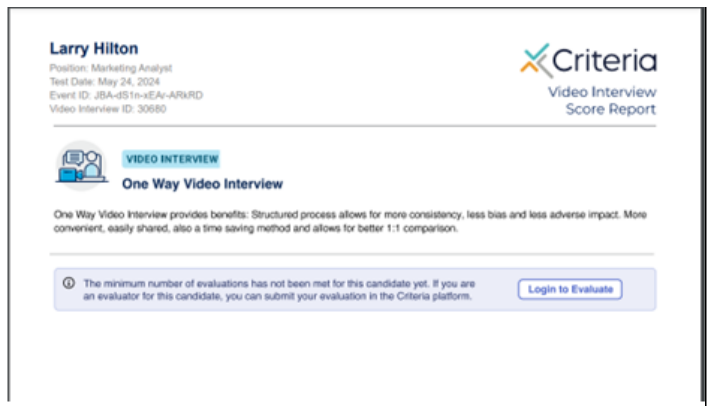
The interim Criteria report will be available within the Criteria Report field, allowing evaluators quick access to Criteria to complete their evaluation.
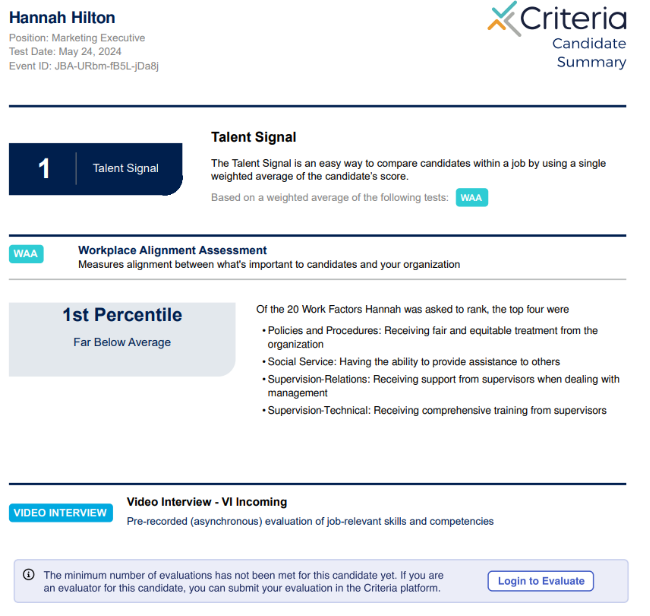
If a candidate completed a package containing both a Video Interview and Assessments, the assessment results will be available at this time. The Talent Signal will be populated into the Criteria Score field so you can sort your candidates based on their Assessment scores, to help your evaluators choose whose videos to review first.

The assessment results will also be available in the candidate notes.
The interim Criteria report will contain the Assessment Results, as well as the link for evaluators to complete their evaluation in Criteria.
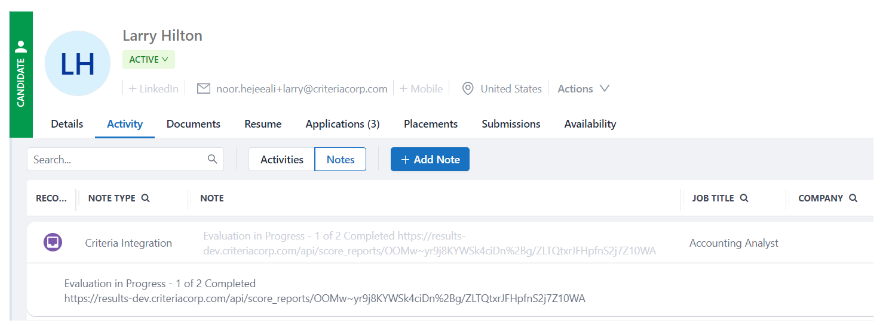
When an evaluator submits their evaluation, the Criteria Status will be updated to show the progress of the evaluation. The first number in the message will be updated as each evaluator completes.

The status update is also logged to the candidate notes for a full history of the testing process.
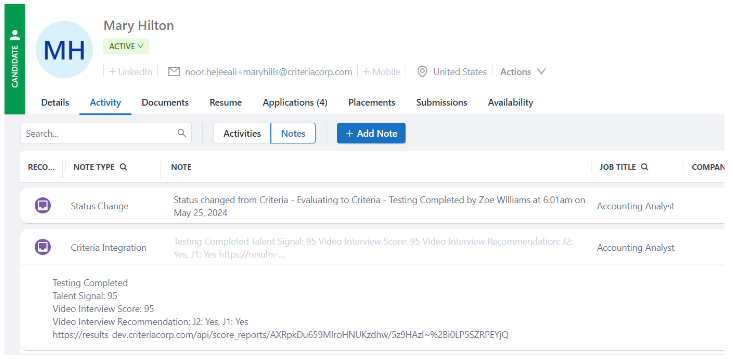
Once the minimum number of evaluations has been reached, the overall video interview score and recommendations will become available. The Application Status will be updated to the chosen Completed status for this round of testing. The Talent Signal (if applicable) will be shown in the Criteria Score column.

The candidate notes will display the Video Interview overall score and the recommendation from each evaluator.
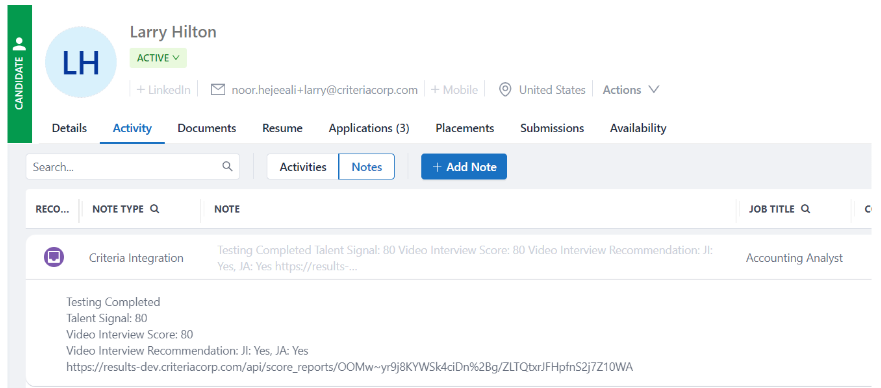
A link to the Criteria report will be available in the Criteria Report field.
If a candidate completed a package containing both a Video Interview and Assessments, the Talent Signal may be updated to include the Video Interview score. (This is dependent on the Job Settings for that specific assessment package in Criteria.)
The notes will display both Video Interview and Assessment results, and the updated Talent Signal.
If an additional evaluator completes, the status and score and report will be updated to include the results from the new evaluation.
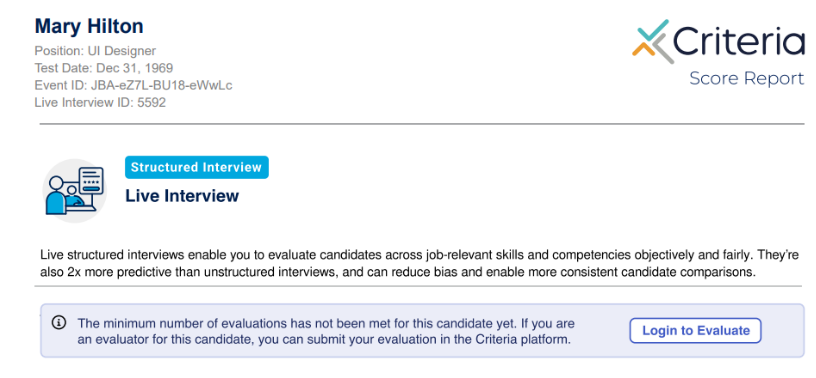
Live Interview Status Updates and Results
When a candidate is invited to a Criteria Package which includes a Live Interview, the candidate will not receive the invitation email. The evaluator/s will be sent an email with a link with the questions they should ask during the interview. It is best practice to ensure the evaluators are aware of the interview before triggering the invitation via the Criteria integration.
The candidate’s status will remain in the Invited status until an evaluator has completed their evaluation.
Once an evaluation is submitted, the Criteria Status field will display Evaluation in Progress X of Y Completed showing you the number of evaluations that have been submitted (X) and the minimum number of evaluations that must be completed before a Video Interview score is generated (Y).
If an Evaluation status is set up in your integration for this round of testing, then the candidate will be moved into the chosen Application Status.

The status message will also be visible in the candidate notes.

The interim Criteria report will be available within the Criteria Report field, the report will just indicate that the minimum number of evaluations hasn’t been reached yet. Evaluators may use the link in this report to complete their evaluation of this candidate in Criteria.
Once the minimum number of submitted evaluations has been reached, the overall score and recommendation will be available.
The Application Status will be updated to the chosen Completed status for this round of testing. The Talent Signal (if applicable) will be shown in the Criteria Score column and the final report will be available in the Criteria Report field.

The candidate notes will display the Interview overall score and the recommendation from each evaluator.
A link to the Criteria report will be available in the Criteria Report field.
Adding Packages
Talk to your Criteria CSM about adding additional packages. Alternatively, if you have a login to the Criteria Platform, you can add a new Job and it will appear as a package in JobAdder.
The new package will appear in the drop-down in JobAdder as soon as the package (Job) is created in your Criteria account.
Removing a Criteria package from a Job
You can unlink a JobAdder Job from a Criteria package if you do not wish to have candidates complete testing in the Job.
In the Job, go to [Actions > Criteria > Select Package].
Select the Select a Package option and click Select.

The message will indicate that the package was successfully removed from the Job.

The Jobs List will show Package Configured in the Criteria Action column once a Criteria package has been selected on the Job.
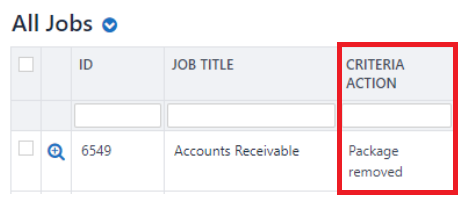
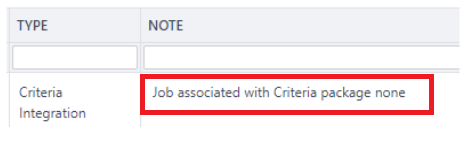
The notes on the Job will indicate the Job has been associated with the package 'none', meaning the package has been removed.
Re-activating Integration
If something goes wrong with the integration connection or configuration, the integration may become inactive and will need to be re-activated to restore the connection.
You will need to complete the Activate Integration process again. Login to Criteria and click the Edit link in the JobAdder tile on the Integrations page, to start the process again. Refer to the Activate Integration section above for step-by-step details.
Once completed, it will take about 5 minutes for the connections to be restored, so wait a few minutes and then re-attempt the action that was causing problems.
Troubleshooting
If the integration is not working as expected, go to the Integrations page in the Criteria platform to see if an issue has been detected.
The message may ask you to click Edit to set up the integration again, or just go into Edit Configuration and save the configuration to restore any mis-configurations.